
Safing Sensor for Air Bag | Component Specifications | Page 760
Safing Sensor: Service and Repair
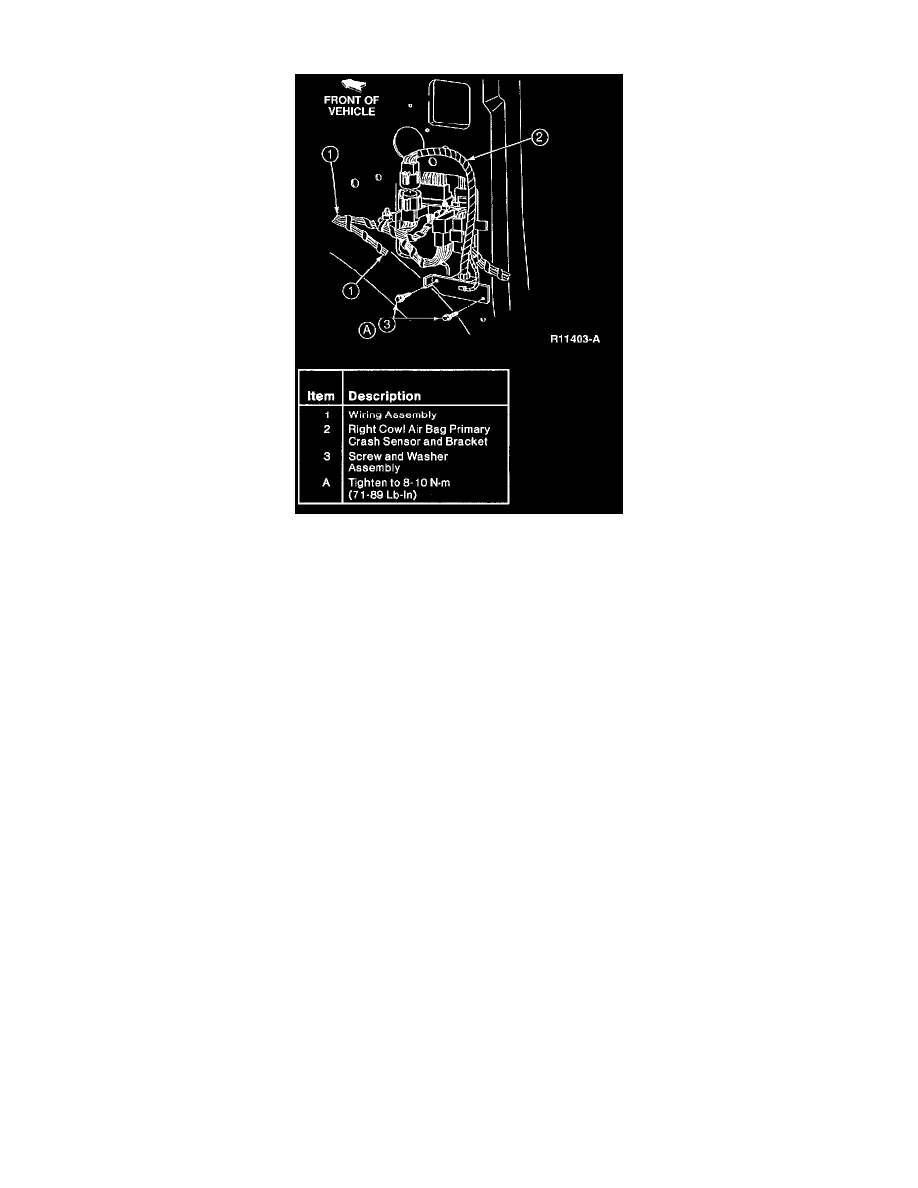
Removal
1. Disconnect battery positive cable and wait one minute for backup power supply energy to be depleted.
WARNING: THE ELECTRICAL CIRCUIT NECESSARY FOR SYSTEM DEPLOYMENT IS POWERED DIRECTLY FROM THE
BATTERY AND BACKUP POWER SUPPLY. TO AVOID ACCIDENTAL DEPLOYMENT AND POSSIBLE PERSONAL INJURY,
THE BATTERY POSITIVE CABLE MUST BE DISCONNECTED FOR ONE MINUTE PRIOR TO SERVICING OR REPLACING
ANY SYSTEM COMPONENTS.
NOTE:
-
To service stripped retaining screws, replace old screws with N808545. Tighten to 13-17 Nm (9-13 lb-ft).
-
When the battery has been disconnected and reconnected, some abnormal drive symptoms may occur while the Powertrain Control Module
(PCM) relearns its adaptive strategy. The vehicle may need to be driven 10 miles or more to relearn the strategy.
2. Remove RH cowl side panel.
3. Disconnect sensor wiring connector from wiring assembly connector.
4. Remove two screws retaining cowl side panel. Remove sensor.
Installation
1. Position sensor to cowl side panel.
2. Secure sensor with two retaining screws. Tighten to 8-10 Nm (71-89 lb-in).
3. Connect sensor wiring connector to wiring assembly connector.
4. Install RH cowl side panel.
5. Connect battery positive cable.
6. Verify air bag indicator.