
E 350 V10-6.8L (2007)
Part 2
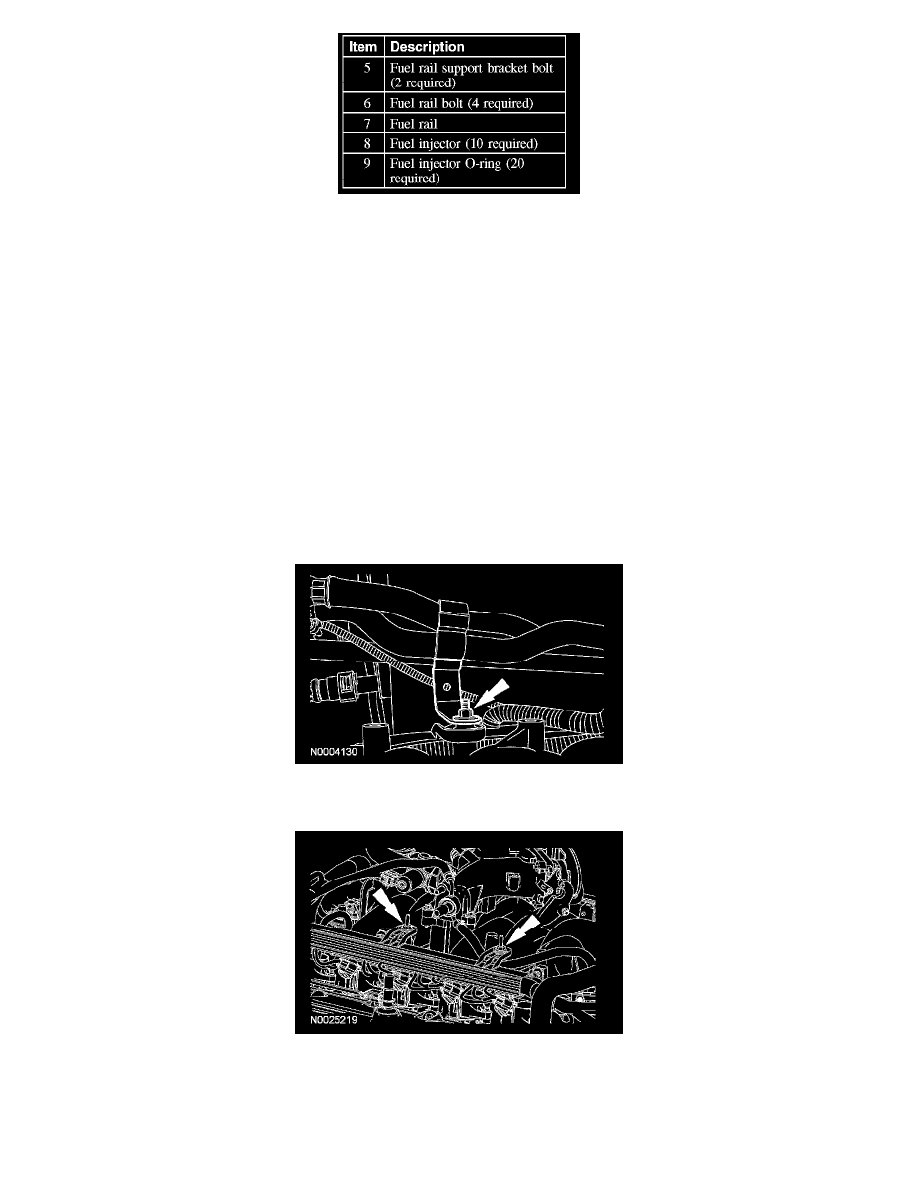
Exploded View
Removal and Installation
WARNING:
-
Do not smoke or carry lighted tobacco or open flame of any type when working on or near any fuel-related components. Highly
flammable mixtures are always present and can be ignited resulting in possible personal injury.
-
Before working on or disconnecting any of the fuel tubes or fuel system components, the fuel system pressure must be relieved. Failure to
follow these instructions may result in personal injury.
1. Release the fuel system pressure.
2. Disconnect the battery ground cable.
3. Remove the engine cover.
4. Remove the air cleaner and the air cleaner outlet tube.
5. Disconnect the fuel tube spring lock coupling.
6. Disconnect the fuel rail pressure temperature sensor electrical connector and vacuum hose.
7. Disconnect the 10 fuel injector electrical connectors.
8. Disconnect the positive crankcase ventilation (PCV) valve electrical connector and the tube from the RH valve cover.
9. Remove the retaining nut and position the transmission fluid and indicator tube aside.
-
To install, tighten to 10 Nm (89 lb-in).
10. Remove the retainers from the fuel wiring harness and position the wiring harness away from the fuel rail.
-
To install, tighten to 10 Nm (89 lb-in).
11. Remove the 2 fuel rail support bracket bolts.
-
To install, tighten to 10 Nm (89 lb-in).