
E 350 V10-6.8L (2007)
procedure again.
-
Mat or carpeting removed for clarity.
1. Depower the system.
2. Remove the driver seat.
3. CAUTION: Care must be taken to prevent damage to the RCM cover. If the RCM cover is damaged, a new cover must be installed.
Remove the RCM cover.
-
Pry outward on each side of the cover to disengage the clips.
-
Slide the cover rearward and remove.
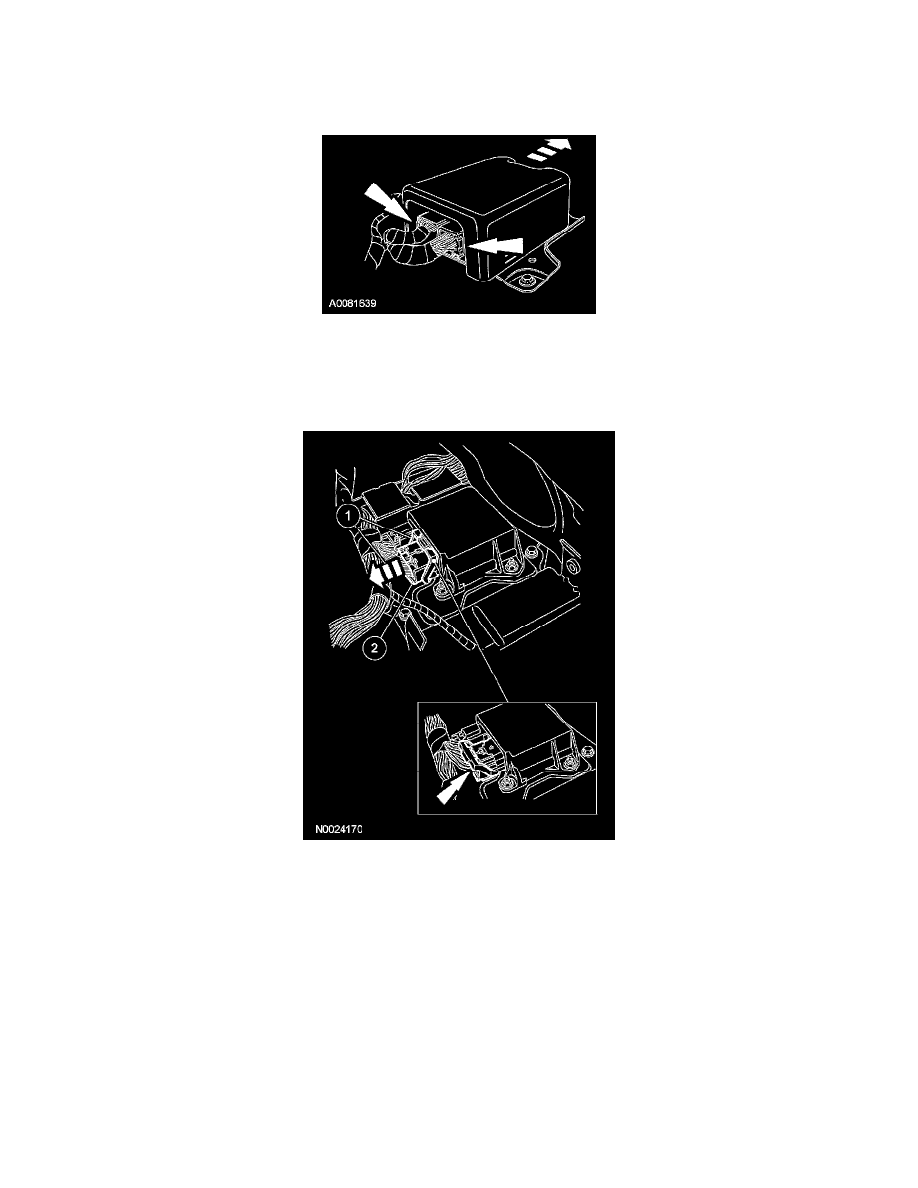
4. NOTE: A similar RCM and connectors are shown.
Disconnect the large RCM electrical connector.
1
Pinch the thumb tab and pivot the connector position assurance lever all the way back until it stops.
2
Pull out and disconnect the large RCM electrical connector.
5. Disconnect the small RCM electrical connector.
6. Remove the 3 bolts and the RCM and bracket assembly.
Installation
1. WARNING: The tightening torque of the air bag RCM bracket retaining bolts is critical for correct system operation.
NOTE: Inspect the RCM bracket bolts for corrosion before securing the RCM and bracket assembly to the vehicle.
Install the RCM and bracket assembly and tighten the bolts to specification.
-
Tighten to 12 Nm (9 lb-ft).