
E 350 V8-6.0L DSL Turbo VIN P (2004)
the sensor is two (2) strings of numbers. See Figure 2.
^
The first string of numbers must be 1850353.
^
The second string of numbers must begin with C1. The remaining numbers are inconsequential.
-
If the part number is anything but 1850353/C1 or if the part number is illegible and cannot be read, install a new sensor, (Ford PN -
4C3Z-9J460-A) and tighten to 10 Nm (89 lb-in), then proceed with the next step of this procedure.
-
If the part number is 1850353/C1 reinstall it and tighten to 10 Nm (89 lb-in), then proceed with the next step of this procedure.
6.
Remove the tape from the vehicle harness back to the original take-out location.
7.
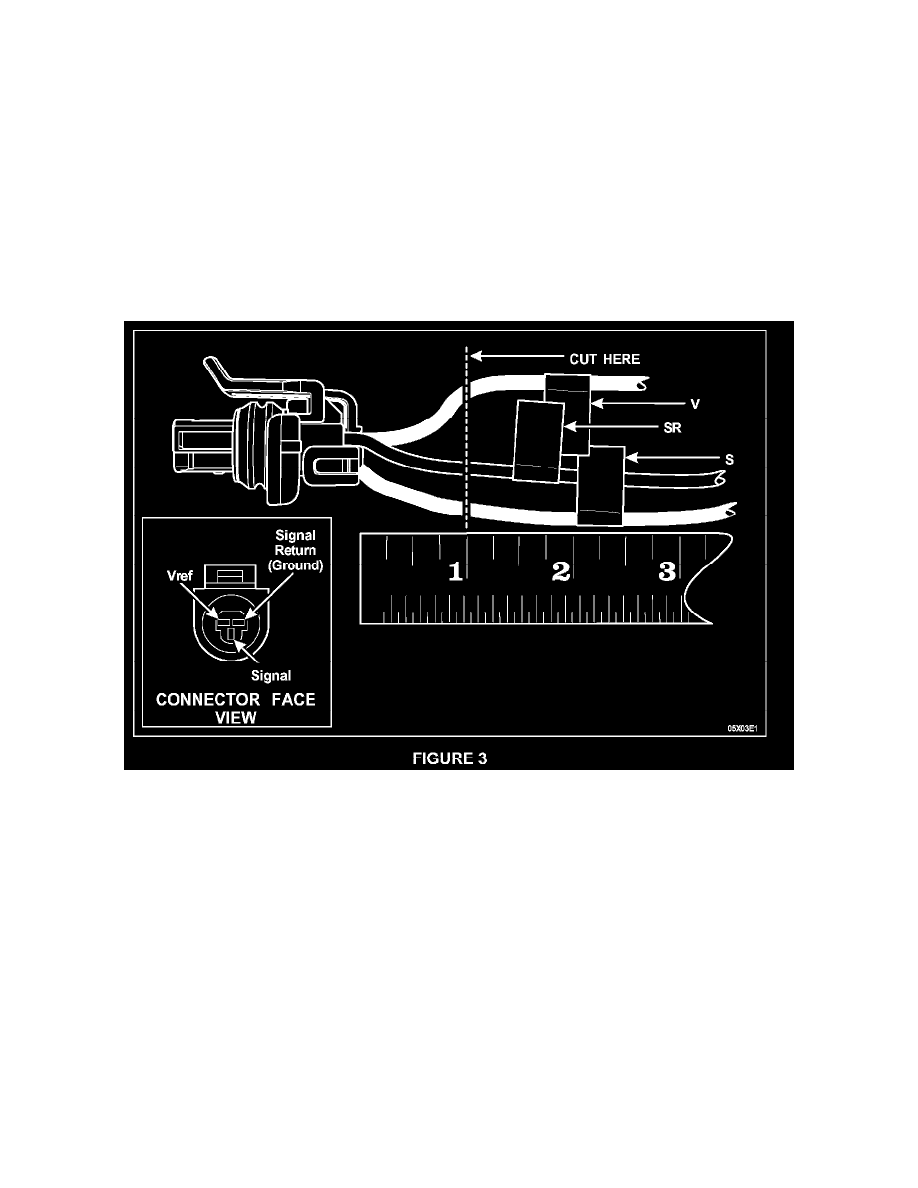
CAUTION: The replacement connectors have only one color wire, so location identification is crucial for a proper repair.
Label the wires identifying the cavity in which they are located. Place identifying tags at least a few inches away from the connector to be cut off.
8.
Cut the wires about 25 mm (1 inch) behind the connector on the vehicle harness MAKING SURE TO LEAVE THE IDENTIFYING TAGS ON
THE HARNESS and discard the old connector. See Figure 3.
9.
Strip about 7 mm (1/4 inch) of insulation from the wires on the new pigtail.
10.
Using the crimp tool provided in the Rotunda Tool Kit, install the buff splice connectors provided in the service kit onto the replacement
connector pigtail.
11.
Strip about 7 mm (1/4 inch) of insulation from the wires on the vehicle harness.
12.
Position the heat shrink over the wires on the new connector.
13.
Matching the wires on the pigtail to the identifying tags on the vehicle harness, crimp the new butt splice connectors to the vehicle harness. Lightly
tug on the wires to make sure of quality connections.
14.
Position the heat shrink tubing over the butt splice connectors, then using the provided Flameless Heat Gun and deflector, heat the tubes on the
vehicle harness until they shrink and adhesive flows from the ends, indicating a water-tight seal.
15.
Fold the repaired harness to mirror the original harness length and tape the harness.
16.
Install a length of convolute over the spliced section of harness and secure with tape.