
E 350 Van L6-300 4.9L VIN E 1-bbl (1982)
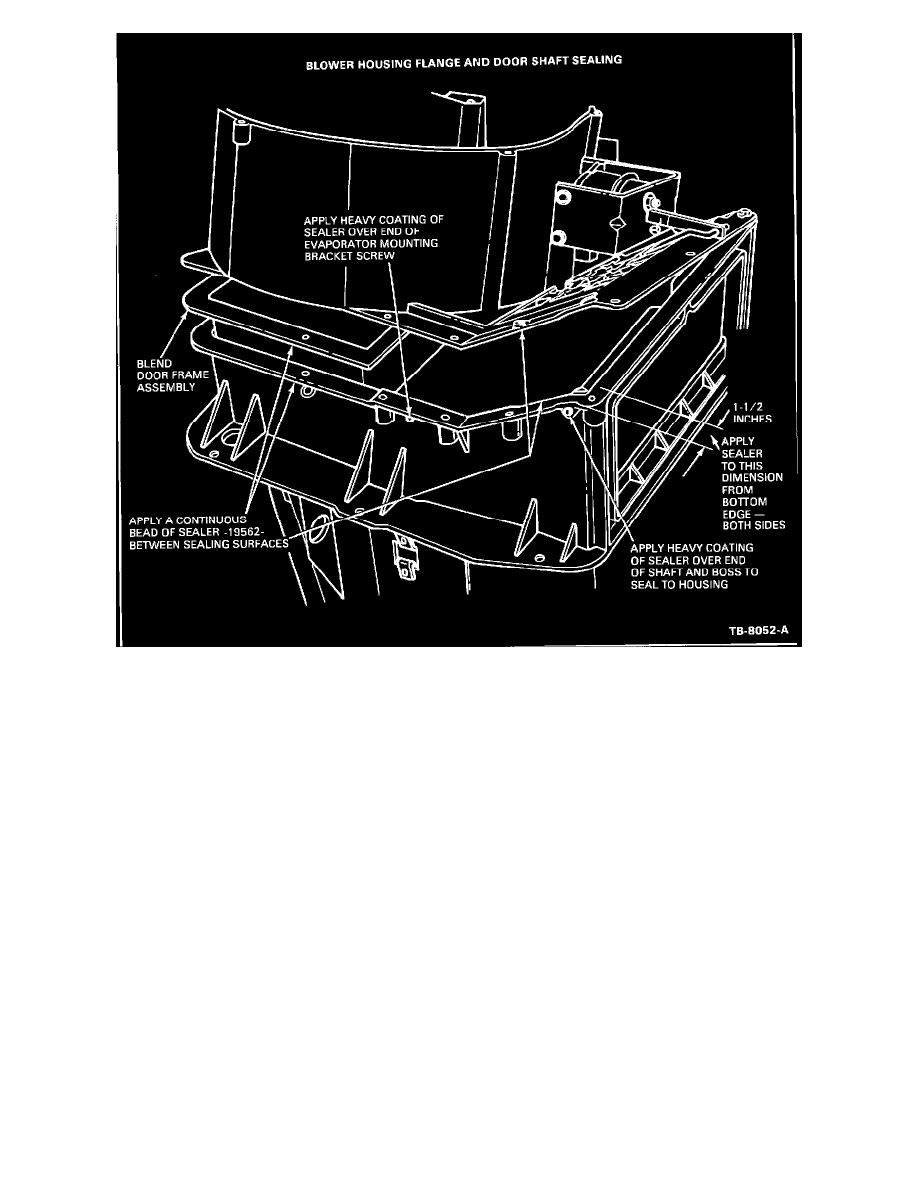
Figure 26
3.
If leakage was noted from the bottom end of the OUTSIDE-RECIRC door shaft, blow compressed air around the end of the shaft area until
thoroughly dry. Apply black silicone sealer, D6AZ-19562-A, liberally to cover completely the end of the shaft and boss to seal the area to the
housing (Figure 26). If leakage was not noted from the evaporator core lower mounting screw, blow compressed air around the screw head until
dry and apply black silicone sealer, D6AZ-19562-A, to cover the screw head (Figure 26).
4.
If leakage was noted from the flange, remove the blower motor resistor connections and the blower scroll cover (Figure 25). Remove eight screws
from the bottom and sides of the housing flange (two screws inside blower housing). Leave the top three screws in place, as well as the vacuum
actuator shaft clip (Figure 26).
5.
Pry the lower flanges of the blower and evaporator housing apart. Thoroughly blow dry the sealing areas with compressed air. Apply a continuous
bead of black silicone rubber sealer on the sealing surfaces across the bottom flange and 1-1/2 inches up both sides (Figure 26). Carefully place
flanges together and reassemble eight screws. Allow time for the sealer to set up and repeat leak test of Step 2.
6.
Remove blower scroll cover and inspect blower housing cover seal for full contact impression with edge of blower housing. If full contact is not
evident or seal is damaged, replace seal or repair skip areas with silicone sealer.
7.
Reassemble blower scroll cover and electrical connections, and EEC IV system module (if so equipped).
8.
Check for proper blower operation as described in the applicable Shop Manual.