
E 350 Van L6-300 4.9L VIN E 1-bbl (1982)
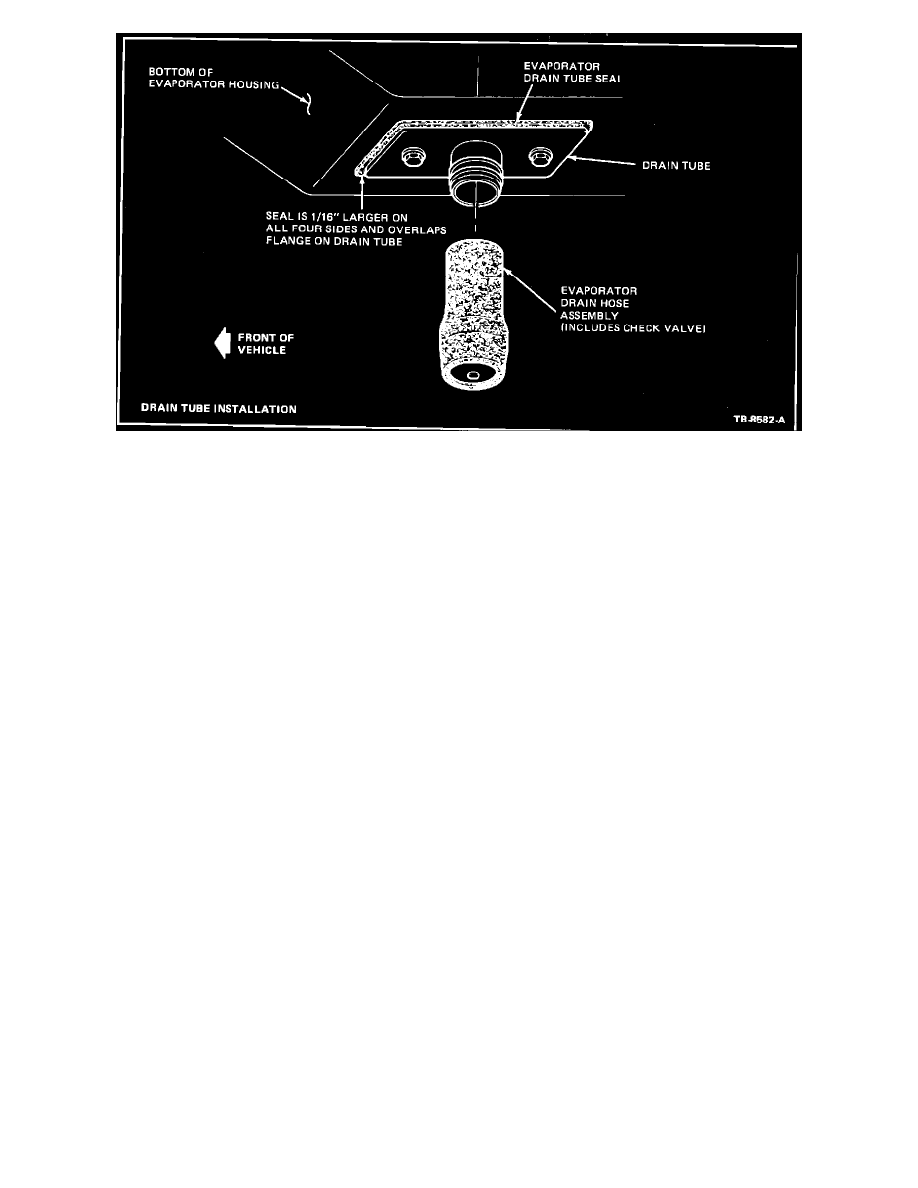
Figure 7
Replacement of Evaporator Condensate Drain Tube Assembly - Vehicles Built From March, 1984 to March, 1986 Only (Refer to Figure 7)
1.
Remove battery.
2.
Pull the check valve drain tube assembly (includes 90~ formed hose and check valve) from the barbed end of the plastic drain tube projecting
inboard from the bottom of the evaporator housing.
3.
Remove the plastic evaporator drain tube and seal attached to the bottom of the evaporator housing by removing the two attaching screws with a
5/16 inch socket. Discard the drain tube parts and keep the screws.
4.
Using a new seal, attach the new plastic drain tube to the bottom of the evaporator drain housing, using two No. 10-16 x .5 hex washer head screws
(42367-S2) and two No. 10 spring nuts (Figure 7). No. 10-12 x .5 screws (42127-S2) may be used as an option to screws 42367-S2.
5.
Push the new straight check valve drain hose onto the barbed end of the plastic drain tube with the check valve pointing straight down, Prior to
installation, ensure that the check valve disc is free to move and check airflow. Conduct the check by blowing and drawing air through the hose.