
E 350 Van L6-300 4.9L VIN E 1-bbl (1982)
1.
Pull the aspirator air hose from the aspirator outlet drain tube assembly.
2.
Remove the aspirator outlet drain tube assembly from the barbed connection of the plastic evaporator drain tube projecting inboard from the
bottom of the housing.
3.
Remove the plastic evaporator drain tube and seal attached to the bottom of the evaporator housing by removing the two attaching screws with a
5/16 inch socket. Inspect the plastic drain tube for cracks or chips from the barbs which would provide an air leak path. Inspect the seal for full
sealing contact around the drain opening from the housing to the drain tube. If not properly sealed, replace seal or apply silicone sealer to the seal
surface to insure a complete seal. Install seal, drain tube and attaching screws.
4.
Plug aspirator air hose with rubber cap 382443-S or similar and tape hose out of the way on the underside of evaporator housing.
5.
Install the new check valve drain tube assembly, E5UZ-19858-B, to the barbed end of the plastic drain tube projecting from the underside of the
evaporator housing with the check valve down.
Blend Door Frame Rework and Resealing of Lower Housing Flanges
The plastic blend door frame assembly introduced to production in March 1984, requires the addition of drain holes to prevent the accumulation of
water. Add holes as follows:
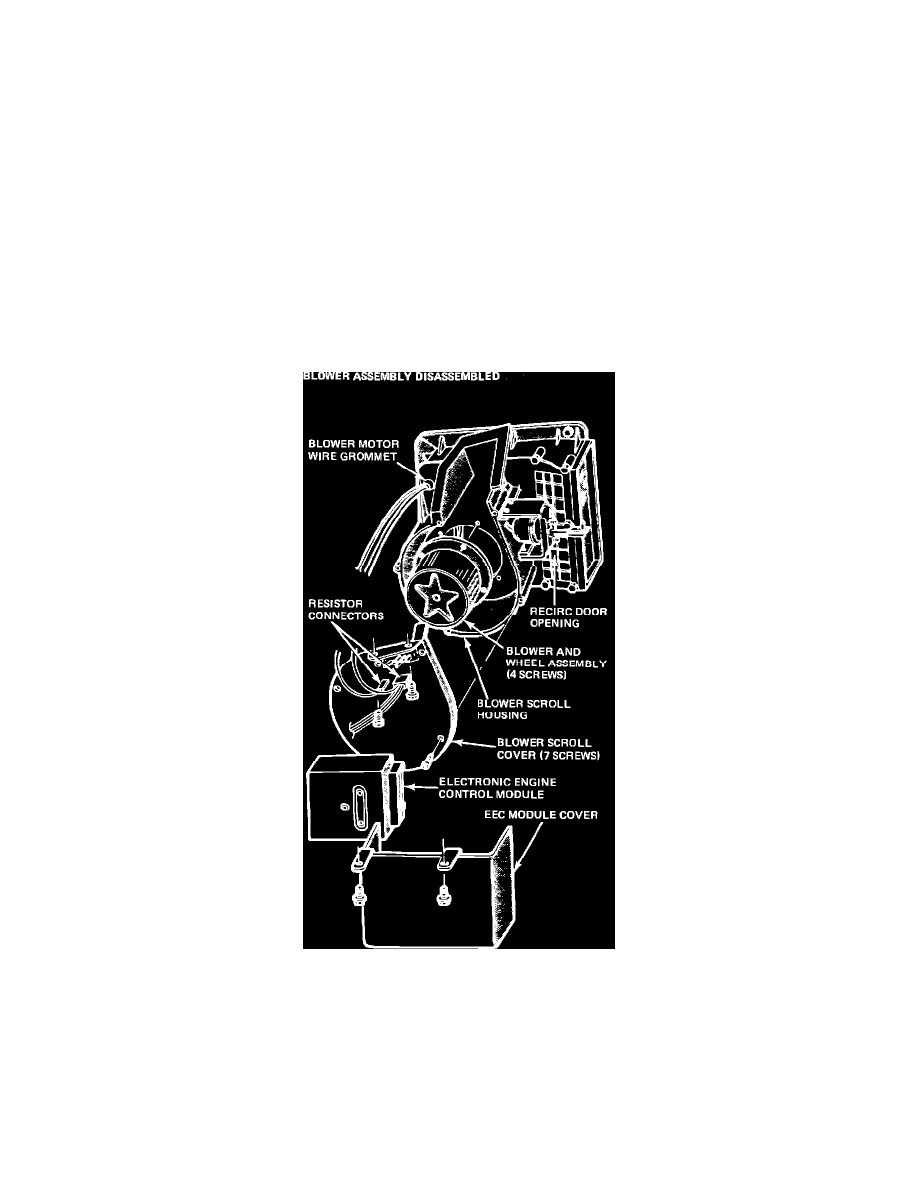
Figure 19
1.
Remove the blower motor and resistor connections from the blower scroll cover (Figure 19).
2.
Remove blower scroll cover (7 screws) and blower motor (4 screws) from blower housing (push/pull blower motor wire grommet toward inside of
evaporator housing) (Figure 19).