
E 350 Van V8-7.3L DSL (1988)
9. Install snap rig on lock release lever assembly.
10. Install flange retaining bolts though holes in flange and hand start nuts 1 to 2 threads on rear side.
Tilt Column
DISASSEMBLY
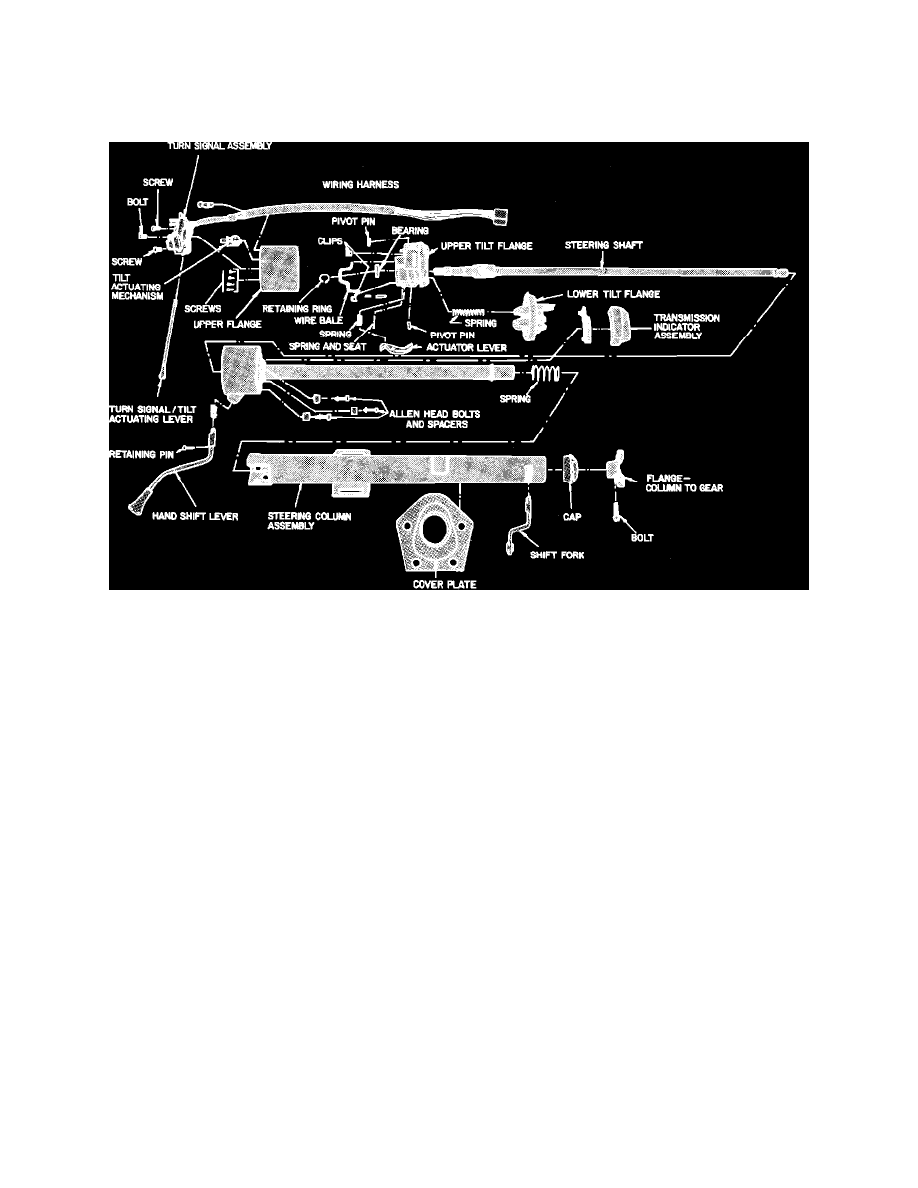
Fig. 3 Tilt Steering Column
1.
Remove steering wheel and steering column, Fig. 3, from vehicle.
2.
Remove turn signal actuator lever.
3.
On models equipped with automatic transmission, drive out pivot pin and remove shift lever.
4.
On all models, remove lower bearing retainer.
5.
On models equipped with automatic transmission, remove shift tube retaining screw from bottom of shift socket, then slide shift tube out of
bottom of column.
6.
On all models, remove lock drive gear.
7.
Remove turn signal switch attaching screws, then the wiring harness-to-steering column tube clips, if necessary.
8.
Remove turn signal switch and harness from steering column.
9.
Remove cover casting screws, then the casting from column.
10.
Unhook and remove upper actuator from lower actuator.
11.
Remove and discard lower flange-to-outer tube attaching screws.
12.
Loosen ignition switch nut and washer assemblies and remove ignition rod from switch end.
13.
Remove tilt mechanism, steering shaft and ignition actuation rod from steering column upper end.
14.
On models equipped with automatic transmission, remove shift socket, then the shift lever indicator ring.
15.
On models equipped with manual transmission, then the key release lever mechanism from tilt mechanism.