
E 350 Van V8-7.3L DSL Turbo VIN F (1995)
Evaporator Case: Service and Repair
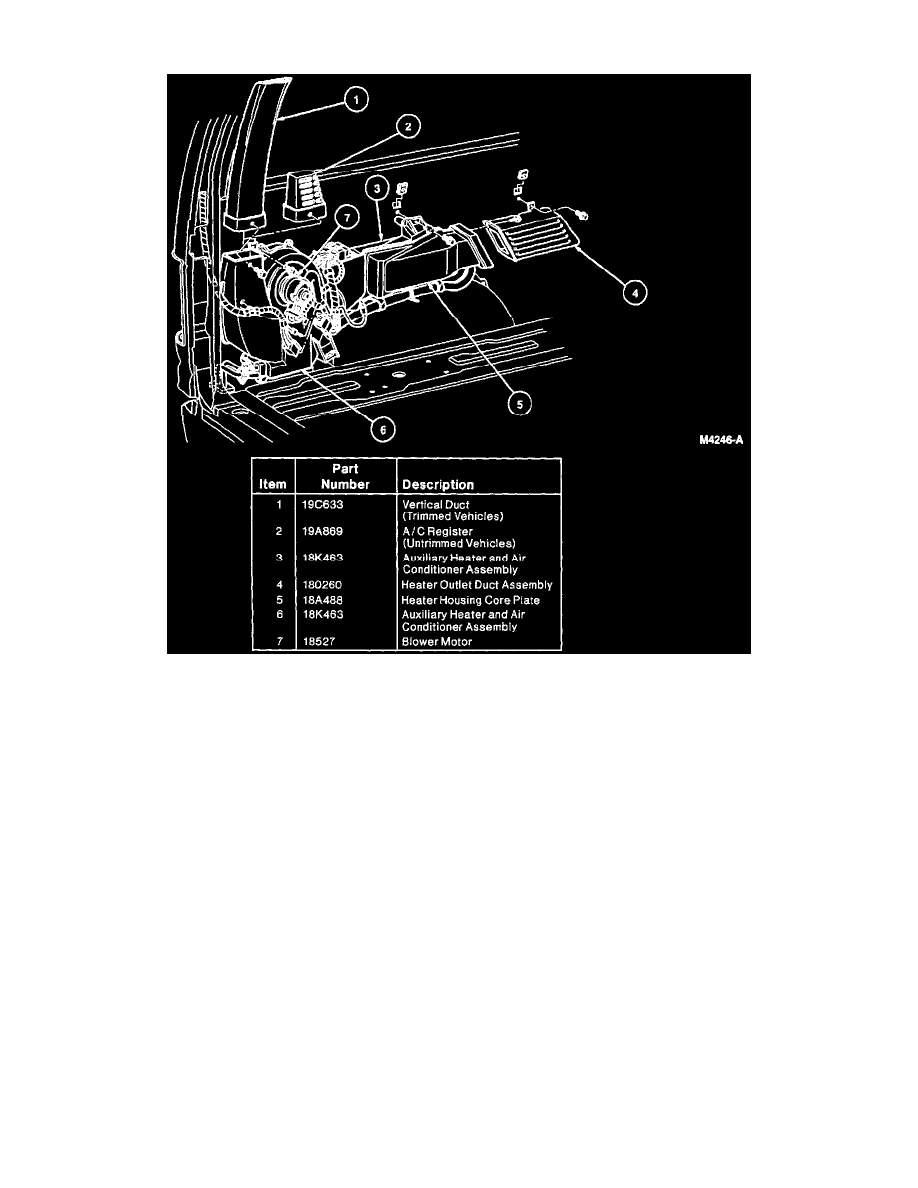
Rear Heater/Air Installation
REMOVE
1. Remove the third, fourth and fifth bench seats (if equipped).
2. Remove the left rear lower and upper trim panels, left lower front trim panel and the left center bolster trim panel (if equipped).
3. Discharge the air conditioning refrigerant system following the recommended service procedures, if equipped with auxiliary air conditioning.
4. Working under the vehicle disconnect the heater tubes to the heater water hoses connected to the auxiliary unit. Plug the heater hoses.
5. Cap the condenser lines and fittings.
6. Disconnect the main wiring harness and vacuum line to the auxiliary heater and air conditioner assembly.
7. If equipped, remove the mounting screws from the auxiliary heater and air conditioner assembly vertical duct. Lift the duct into the headliner and
remove by pulling down and away from the auxiliary case assembly.
8. Lift the auxiliary heater and air conditioner assembly out of the vehicle away from the sheet metal to clear the alignment pin, while guiding the
heater water hoses out from below the underbody.
INSTALL
1. Place the auxiliary heater and air conditioner assembly into the vehicle while guiding the heater water hoses and air conditioner lines through the
holes in the floor panel.
2. Make sure that the heater water hoses, air conditioner lines and drain seals are positioned properly.
3. Align the auxiliary heater and air conditioner assembly with the dowel alignment pin. Install the two auxiliary heater and air conditioner assembly
mounting screws.
4. Place the vertical duct (if equipped) into its mounting position and install the mounting screw.
5. Connect the main wiring harness and vacuum line to the auxiliary heater and air conditioner assembly.
6. Connect the evaporator to compressor suction line (19867) and the condenser to evaporator tube (19835) to the underbody air conditioner lines.
7. Connect the heater tubes under the vehicle to the heater water hose connected to the auxiliary unit.
8. Fill the cooling system to specification and check for coolant leaks.
9. Leak-test, evacuate and charge the refrigerant system following the recommended service procedures, if equipped with auxiliary air conditioning.
10. Install the left rear lower and upper trim panels, left lower front trim panel and the left center bolster trim panel (if equipped).
11. Install the third, fourth and fifth bench seats (if equipped).