
E 350 Van V8-7.3L DSL Turbo VIN F (1995)
NOTE: If applicable, use care not to damage exciter ring when removing ring gear. Whenever removing ring gear bolts, discard and replace with
new bolts upon assembly.
12. If applicable or necessary, remove exciter ring using a soft faced hammer, then discard ring.
13. Replace differential case in vise, then drive out lockpin that retains pinion mate shaft to case.
14. Remove pinion mate shaft using a suitable drift, then rotate side gears until pinion mate gears turn to opening of case.
15. Remove pinion mate gears and spherical washers behind gears, then lift out side gears and thrust washers.
16. Inspect all parts, including machined surfaces of case. If any one of gears are to be replaced, they are to be replaced as a set.
NOTE: If excessive wear is visible on all parts, it is suggested that complete differential case assembly be replaced.
17. Turn nose of carrier upward, hold end yoke or flange with a suitable pinion flange holding tool, then remove pinion nut and washer from pinion
shaft.
18. Remove end yoke or flange using a suitable yoke remover and inspect. If yoke or flange shows any signs of wear, replace.
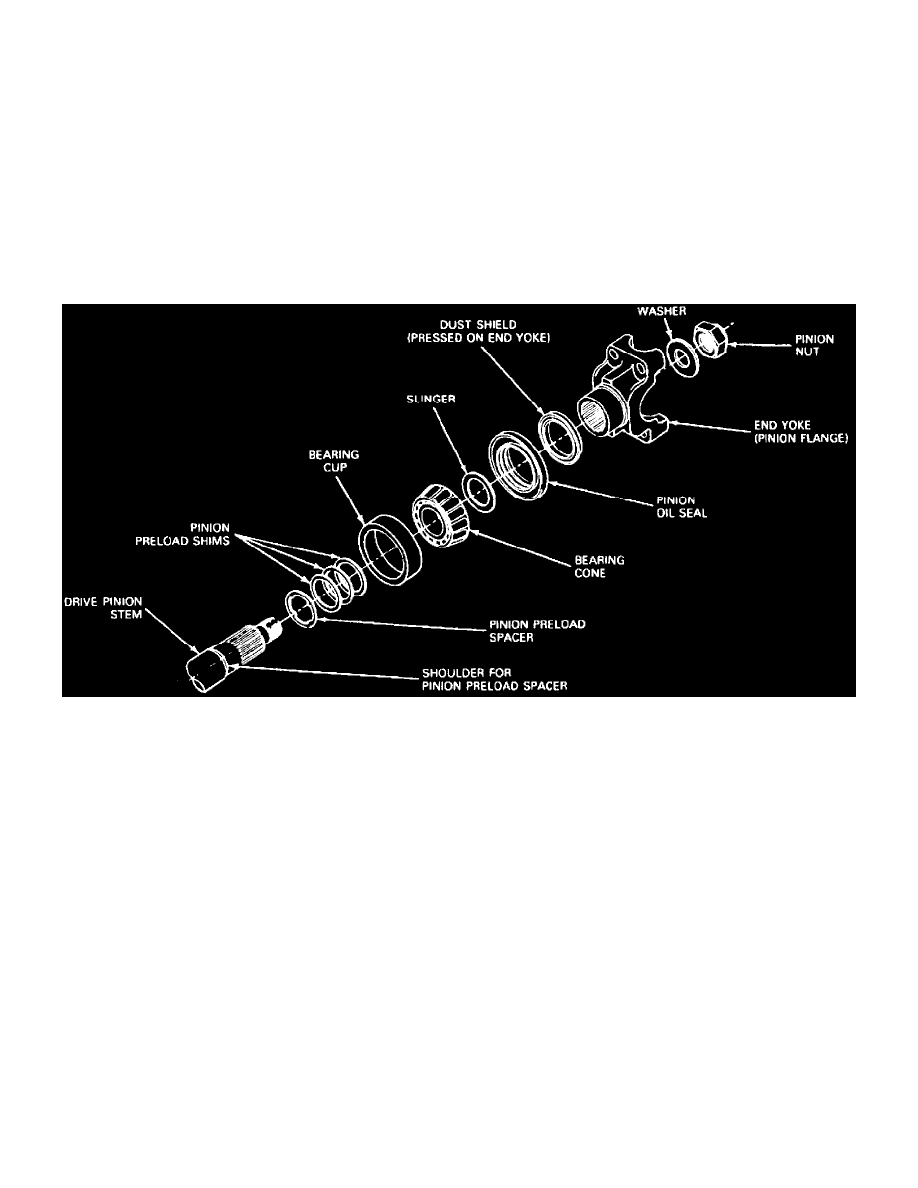
Fig. 5 Exploded View Of Pinion Preload Spacer & Shims. Model 70 Type Full-floating Rear Axle
19. Remove drive pinion by tapping on drive pinion shaft using a rawhide or plastic hammer. Catch pinion to prevent damage to pinion teeth. On
spline end of pinion there are bearing preload shims. Collect shims and keep together for reassembly.
NOTE: Model 70 axles may also use a pinion preload spacer with preload shims, preload spacer must be assembled in sequence or unit failure
may occur.
WARNING: Gear teeth may have sharp edges, use care when handling gear to prevent personal injury.
20. Remove drive pinion oil seal from carrier using a suitable bearing cup puller and a slide hammer.
21. Remove outer pinion bearing cone and outer oil slinger.
22. Turn nose of carrier downward and remove outer pinion bearing cup using a suitable pinion bearing cup remover and driver handle. Locate driver
on back edge of cup and drive cup out of bore.
23. Remove inner pinion bearing cup and baffle using a suitable pinion bearing cup remover and driver handle. Shims are located between bearing cup
and carrier bore and may also include an oil baffle. If shims and/or baffle are bent or nicked, replace. Wire shim stacks together and measure each.
If stack has to be replaced, replace with same thickness.
24. Remove inner pinion bearing from drive pinion using tool No. D81L-4220-A, or equivalent.