
Econoline E450 V8-5.4L SOHC VIN L (1998)
Wheels: Service and Repair
Single Wheel
REMOVAL
1. Remove the wheel cover, if so equipped.
2. With the weight of the vehicle still on the tires, loosen the lug nuts.
CAUTION: Do not use heat to loosen a seized lug nut. Heat can damage the wheel and wheel bearings.
NOTE: Do not remove the lug nuts at this time.
3. Raise the vehicle until the wheel and tire assembly clears the floor.
4. Remove the lug nuts.
5. Remove the wheel and tire assembly.
INSTALLATION
1. Position the wheel and tire assembly on the vehicle.
WARNING: WHEN A WHEEL IS INSTALLED, ALWAYS REMOVE ANY CORROSION, DIRT OR FOREIGN MATERIAL
PRESENT ON THE MOUNTING SURFACES OF THE WHEEL OR THE SURFACE OF THE FRONT DISC BRAKE HUB AND
ROTOR THAT CONTACTS THE WHEEL. INSTALLING WHEELS WITHOUT PROPER METAL-TO-METAL CONTACT AT THE
WHEEL MOUNTING SURFACES CAN CAUSE THE LUG NUTS TO LOOSEN AND THE WHEEL TO COME OFF WHILE THE
VEHICLE IS IN MOTION, RESULTING IN LOSS OF CONTROL.
2. Install the lug nuts loosely. Make sure the cone ends of the lug nut face inward.
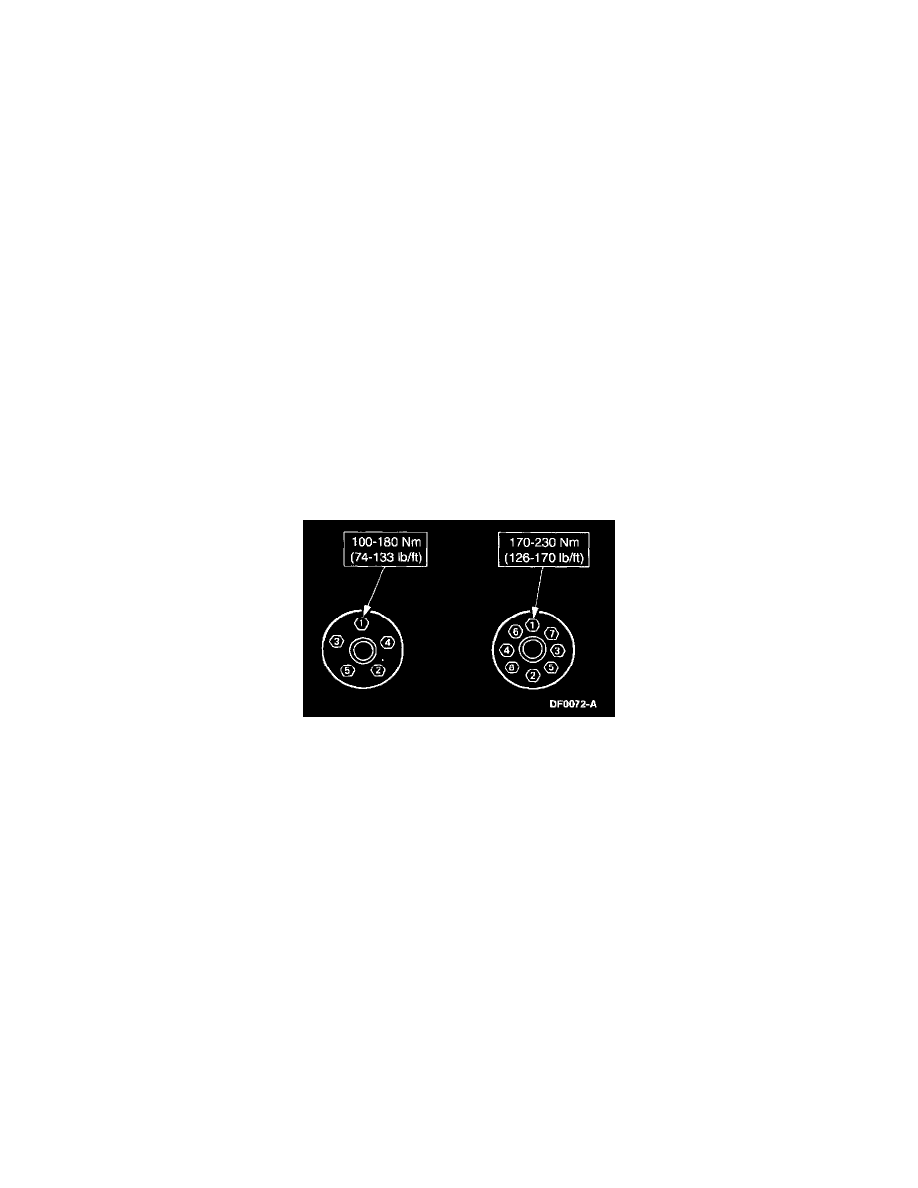
3. Turn the wheel until one lug nut is at the top of the wheel hub bolt circle. Tighten the lug nut until snug. In a crisscross-type pattern tighten the
remaining lug nuts until snug to minimize runout.
4. Lower the vehicle.
5. Tighten the lug nuts to specification.
CAUTION: Failure to tighten the lug nuts in a star pattern can result in high rotor runout, which will speed up the development of brake
roughness, shudder and vibration.
6. Install the wheel cover, if so equipped.