
Econoline E550 V8-7.3L DSL Turbo VIN F (2002)
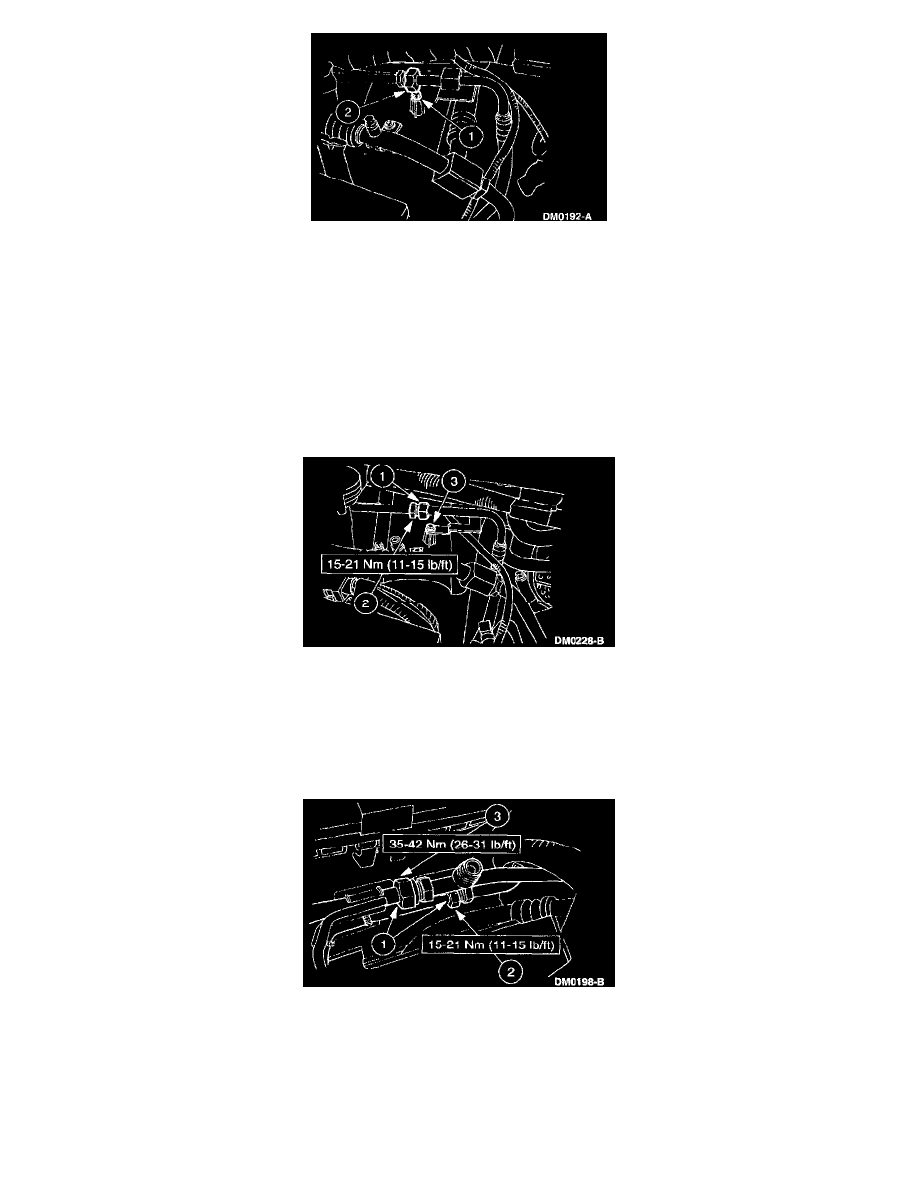
6. Disconnect the A/C evaporator core fitting.
1
Remove the screw.
2
Disconnect the A/C evaporator core fitting.
CAUTION: Use a wrench on each side of the fitting to prevent damage to the A/C fitting.
7. Remove the condenser to evaporator tube.
INSTALLATION
1. Service the new condenser to evaporator tube with the correct amount of PAG Refrigerant Compressor Oil (R-134a Systems) F7AZ-19589-DA
(Motorcraft YN-12-C), or equivalent meeting Ford specification WSH-M1C231-B.
2. Route the condenser to evaporator tube.
3. Connect the A/C evaporator core fitting.
1
Lubricate the new O-ring seals with PAG Refrigerant Compressor Oil (R-134a Systems) F7AZ-19589-DA (Motorcraft YN-12-C), or
equivalent meeting Ford specification WSH-M1C231-B and install the O-ring seals.
2
Connect the A/C evaporator core fitting.
3
Install the screw.
CAUTION: Use a wrench on each side of the fitting to prevent damage to the A/C fitting.
4. Connect the condenser core refrigerant lines.
1
Lubricate the new O-ring seals with PAG Refrigerant Compressor Oil (R-134a Systems) F7AZ-19589-DA (Motorcraft YN-12-C), or
equivalent meeting Ford specification WSH-M1C231-B and install the O-ring seals.
2
Connect the condenser to evaporator tube.
3
Connect the compressor discharge line.
CAUTION: Use a wrench on each side of the fitting to prevent damage to the A/C fitting.