
Edge AWD V6-3.5L (2009)
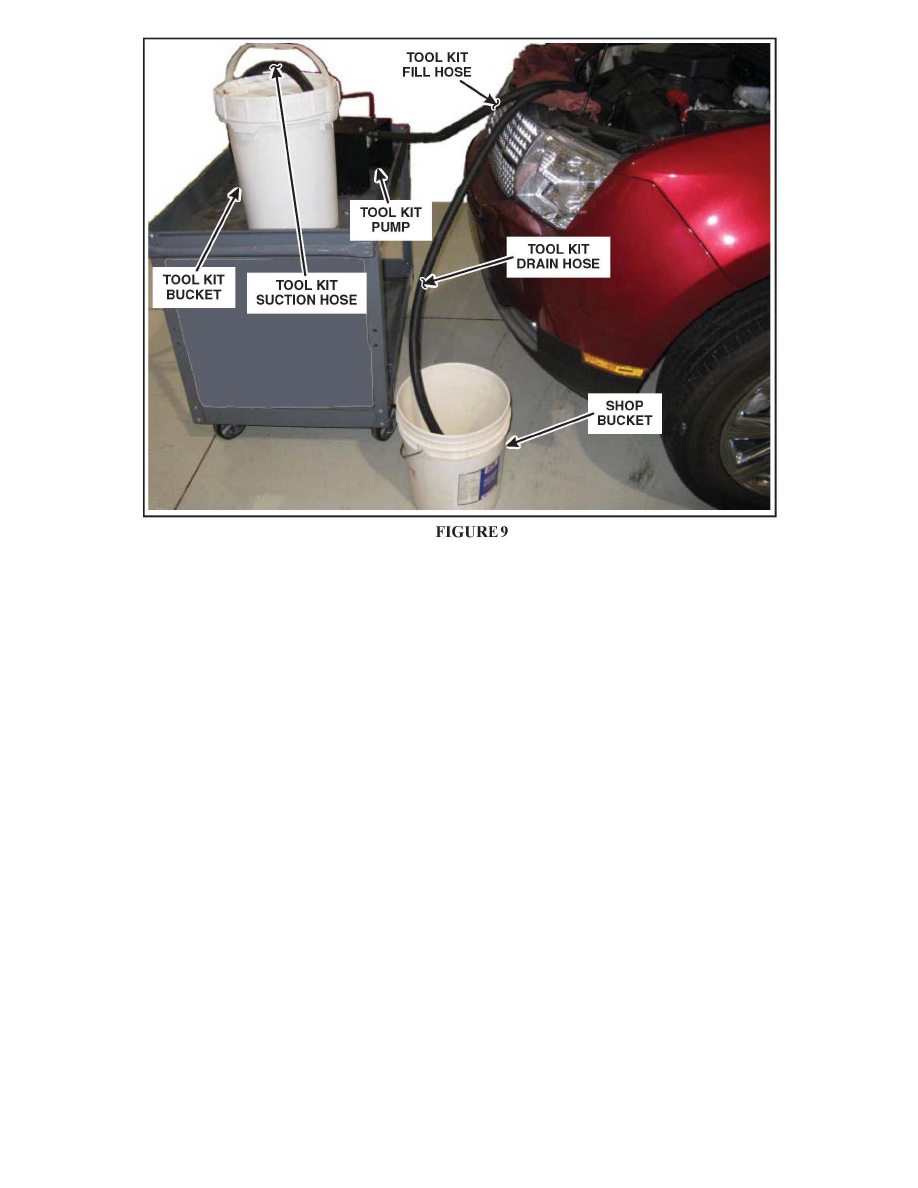
17. Place the flush tool kit pump onto a tool cart in front of the vehicle. Connect the fill hose from the heater core outlet to the pump. See Figure 9.
18. Position the flush tool kit 5 gallon bucket onto the tool cart along side the pump. See Figure 9.
19. Reinstall the air cleaner assembly and connect the MAF electrical connector. It is NOT necessary to secure the air cleaner assembly at this time.
20. NOTE: For measuring purposes it is recommended to use a clean 5 gallon shop bucket. Place a separate empty 5 gallon shop bucket on the floor in
front of the vehicle. See Figure 9.
21. Place the flush tool kit drain hose from the heater core inlet port on the thermostat housing into the empty bucket on the floor. See Figure 9.
22. Install the tool kit water valve onto the shop fresh water supply hose. Completely fill the cooling system through the degas bottle with fresh water
until the water flows from the radiator drain.
(NEW!) 23. Allow the radiator to completely drain. Close the radiator drain and install the degas bottle cap.
24. NOTE: The pinch-off pliers are used to control the direction of fluids in certain areas of the cooling system. They are also used for optimum
cleaning and to prevent air from entering into the cooling system.
NOTE:
If the vehicle is being lifted to install and remove the lower radiator hose pinch-off pliers the flush tool kit pump must be secured onto the
radiator shroud while lifting.