
Edge AWD V6-3.5L (2009)
63. NOTE: Remove ONLY the pinch-off pliers from the lower radiator hose in this step. Remove the pinch-off pliers from the lower radiator hose.
64. NOTICE: Distilled water must be used for the final 5 gallon flush and fill.
After flushing the system with a minimum of 10 gallons of fresh shop water, continue the flush using an additional 5 gallons of distilled water.
65. Remove the pinch-off pliers from the upper radiator hose.
66. Remove air supply from flush tool kit pump.
67. Disconnect the flush tool kit suction hose from the pump and remove the drain hose from the shop bucket. Move the tool cart with the bucket and
pump aside.
68. Remove the degas bottle cap.
69. NOTE: Dispose of Motorcraft(R) Engine Cooling System Cleaner VC-11/water mixture in the same way as coolant in accordance with local, state
and federal laws.
Open the radiator drain and completely drain the radiator.
70. Close the radiator drain.
71. Remove the Air Cleaner Assembly.
72. NOTE: A black residue may be evident after the flushing procedure. This is a normal condition and requires NO action.
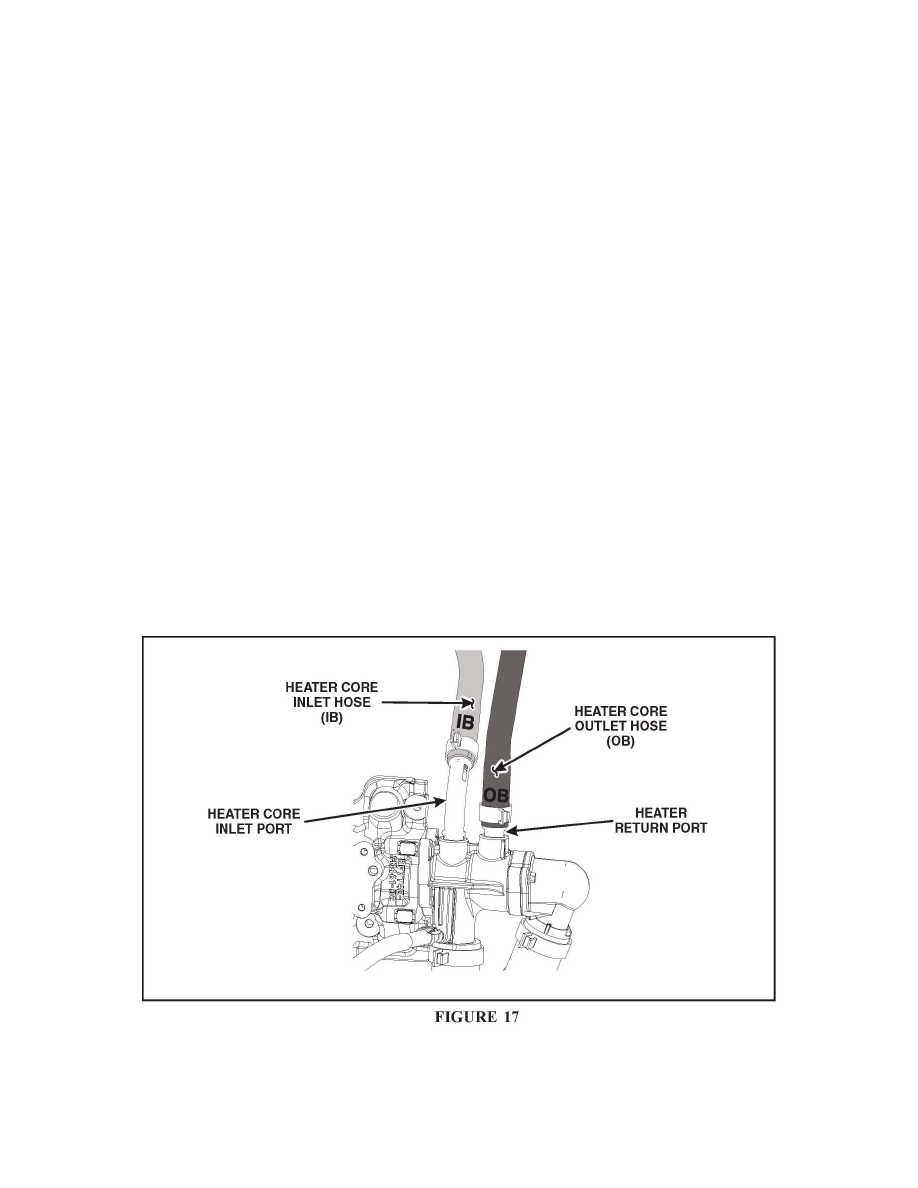
Remove the heater core inlet hose from the heater return port on the thermostat housing.
73. Remove the drain hose from the heater core inlet port on the thermostat housing.
74. Remove the thermostat housing cover and remove the flush tool kit plug.
75. Install the thermostat and housing cover. Tighten the bolts to 10 Nm (89 lb-in).
76. Install the heater core inlet and outlet hoses onto the thermostat housing See Figure 17.
77. Install the Air Cleaner Assembly
^
Install the air cleaner assembly into the rubber grommets