
Edge AWD V6-3.5L (2009)
-
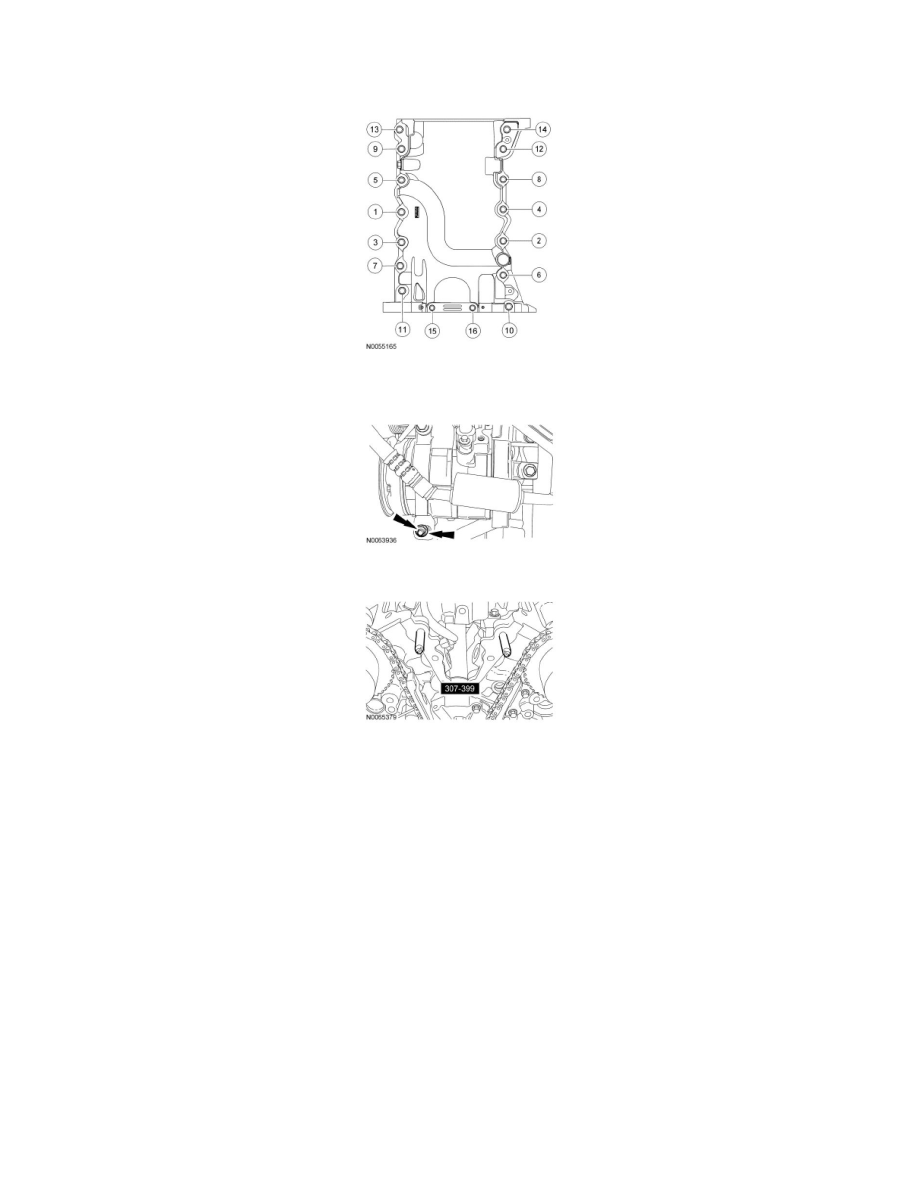
Tighten the small bolts (15 and 16) to 10 Nm (89 lb-in).
6. Install the A/C compressor mounting stud and nut.
-
Tighten the stud to 9 Nm (80 lb-in) and the nut to 25 Nm (18 lb-ft).
7. Install the Alignment Pins.
8. NOTICE: Failure to use Motorcraft(R) High Performance Engine RTV Silicone may cause the engine oil to foam excessively and result in
serious engine damage.
NOTE: The engine front cover and bolts 17, 18, 19 and 20 must be installed within 4 minutes of the initial sealant application. The remainder of
the engine front cover bolts and the engine mount bracket bolts must be installed and tightened within 35 minutes of the initial sealant application.
If the time limits are exceeded, the sealant must be removed, the sealing area cleaned and sealant reapplied. To clean the sealing area, use silicone
gasket remover and metal surface prep. Failure to follow this procedure can cause future oil leakage.
Apply a 3.0 mm (0.11 in) bead of Motorcraft(R) High Performance Engine RTV Silicone to the engine front cover sealing surfaces including the 3
engine mount bracket bosses.
-
Apply a 5.5 mm (0.21 in) bead of Motorcraft(R) High Performance Engine RTV Silicone to the oil pan-to-cylinder block joint and the cylinder
head-to-cylinder block joint areas of the engine front cover in 5 places as indicated.