
Edge AWD V6-3.5L (2009)
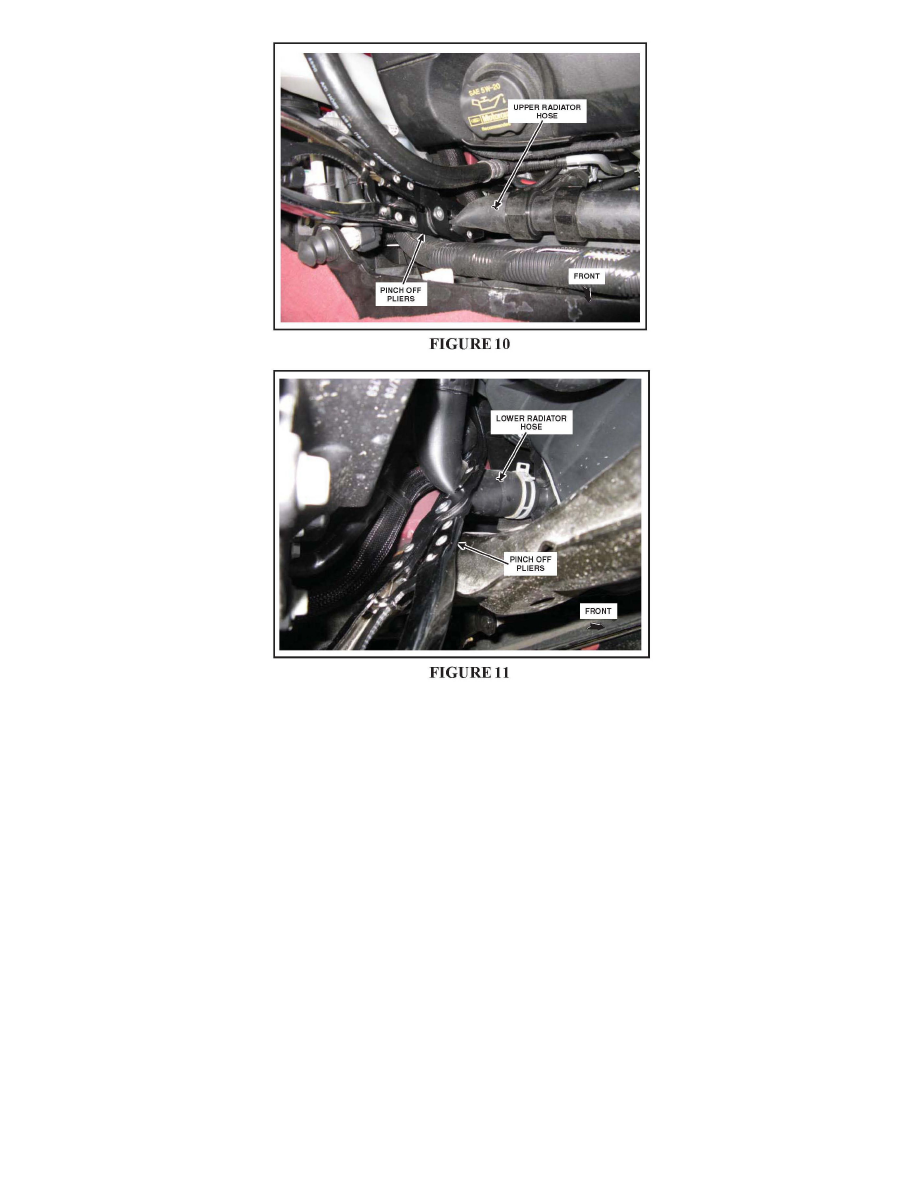
Position and clamp the pinchoff pliers onto the upper radiator hose (see Figure 10) and the lower radiator hose (see Figure 11) as close to the
radiator as possible.
25. Place the flush tool kit suction hose from the pump into one of the small holes in the lid of the flush tool kit bucket that is along side of the pump.
The hose MUST be kept a minimum of 2 inches from the bottom of the tool kit bucket.
26. Using the shop fresh water supply, fill the flush tool kit bucket with fresh water. Use the tool kit valve attached to the shop fresh water supply hose
to maintain the water level in the tool kit bucket.
27. Connect a shop air supply to the pump, with the fresh water supply on, and maintain the water level in the tool kit bucket.
28. NOTE: Do NOT allow the tool kit supply bucket to become low or empty. This will introduce air into the cooling system and cause an overheating
condition
With the fresh water supply on, monitor and maintain the water level in the tool kit bucket.
29. NOTE: Dispose of old coolant and flushing water contaminated with antifreeze in accordance with local, state and federal laws.
Allow a minimum of 10 gallons of water to flush through the engine and out the drain hose into the shop bucket on the floor. It will be necessary to
disconnect the shop air supply from the pump to eliminate the water flow from the drain hose while emptying the shop bucket.
30. After a minimum of 10 gallons of water has flushed through the engine, disconnect the shop air from the pump and turn off the fresh water supply.
31. Remove the tool kit bucket lid and empty the bucket.
VC-11 FLUSH