Escape 2WD L4-2.3L VIN Z (2005)

9. CAUTION: When reusing liquid or vapor tube connectors, make sure to use compressed air to remove any foreign material from the
connector retaining clip area before separating the tube.
NOTE: If the vapor tube or retainer clip is broken or damaged, install a suitable fuel tube disconnect tool to separate the retainer clip legs. Once
the retainer clip legs have separated, lift the clip out of the connector housing, lifting the stamped side of the connector body.
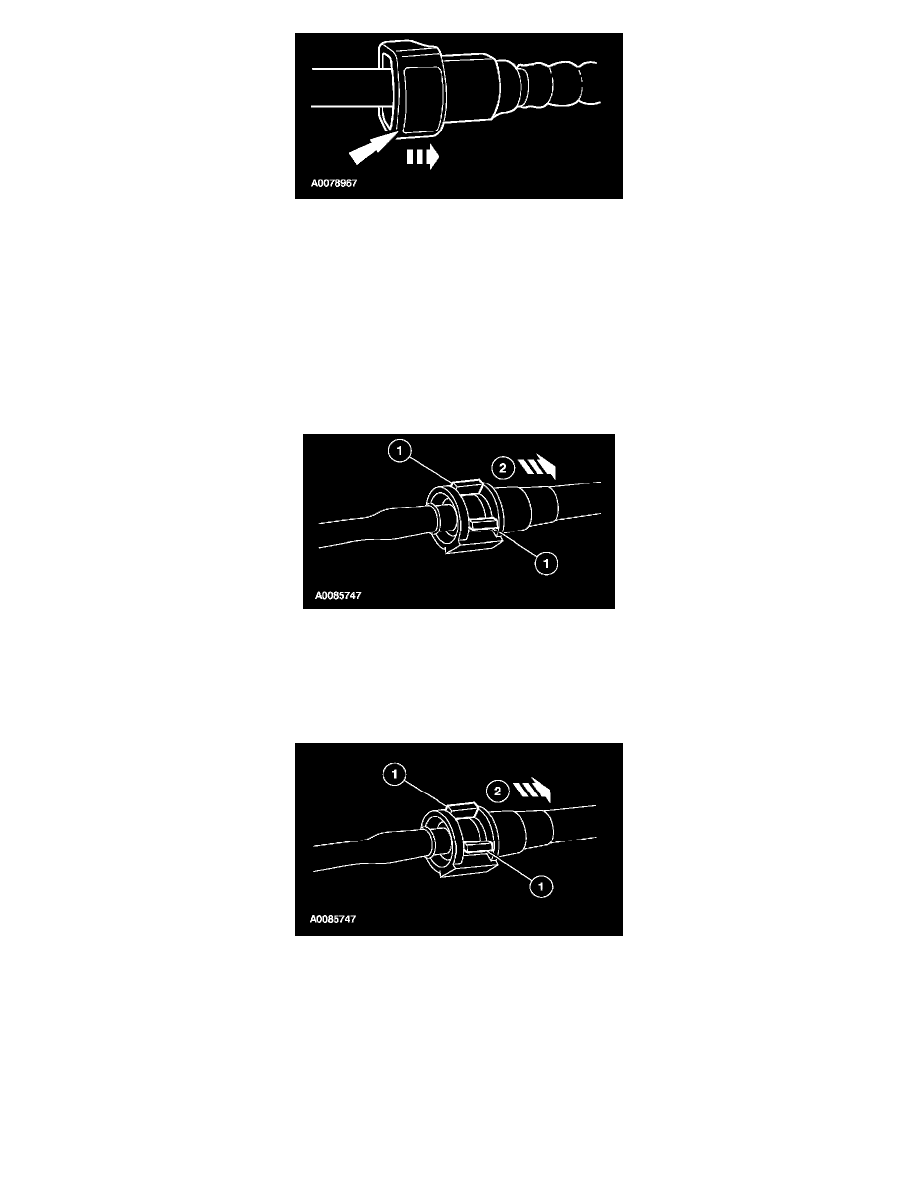
Disconnect the fuel vapor tube quick connect couplings from the intake manifold and the emissions canister purge valve.
-
Push the connector toward the tube to release the pressure.
-
Press the fuel vapor tube quick connect coupling button and pull the fuel vapor tube to disconnect.
10. Detach the fuel vapor tube retainers.
-
Remove the fuel vapor tube.
11. CAUTION: When reusing liquid or vapor tube connectors, make sure to use compressed air to remove any foreign material from the
connector retaining clip area before separating the tube.
Disconnect the fuel vapor tube quick connect coupling from the evaporative emissions (EVAP) canister purge valve.
1
Press the fuel vapor tube quick connect coupling locking tabs.
2
Disconnect the fuel vapor tube quick connect coupling.
12. CAUTION: When reusing liquid or vapor tube connectors, make sure to use compressed air to remove any foreign material from the
connector retaining clip area before separating the tube.
Disconnect the fuel supply jumper tube and the fuel vapor tube quick connect couplings.
1
Press the quick connect coupling locking tabs.
2
Disconnect the fuel supply jumper tube and the fuel vapor tube quick connect couplings.
13. Release the fuel supply and fuel vapor tubes from the frame-mounted retainer clip.
