
Escape 2WD L4-2.5L Hybrid (2010)
23. NOTICE: Failure to follow the camshaft loosening procedure can result in damage to the camshafts.
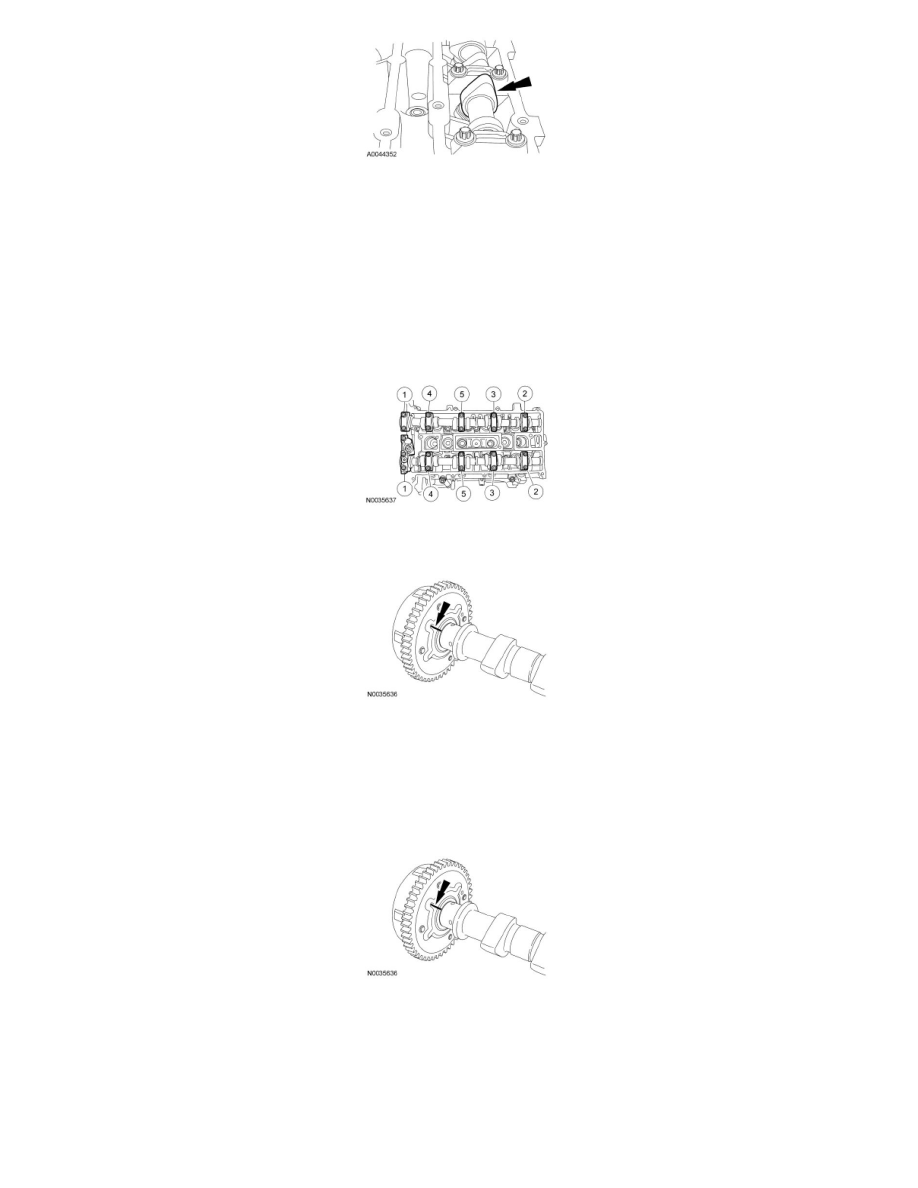
NOTE: Mark the location and orientation of each camshaft bearing cap.
Remove the camshafts from the engine.
-
Loosen the camshaft bearing cap bolts, in sequence, one turn at a time until all tension is released from the camshaft bearing caps.
-
Remove the bolts and the camshaft bearing caps.
-
Remove the camshafts.
24. If removal of the camshaft phaser and sprocket is necessary, mark the sprocket and camshaft for reference during installation.
-
If necessary, place the camshaft in a soft-jawed vise. Remove the bolt and the camshaft phaser and sprocket.
Installation
1. NOTE: If new parts are installed, transfer the reference marks made during disassembly to the new parts.
If necessary, position the camshaft in a soft-jawed vise and install the camshaft phaser and sprocket and the bolt.
-
Align the reference marks on the camshaft phaser and sprocket and the camshaft. Tighten the bolt to 72 Nm (53 lb-ft).
2. NOTICE: Install the camshafts with the alignment slots in the camshafts lined up so the Camshaft Alignment Plate can be installed
without rotating the camshafts. Make sure the lobes on the No. 1 cylinder are in the same position as noted in the removal procedure.
Rotating the camshafts when the timing chain is removed, or installing the camshafts 180 degrees out of position can cause severe damage
to the valves and pistons.
NOTE: Lubricate the camshaft journals and bearing caps with clean engine oil.
Install the camshafts and bearing caps in their original location and orientation. Tighten the bearing caps in the sequence shown in 3 stages: