
Escape 2WD V6-3.0L (2009)
Cabin Temperature Sensor / Switch: Service and Repair
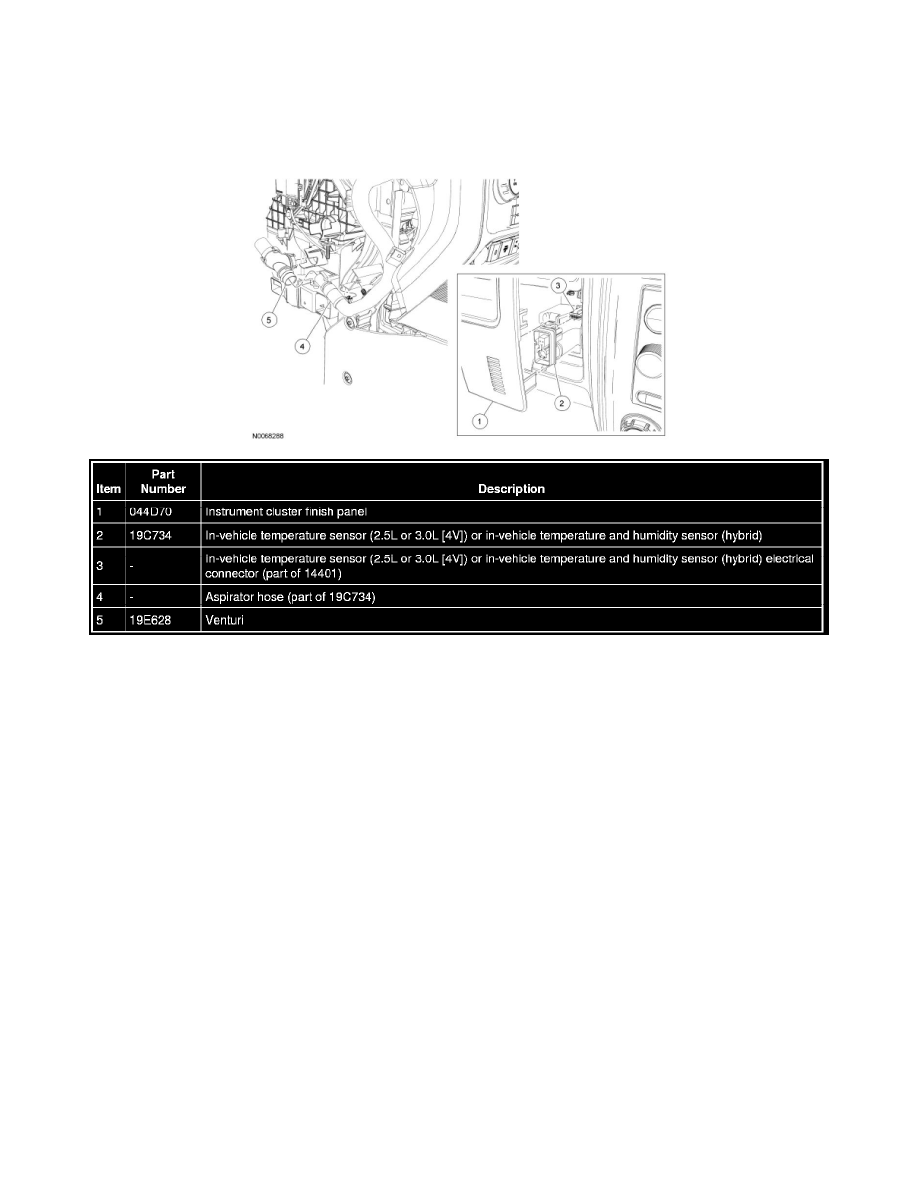
In-Vehicle Temperature and Humidity Sensor
In-Vehicle Temperature and Humidity Sensor
NOTE: In-vehicle temperature and humidity sensor shown. In-vehicle temperature sensor similar.
Removal and Installation
1. NOTICE: Only position the instrument cluster finish panel away from the instrument panel enough to detach the in-vehicle temperature
sensor without stressing the attached components. If the instrument cluster finish panel is positioned too far away from the instrument
panel, damage to the wire harness or instrument cluster finish panel could result.
Detach the instrument cluster finish panel and position it away from the instrument panel to allow access to the in-vehicle temperature sensor.
2. Release the 2 clips and detach the in-vehicle temperature sensor or in-vehicle temperature and humidity sensor.
3. Disconnect the in-vehicle temperature sensor or in-vehicle temperature and humidity sensor electrical connector.
4. Detach the aspirator hose from the venturi at the heater core and evaporator core housing.
5. Detach the aspirator hose from the instrument panel.
6. Remove the in-vehicle temperature sensor or in-vehicle temperature and humidity sensor.
7. NOTE: The venturi must be aligned correctly with the heater core and evaporator core housing for installation. When installing the venturi, it
must be pressed into the heater core and evaporator core housing until an audible click is heard to indicated that it is correctly attached.
Remove the venturi (if needed).
8. To install, reverse the removal procedure.