
Escape 2WD V6-3.0L (2009)
33. Install the No. 7 and No. 8 thrust bearings. See Figure 69.
1. No. 7 thrust bearing
2. No. 8 thrust bearing
34. Install the front planetary carrier/rear ring gear assembly. See Figure 70.
35. Install the forward (1, 2, 3, 4) clutch wave spring See Figure 70
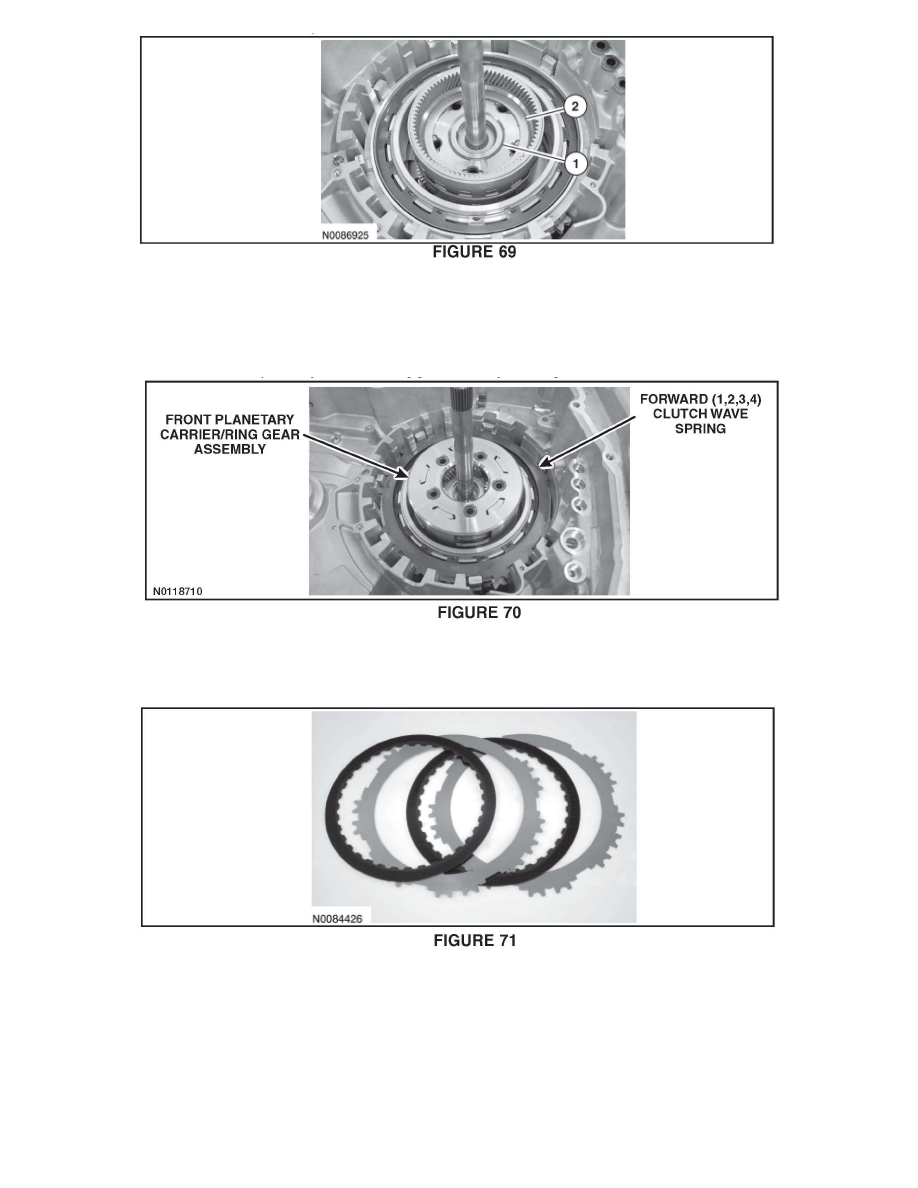
36. Soak the new forward (1, 2, 3, 4) clutch pack in clean automatic transmission fluid. See Figure 71.
37. Install the new forward (1, 2, 3, 4) clutch pack.
38. Install the forward (1, 2, 3, 4) clutch pressure plate.
NOTICE: Be sure to install the forward (1, 2, 3, 4) clutch beveled snap ring with the flat side facing down or the snap ring can come loose causing
damage to the transaxle.