
Escape 2WD V6-3.0L (2009)
1. With the vehicle in NEUTRAL, position it on a hoist.
2. Turn the wheels to the straight ahead position and remove the key.
Hybrid vehicles
3. Disconnect the high-voltage traction battery. For additional information, refer to Hybrid Drive Systems.
4. Remove the rear transmission insulator and retainer.
All vehicles
5. Remove the front tires.
6. NOTICE:
-
Do not reuse the Constant Velocity (CV) joint bolts and washers. Install new bolts and washers or damage to the vehicle may occur.
-
Do not reuse the bolts and cap straps for the center U-joint. Install new bolts and cap straps or damage to the vehicle may occur.
NOTE: Index-mark the front driveshaft to the center bearing.
Remove the front driveshaft, if equipped.
-
Remove the 6 front driveshaft-to-transfer case bolts and washers. Discard the bolts and washers.
-
To install, tighten to 37 Nm (27 lb-ft).
-
Remove the 4 U-joint cap strap bolts and 2 cap straps and remove the front driveshaft. Discard the U-joint cap strap bolts and cap straps.
-
To install, tighten to 23 Nm (17 lb-ft).
7. Remove the 4 bolts (2 each side) and the lateral support crossmember.
-
To install, tighten to 115 Nm (85 lb-ft).
8. Remove the exhaust flexible pipe (2.3L) or the dual converter Y-pipe (3.0L).
9. Remove the 6 bolts and the scrivet from the LH splash shield and remove the splash shield.
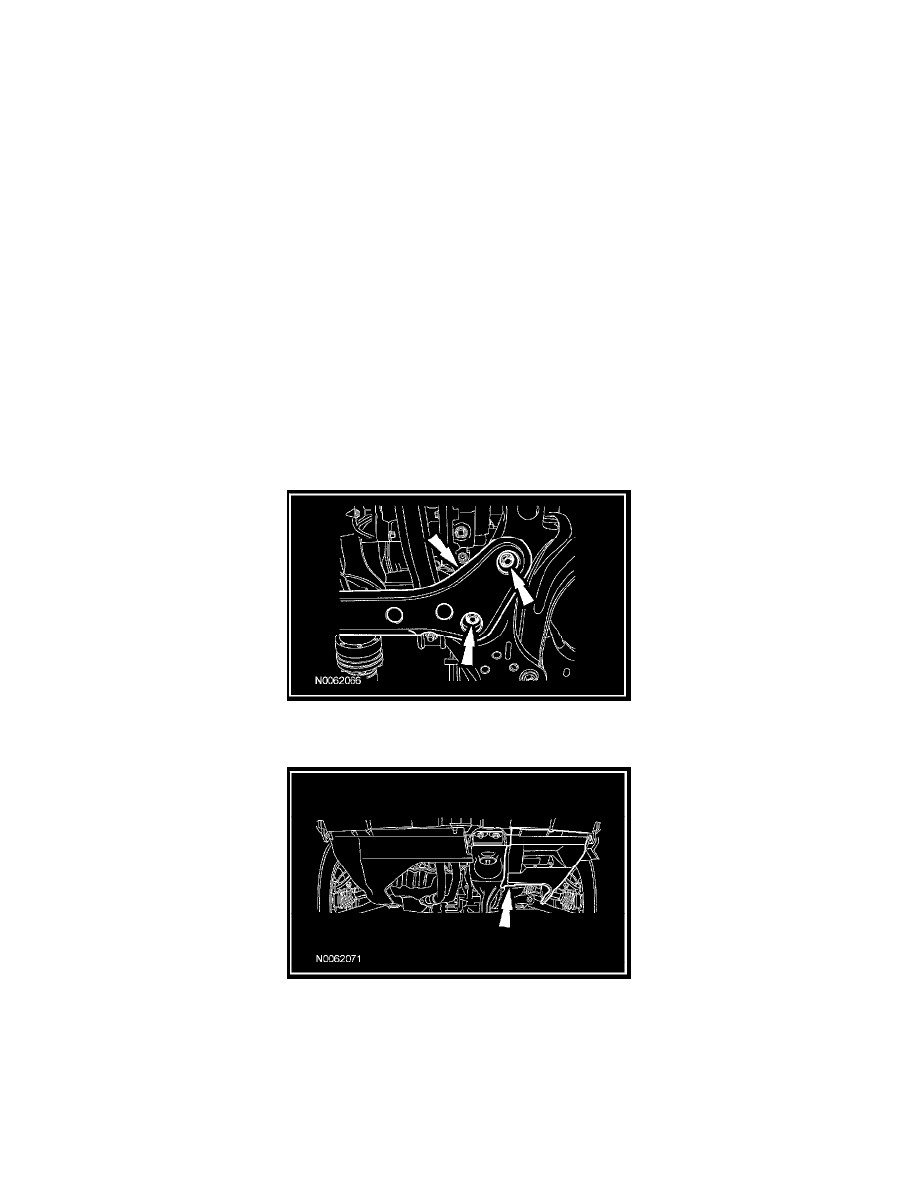
10. Remove the engine support crossmember front insulator bolt.
-
To install, tighten to 115 Nm (85 lb-ft).