
Escape 4WD L4-2.5L (2010)
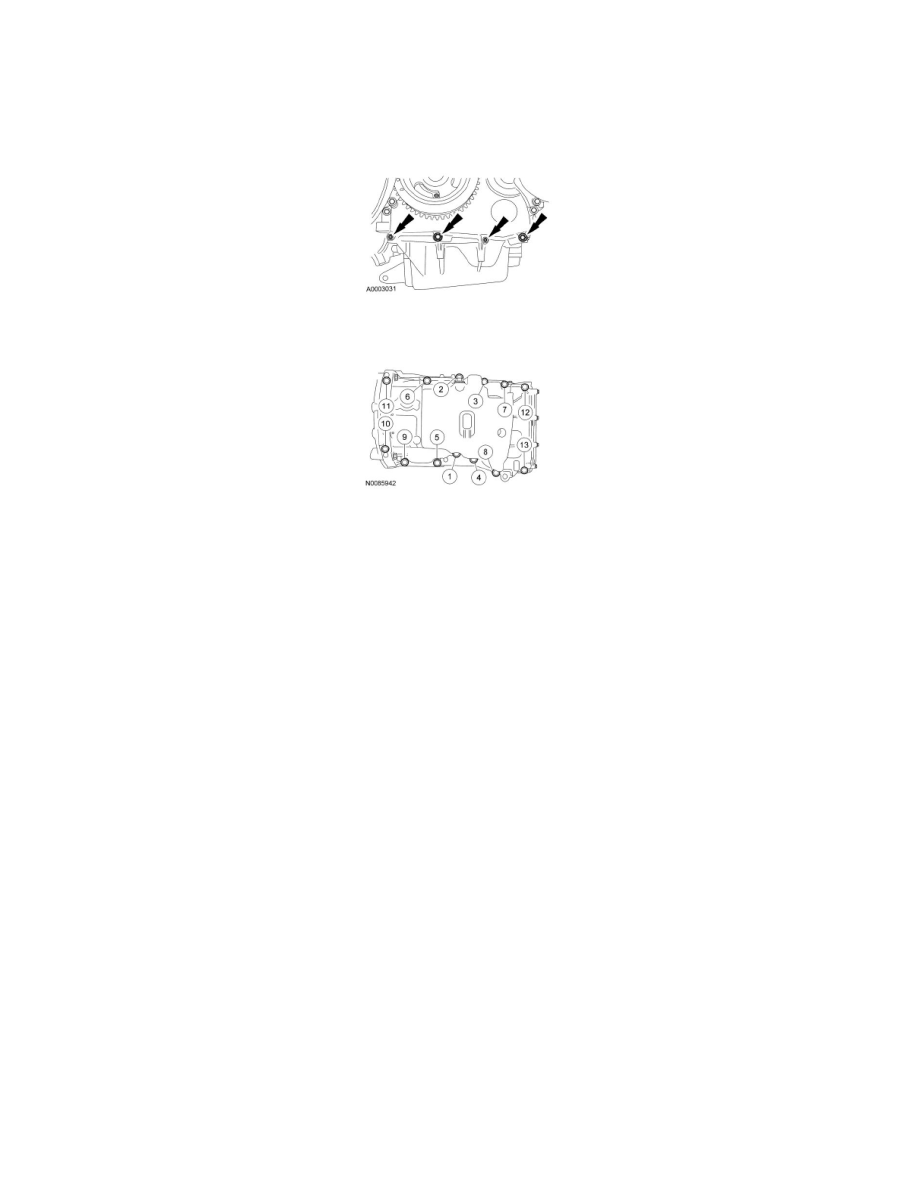
4. NOTE: The engine front cover-to-oil pan bolts must be tightened first to align the front surface of the oil pan flush with the front surface of the
engine block.
Install the 4 engine front cover-to-oil pan bolts.
-
Tighten to 10 Nm (89 lb-in).
5. Tighten the oil pan bolts in the sequence shown.
-
Tighten to 25 Nm (18 lb-ft).
FWD vehicles
6. Alternate tightening the 1 LH bellhousing-to-engine and 1 RH engine-to-bellhousing bolts to slide the transaxle and engine together.
-
Tighten to 48 Nm (35 lb-ft).
7. Tighten the 1 remaining LH bellhousing-to-engine bolt.
-
Tighten to 48 Nm (35 lb-ft).
8. Tighten the 1 remaining RH engine-to-bellhousing bolt (automatic transaxle).
-
Tighten to 48 Nm (35 lb-ft).
AWD vehicles
9. Alternate tightening the 1 RH engine-to-PTU bracket bolt and 1 LH bellhousing-to-engine bolt to slide transaxle and engine together.
-
Tighten the PTU bracket bolt to 45 Nm (33 lb-ft).
-
Tighten the LH bellhousing bolt to 48 Nm (35 lb-ft).
10. Tighten the remaining RH engine-to-PTU bracket bolt.
-
Tighten to 45 Nm (33 lb-ft).
11. Tighten the 1 remaining LH lower bolt.
-
Tighten to 48 Nm (35 lb-ft).
All vehicles
12. Install the 2 bellhousing-to-oil pan bolts.
-
Tighten to 48 Nm (35 lb-ft).
13. Install the 2 oil pan-to-bellhousing bolts.
-
Tighten to 48 Nm (35 lb-ft).
14. Install the LH splash shield and the 7 retainers (5 shown).
-
Tighten to 9 Nm (80 lb-in).