
Escape 4WD L4-2.5L (2010)
Removal
NOTICE: Never pick up or hold the halfshaft by only the inner or outer Constant Velocity (CV) joint. Damage to the CV joint will occur.
NOTICE: Never use a hammer to remove or install the halfshafts. Damage to the halfshaft may occur.
NOTICE: Never use the halfshaft assembly as a lever to position other components. Damage to the halfshaft or Constant Velocity (CV) joints
may occur.
NOTICE: Do not allow the boots to contact sharp edges or hot exhaust components. Damage to the halfshaft boots will occur.
NOTICE: Do not drop assembled halfshafts. The impact may cut the boots from the inside without evidence of external damage.
1. Remove the coil spring. For additional information, refer to Rear Suspension.
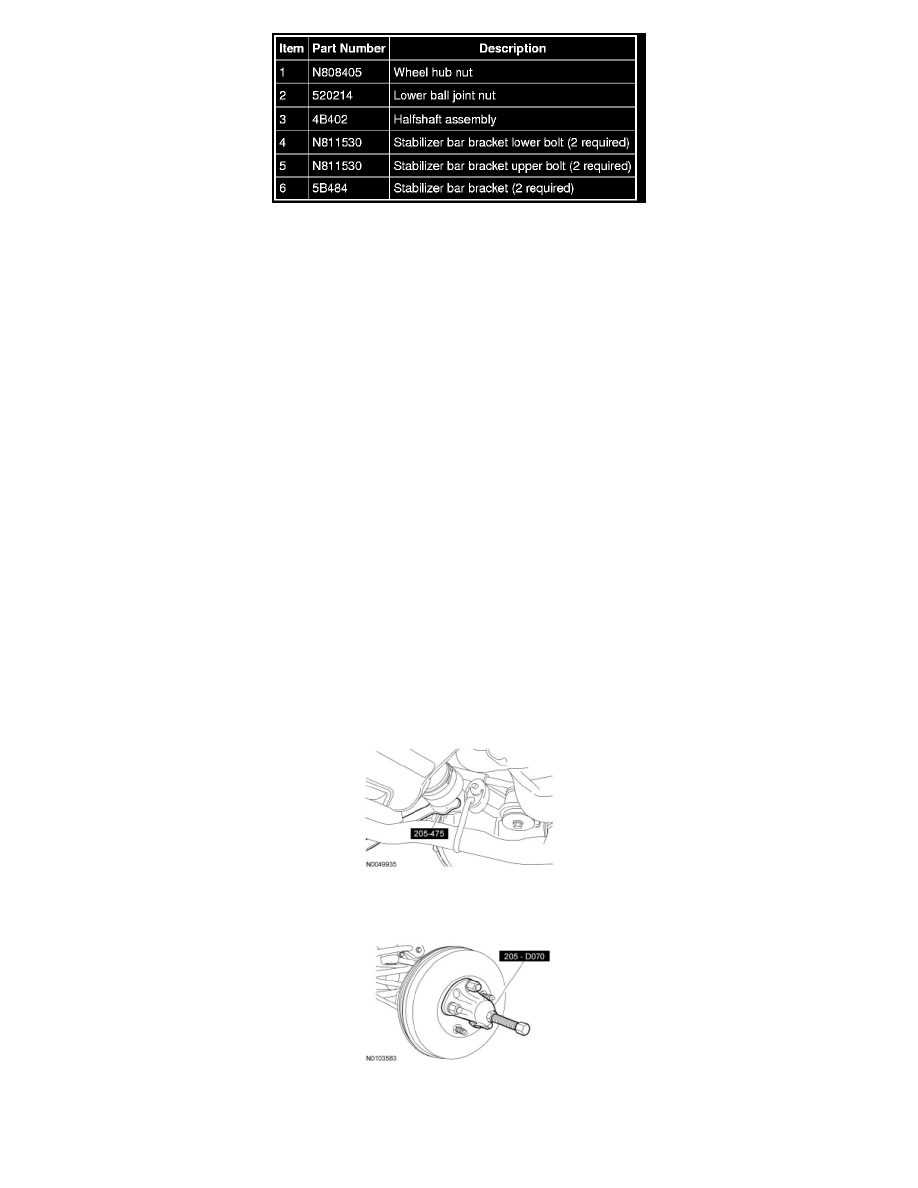
2. Remove and discard the wheel hub nut.
3. Remove the wheel speed sensor harness-to-body bolt.
4. Remove and discard the 4 stabilizer bar bracket upper and lower bolts.
5. NOTE: Support the wheel knuckle.
Remove the nut and separate the lower ball joint.
6. NOTICE: Do not damage the oil seal when removing the axle halfshaft from the differential.
NOTE: Support the halfshaft inner joint.
Using the Halfshaft Remover Tool, remove the halfshaft from the differential.
7. Using the Front Hub Remover, separate the halfshaft from the rear wheel hub assembly.
-
Remove the halfshaft.
Installation
1. Using the Halfshaft Installer, install the outer halfshaft end into the hub assembly.