
Escape 4WD V6-3.0L (2008)
Part 2
Disassembly and Assembly
1. Remove the passenger airbag module.
2. Remove the audio unit.
3. Remove the instrument cluster.
4. Remove the instrument panel.
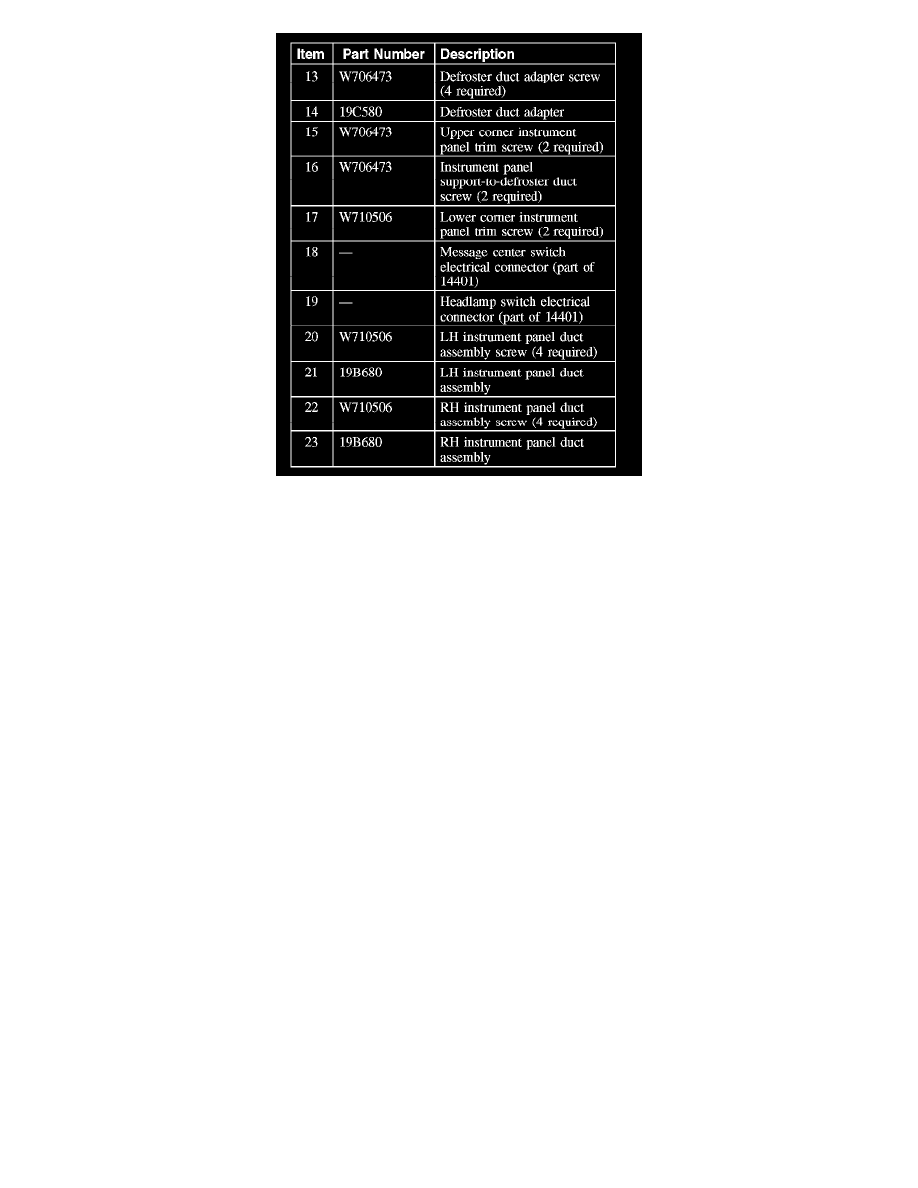
5. Remove the 4 defroster duct adapter screws and the defroster duct adapter.
6. Remove the 4 front display interface module (FDIM) screws and the FDIM.
-
Disconnect the FDIM electrical connector.
7. Remove the 2 instrument cluster opening instrument panel trim screws.
8. Remove the 4 instrument panel trim-to-audio unit bracket screws.
9. Remove the 2 instrument panel trim-to-audio unit bracket nuts.
10. Remove the 3 glove compartment screws and the glove compartment.
11. Remove the 2 glove compartment latch striker screws and the glove compartment latch striker.
12. Remove the lower center instrument panel trim screw.
13. Remove the 4 lower steering column opening instrument panel trim screws.
14. Disconnect the headlamp switch and the message center switch electrical connectors.
15. Remove the 2 upper corner instrument panel trim screws.
16. Remove the 2 lower corner instrument panel trim screws.
17. Remove the 2 instrument panel support-to-defroster duct screws.
18. NOTE: The instrument panel trim will need to be positioned away from the instrument panel support to access the LH duct assembly upper center
screw.
Remove the 4 LH duct assembly screws and remove the LH duct assembly.
19. NOTE: The instrument panel trim will need to be positioned away from the instrument panel support to access the RH duct assembly upper
center screw.
Remove the 4 RH duct assembly screws and remove the RH duct assembly.
20. To assemble, reverse the assembly procedure.