
Escape 4WD V6-3.0L (2008)
Receiver Dryer: Service and Repair
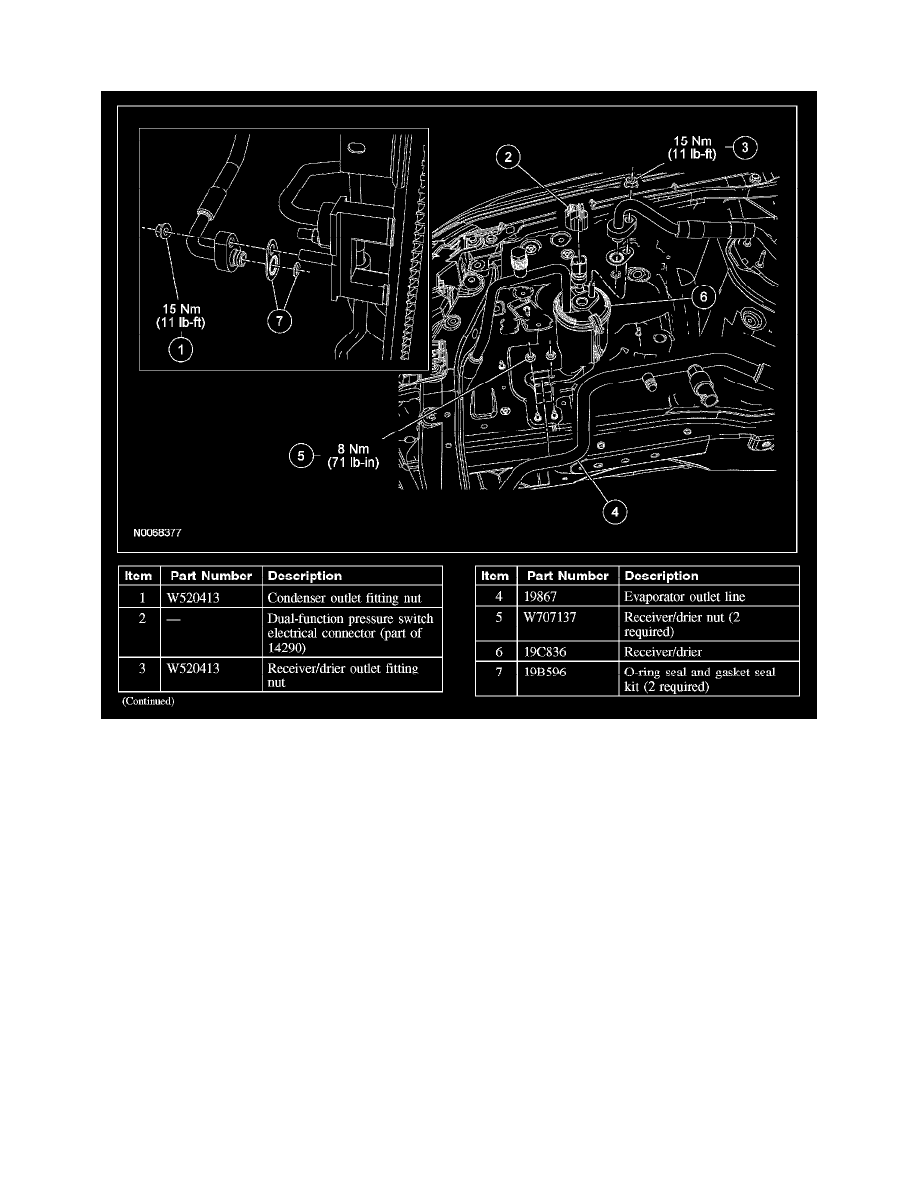
RECEIVER DRIER
Removal and Installation
NOTE:
-
The receiver/drier fitting studs can be removed and installed separately from the receiver/drier and are available as service parts. If only the fitting
studs are damaged, it is not necessary to install a new receiver/drier.
-
Installation of a new receiver/drier is not required when repairing the air conditioning system, except when there is physical evidence of
contamination from a failed A/C compressor or damage to the receiver/drier.
1. Recover the refrigerant.
2. Remove the front bumper cover.
3. Remove the condenser outlet fitting nut and disconnect the fitting.
-
Discard the O-ring seal and gasket seal.
-
To install, tighten to 15 Nm (11 lb-ft).
4. Disconnect the dual-function pressure switch electrical connector.
5. Remove the receiver/drier outlet fitting nut and disconnect the fitting.
-
To install, tighten to 15 Nm (11 lb-ft).
-
Discard the O-ring seal and gasket seal.
6. Detach the evaporator outlet line from the receiver/drier bracket clip.
7. Remove the 2 receiver/drier nuts.
-
To install, tighten to 8 Nm (71 lb-in).
8. Remove the receiver/drier.