
Escape 4WD V6-3.0L VIN 1 (2005)
Part 2
Removal and Installation
1. Disconnect the battery.
2. Open the 4 A-pillar passenger assist handle covers.
3. Remove the 4 bolts and the 2 A-pillar passenger assist handles.
-
To install, tighten to 5 Nm (44 lb-in).
4. Remove the 2 A-pillar trim panels.
5. Remove the 2 B-pillar trim panels.
6. Remove the 2 C-pillar trim panels.
7. Remove the 2 D-pillar trim panels.
8. Remove the 2 screws and the overhead console.
-
Disconnect the electrical connector.
9. Remove the 4 screws, the 2 sun visors and the 2 clips.
-
If equipped, disconnect the electrical connectors.
10. Remove the interior lamp lens.
11. Remove the 2 interior lamp screws and the front interior lamp.
-
Disconnect the electrical connector.
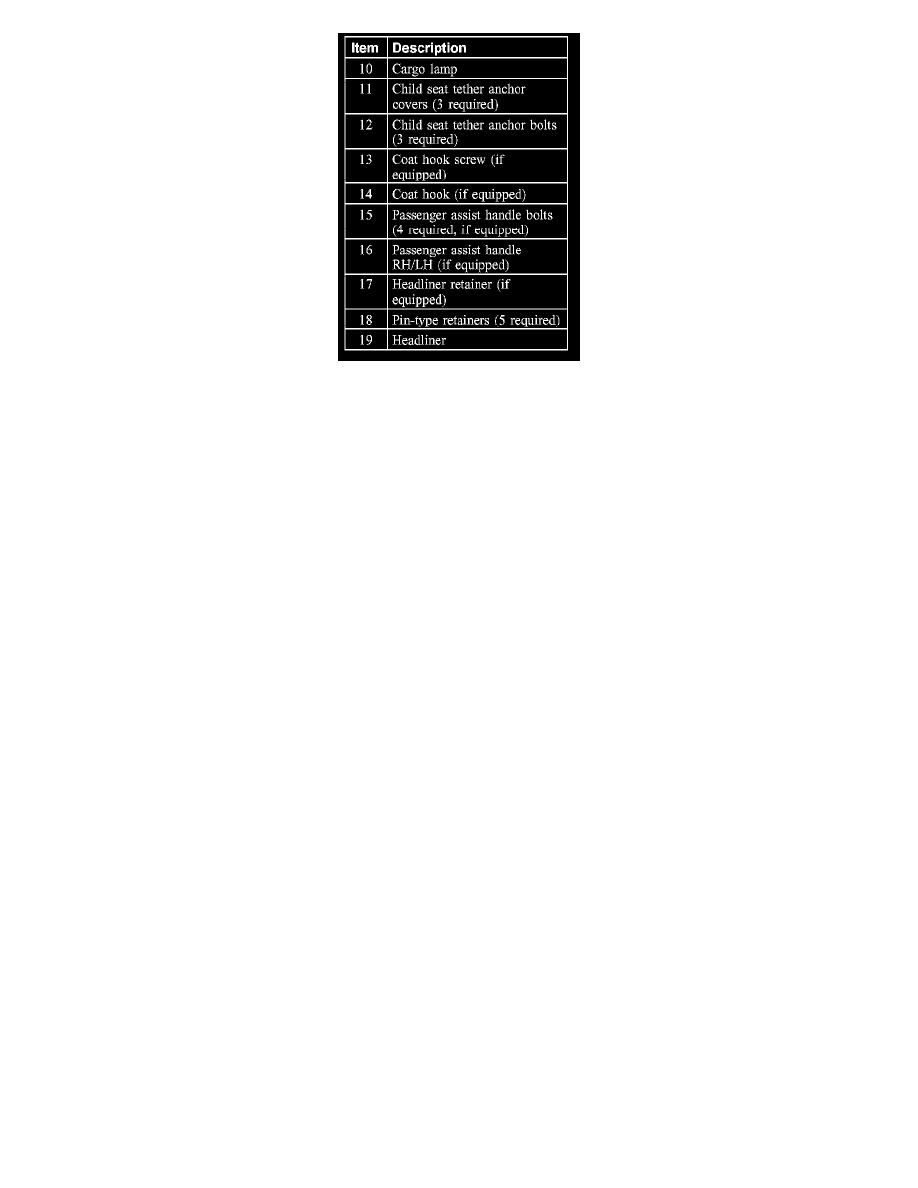
12. Remove the cargo lamp.
-
Disconnect the electrical connector.
13. Remove the 3 child seat tether anchor covers.
14. Remove the 3 bolts and the child seat tether anchors.
-
To install, tighten to 22 Nm (16 lb-ft).
15. If equipped, remove the 2 screws and the coat hooks.
-
To install, tighten to 7 Nm (62 lb-in).
16. Remove the 4 passenger assist handle bolts and the 2 passenger assist handles.
-
To install, tighten to 8 Nm (71 lb-in).
17. NOTE: When installing the retainer it should meet at the rear of the roof opening and have no gaps or overlaps.
If equipped, remove the headliner retainer.
18. Remove the 5 headliner pin-type retainers.