Escape 4WD V6-3.0L VIN 1 (2005)

5. Disconnect the radio ignition interference capacitor electrical connector and detach the 3 wiring retainers from the stud bolts.
6. Remove the nut and the radio ignition interference capacitor.
7. Remove the 2 nuts and position the engine control harness aside.
Installation
1. Clean the valve cover, cylinder head and front cover sealing surfaces with metal surface cleaner.
2. NOTE: The valve cover must be installed and the bolts and stud bolts tightened within four minutes of sealant application.
Apply a 5-mm (0.19-inch) dot of silicone gasket sealant to the front cover-to-cylinder head joints.
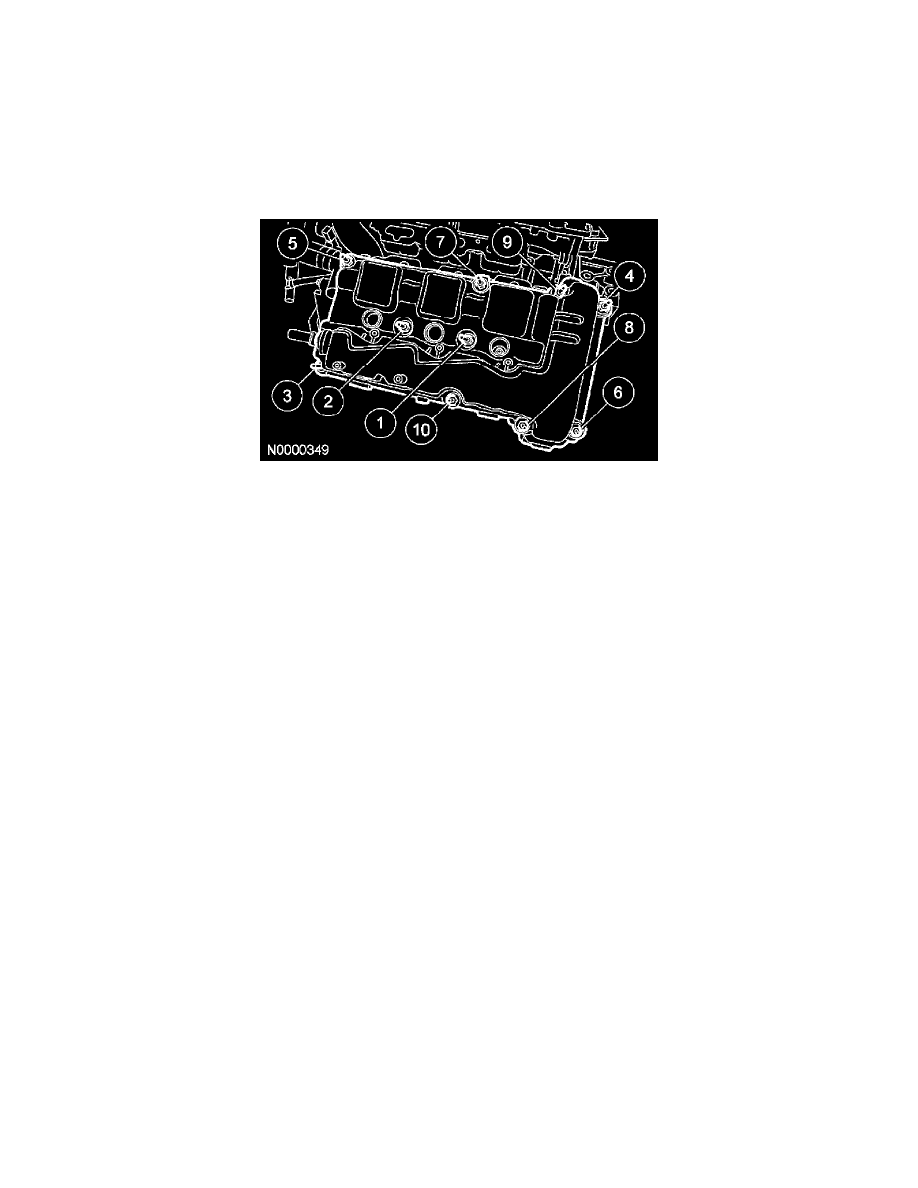
3. Position the valve cover and install the stud bolts.
^
Tighten in the sequence shown to 10 Nm (89 inch lbs.).
4. Position the engine control harness and install the nuts.
^
Tighten to 6 Nm (53 inch lbs.).
5. Install the radio ignition interference capacitor and the nut.
^
Tighten to 6 Nm (53 inch lbs.).
6. Attach the wiring retainers to the stud bolts and connect the radio ignition interference capacitor electrical connector.
7. Connect the PCV tube to the PCV valve.
8. Connect the PCV valve electrical connector.
9. Install the RH ignition coil-on-plugs.
10. Install the upper intake manifold.
