
Escort L4-110 1.8L DOHC (1994)
Axle Shaft: Service and Repair
Removal and Installation
CAUTION: If removing both righthand and lefthand drive shafts, plugs No. T88C-7025-AH, or equivalent, must be installed. Failure to do so may
result in dislocating of differential side gears, requiring transaxle disassembly to align the gears again.
1. Raise and support vehicle.
2. Remove wheel and splash shield.
3. Raise staked portion of halfshaft retaining nut
4. Remove retaining nut and discard.
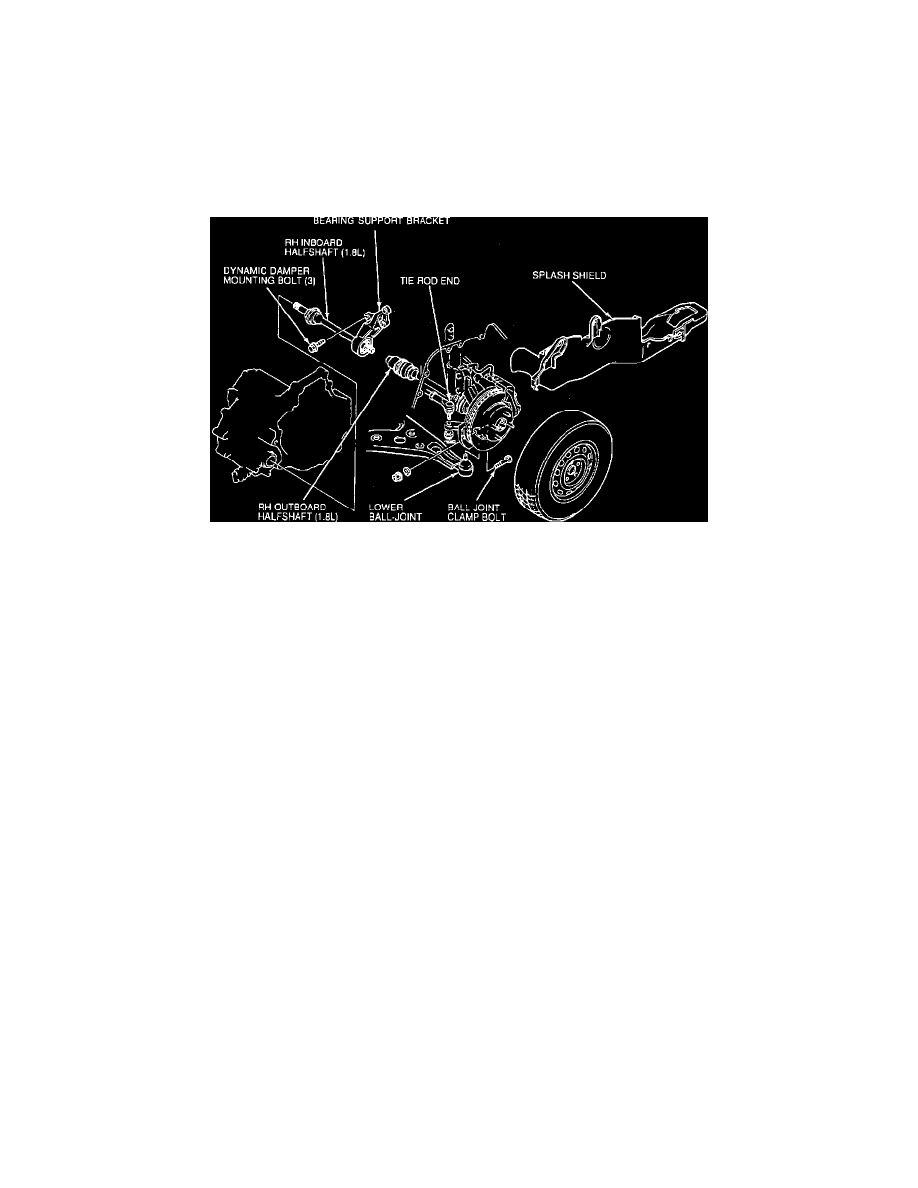
Fig. 2 Halfshaft Removal. 1.8L RH Halfshaft
5. Remove cotter pin from tie rod end and separate tie rod end from steering knuckle using a suitable tie rod remover tool.
6. Remove lower ball joint clamp bolt and pry down on lower control arm to separate ball joint from steering knuckle.
7. Remove lefthand halfshaft as follows:
a. Pull outward on steering knuckle/brake assembly.
b. Carefully pull halfshaft from steering knuckle and position knuckle aside.
c. Support transaxle with a suitable jack stand.
d. Remove four transaxle mount to crossmember nuts.
e. Remove two rear crossmember attaching nuts.
f.
Support rear of crossmember then remove two front mounting bolts and remove crossmember.
8. Position a drain pan under transaxle.
9. On righthand halfshaft, remove three dynamic damper mounting bolts.
10. Insert a pry bar between halfshaft and transaxle case.
11. Remove halfshaft.
12. Reverse procedure to install, noting the following:
a. Position new circlip on inner CV joint spline on circlip gap is at top. Lubricate splines lightly with Motorcraft XG-1-C grease, or equivalent.
b. Position halfshaft so CV joint splines are aligned with differential side gears splines. Push halfshaft into differential.
c. Stake axle hub nut into place. If nut splits or cracks after staking, install a new nut.