
Escort L4-116 1.9L SOHC (1991)
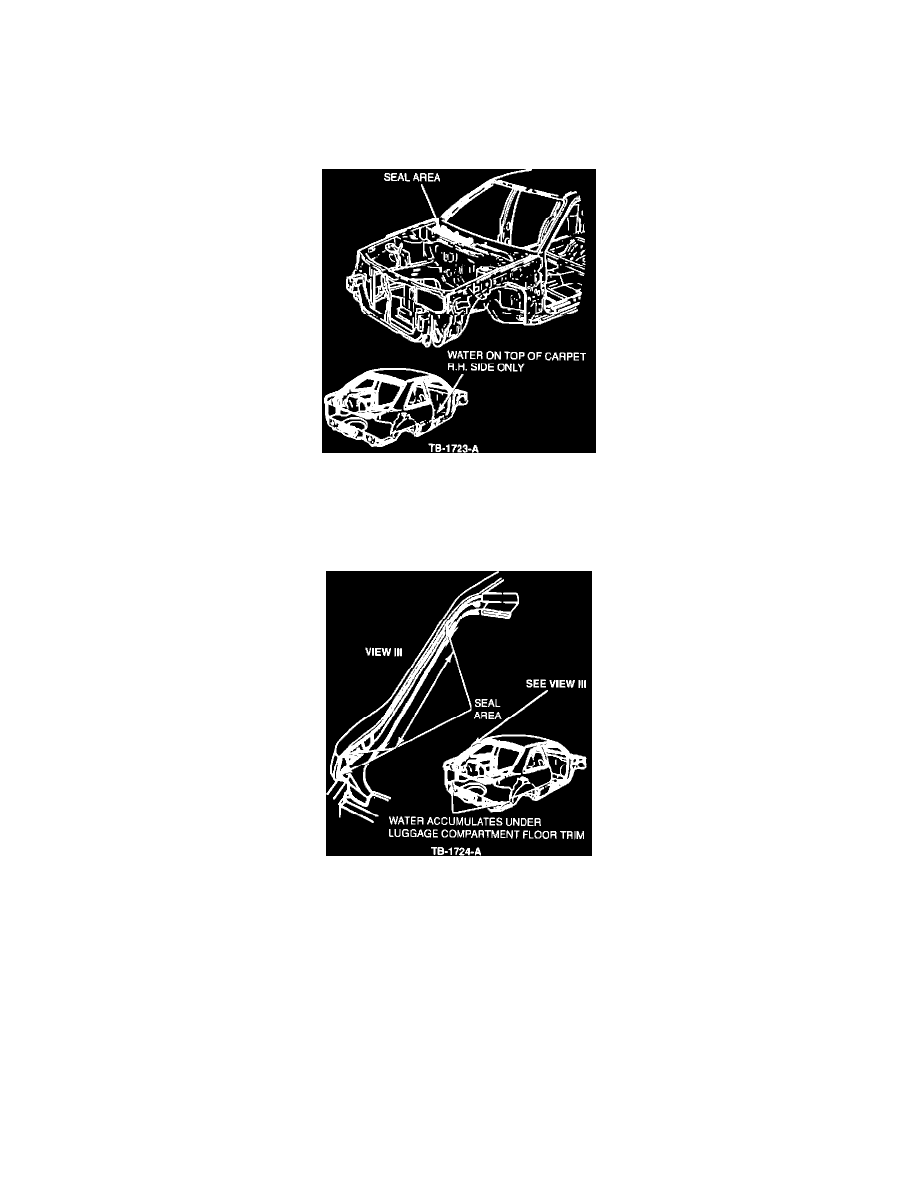
Figure 3
SERVICE PROCEDURE
1.
Inspect and seal joints in the front foot well areas, Figure 3, with clear silicone rubber adhesive (D6AZ-19562-AA).
NOTE:
REMOVE FENDERS TO ACCESS THIS AREA.
Figure 4
2.
Inspect and seal around the cowl air intake cover, Figure 4, with black silicone rubber adhesive (D6AZ-19562-BA).
NOTE:
THE LOWER WINDSHIELD MOULDING MUST BE REMOVED TO COMPLETELY SEAL AROUND THE COVER.
Figure 5
3.
Inspect the joints in the quarter panel to drain through area for sealer skips, Figure 5. Seal missed areas with clear silicone rubber adhesive
(D6AZ-19562-AA).