
Escort L4-116 1.9L SOHC HO (1989)
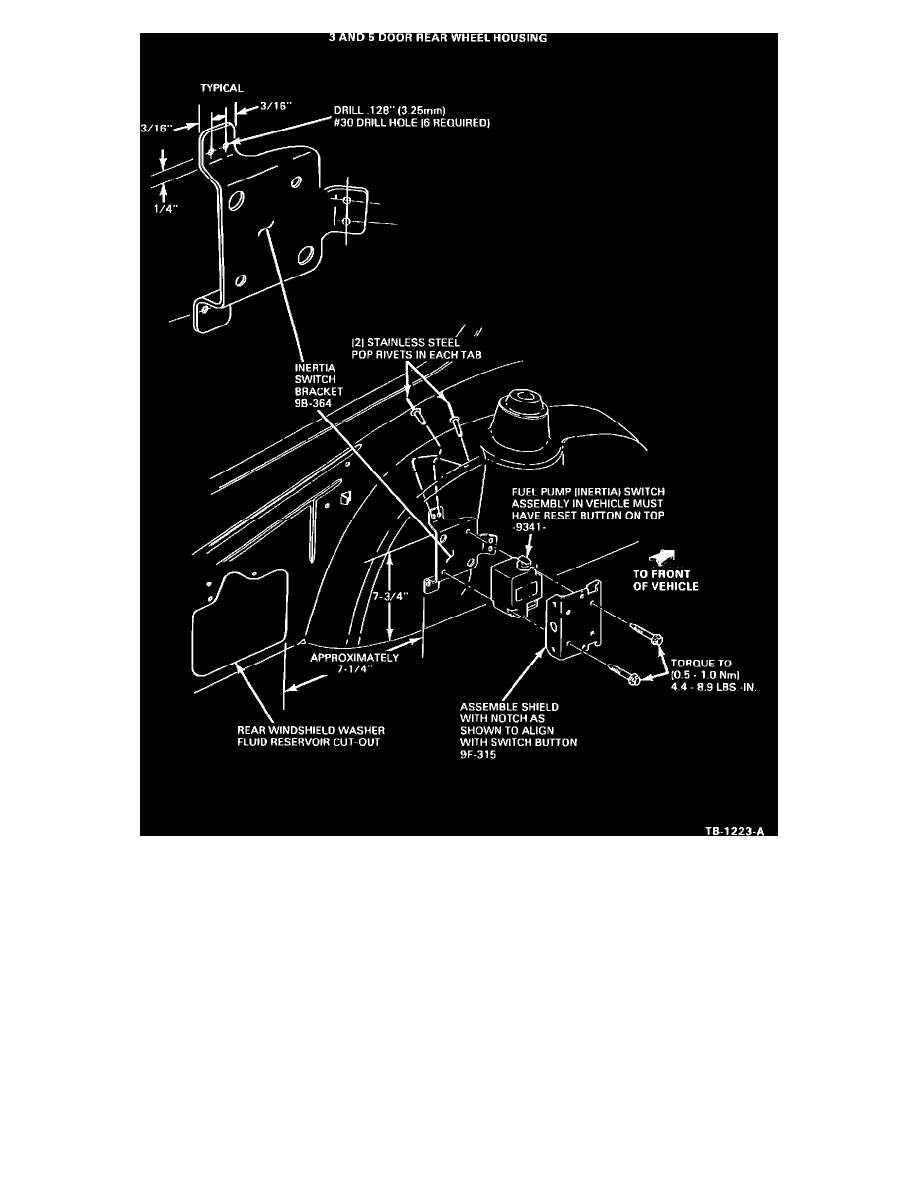
Figure 1
3. Remove all sound deadening and insulation from the new bracket mounting area on the wheel house, Figure 1.
4. Position the new inertia switch bracket (supplied in the kit) about 7-3/4" above the floor pan and against the wheel housing.
Adjust the top of the bracket so it is level and the switch mounting face so it is vertical, Figure 1.
5. Center punch and drill six (6) .128 inch (# 30 drill) holes in the wheel house to fit the holes in the bracket tabs.
NOTE:
IT IS VERY IMPORTANT TO INSTALL THE INERTIA SWITCH LEVEL. CHECK THE INERTIA SWITCH BRACKET FOR
LEVELNESS BEFORE INSTALLING THE RIVETS.
6. Apply RTV sealer to the back of the mounting tabs. Fasten the bracket to the wheel house with six (6) stainless steel pop rivets from the kit
(382568-S), 1/8 inch dia. X 7/16 inch long.
7. Seal the rivets with a small amount of RTV on the inside of the vehicle and with body undercoating on the outside in the fender well.