
Escort L4-98 1.6L SOHC VIN 5 FI (1985)
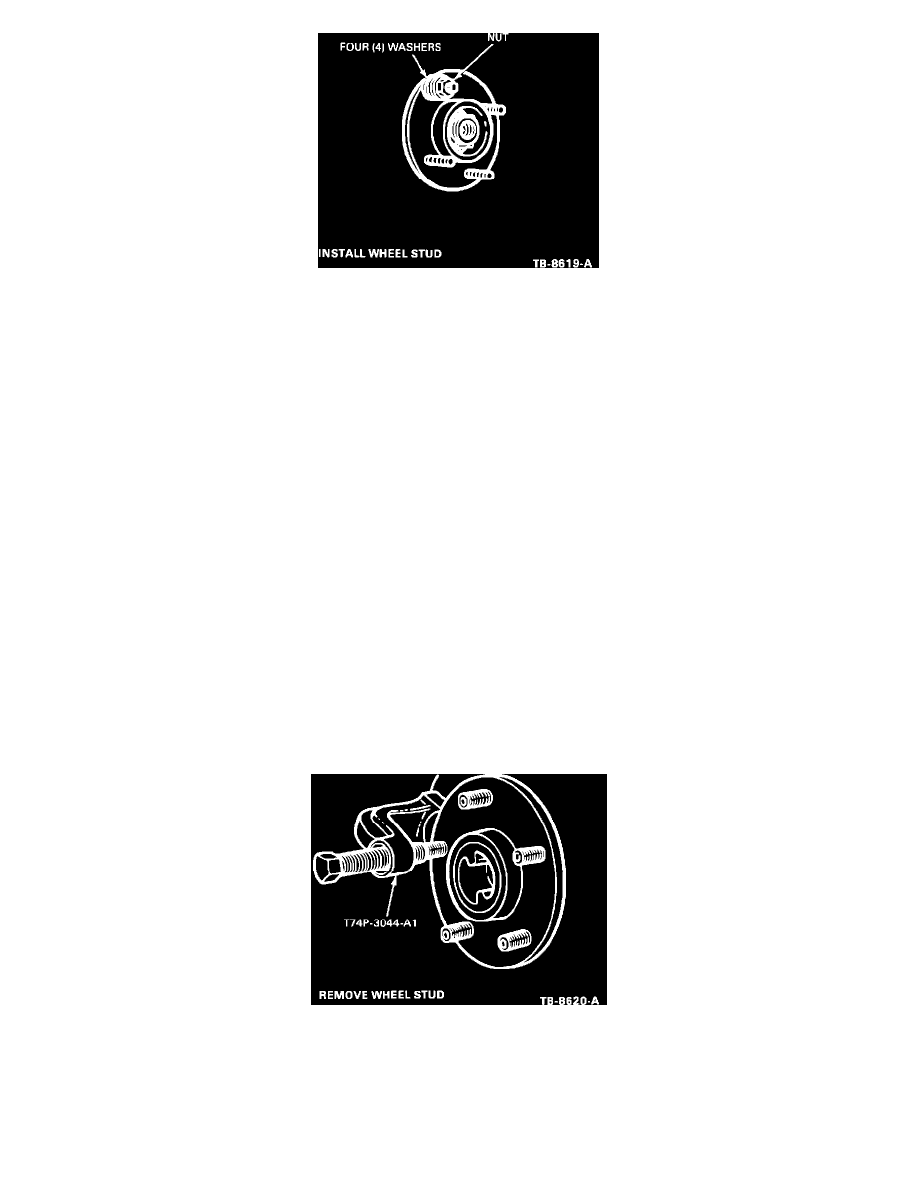
Figure 9
Install Wheel Stud
1.
Insert new stud in hole in hub. Rotate stud slowly to assure the serrations are aligned with those made by the original bolt (Figure 9).
CAUTION:
DO NOT USE AIR TOOLS AS THE SERRATIONS MAY BE STRIPPED FROM THE STUD.
2.
Place four flat washers over the outside end of the stud and thread a wheel nut with the flat side against the washers.
3.
Tighten the wheel nut until the stud head sets against the back side of the hub.
4.
Remove the wheel nut and washers.
5.
Install the rotor and caliper.
6.
Install wheel and tire assembly.
7.
Lower vehicle.
Removal and installation of wheel studs from a rear wheel drive axle can be done (using the same tool, T74P-3044-A) without removing the axle shaft.
NEVER USE A HAMMER TO REMOVE A WHEEL STUD as the axle shaft flange and/or hub(s)/bearing(s) may be damaged.
REAR WHEEL DRIVE - REMOVE AND INSTALL WHEEL STUD
Remove Wheel Stud
1.
Raise vehicle on hoist.
2.
Remove wheel and brake drum.
Figure 10
3.
Using tool T74P-3044-A1, press stud from its seat in the hub (Figure 10).
4.
Remove tool and pull stud out of hub.
Install Wheel Stud