
Escort L4-98 1.6L SOHC VIN 5 FI (1985)
Axle Shaft: Service and Repair
If removing both right and left side halfshafts, plugs T81P-1177B or equivalent must be installed. Failure to do so may result in dislocation of differential
side gears, necessitating transaxle disassembly to re-align the gears. Also, halfshaft removal and installation procedures are the same for manual and
automatic transaxles except for the following: due to automatic transaxle case configuration the right side halfshaft assembly must be removed first. Tool
T81P-4026A or equivalent is then inserted into transaxle to remove left side inner constant velocity joint assembly from transaxle. If only the left side
halfshaft is to be removed from the vehicle, remove right side halfshaft assembly from the transaxle case only and secure to underside of vehicle, then
remove left side halfshaft assembly. The hub nut and lower control arm to steering knuckle attaching bolt and nut must be discarded after removal and
new nuts and bolts installed.
1.
Loosen hub nut without unstaking. Use of a chisel or similar tool to unstake nut may damage spindle threads.
2.
Raise and support vehicle and remove wheel assemblies.
3.
Remove bolt attaching brake hose routing clip to suspension strut.
4.
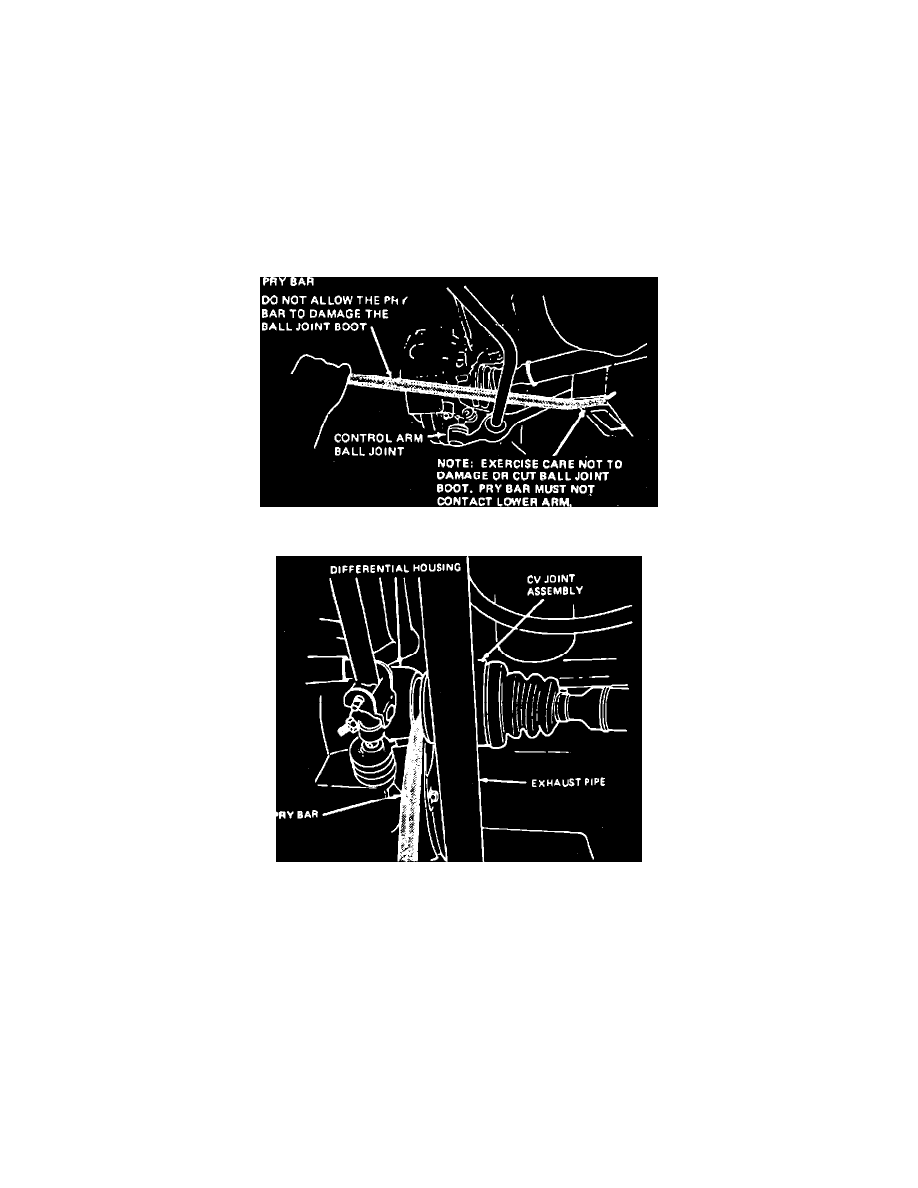
Remove nut from ball joint to steering knuckle attaching bolt, then drive bolt from knuckle using suitable punch and hammer.
Fig. 1 Separating ball joint from steering knuckle
Fig. 2 Removing halfshaft from differential housing