
Excursion 4WD V8-6.0L DSL Turbo VIN P (2004)
2.
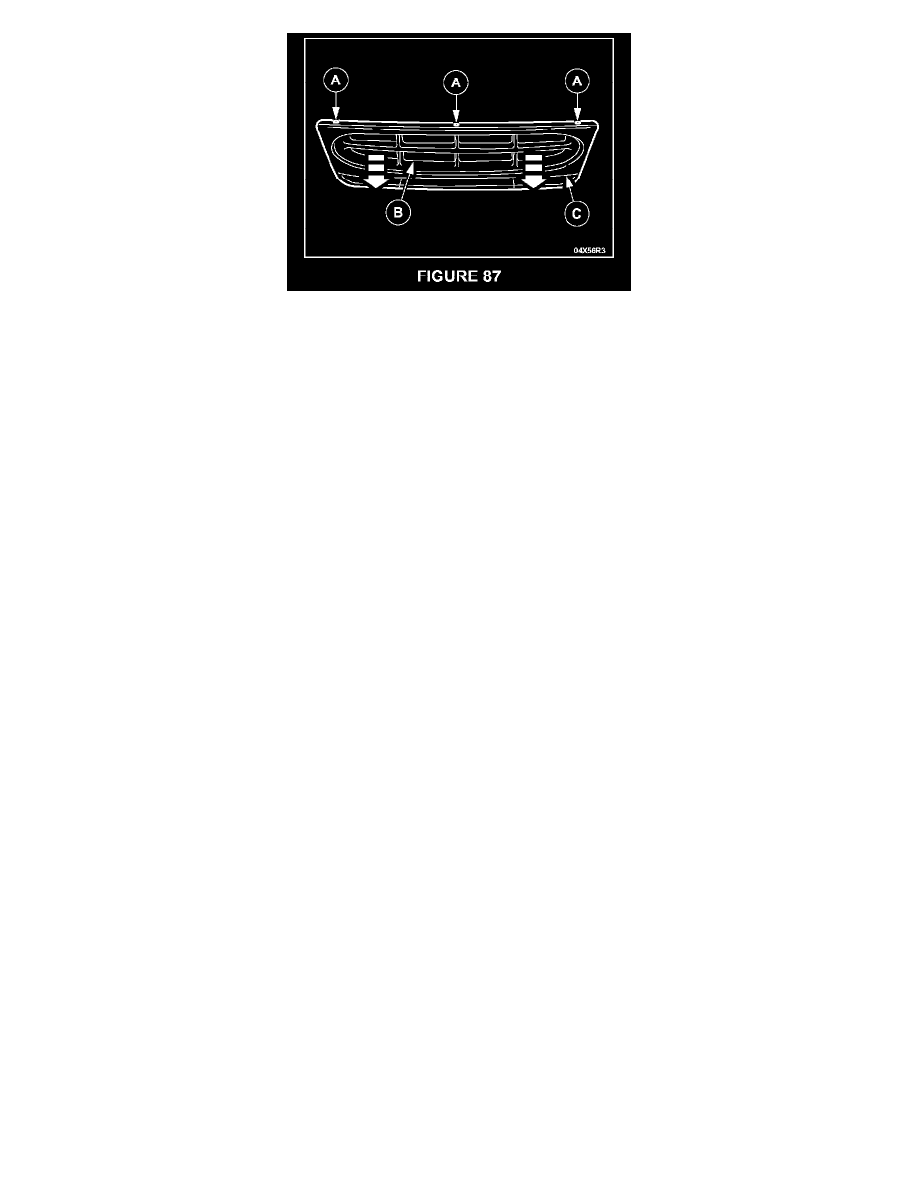
Remove the grille as follows (See Figure 87):
A)
Remove the grille retainer screws.
B)
Grasp the radiator grille by the lower crossmember and pull it forward firmly to disengage the three (3) clips.
C)
Remove the grille from the vehicle.
3.
Remove the parking lamp lenses.
4.
Remove the grille opening panel reinforcement retainers.
5.
Position the reinforcement forward and disconnect the headlamp connectors and pull the parking lamps through the openings, then remove the
reinforcement from the vehicle.
6.
Position a drain pan under the OTA.
7.
Disconnect the hoses from the OTA.
8.
Remove the OTA retainers, then remove the OTA from the vehicle.
INSTALLATION
CAUTION:
The transmission cooling system MUST BE flushed out BEFORE installing the new OTA. Refer to RADIATOR IN-TANK FLUID COOLER AND
LINE FLUSHING.
1.
Position the new OTA in the vehicle and install the retainers.
Tighten to 8 Nm (71 lb-in).
2.
Connect the hoses to the OTA.
3.
Remove the drain pan.
4.
Position the grille opening panel reinforcement in the vehicle, setting the parking lamps in place and connecting the head lamps.
5.
Install the grille opening panel reinforcement fasteners.
Tighten to 11 Nm (8 lb-ft).
6.
Install the parking lamp lenses.
7.
Position the grille and install the fasteners.
Tighten to 10 Nm (89 lb-in).
8.
Position the A/C condenser air deflector and install the fasteners.
Radiator In-Tank Fluid Cooler & Line Flushing