
Expedition 4WD V8-4.6L SOHC VIN 6 (1997)
20.
Remove oil pan drain plug. Completely drain any fluid (oil, coolant) from oil pan. Reinstall drain plug, tightening to 11-16 Nm (98-143 lb-in).
21.
Replace oil filter.
22.
Install exhaust system Y-pipe to exhaust manifolds. Tighten retainers to 34-46 Nm (25-34 lb-ft).
23.
Lower vehicle.
24.
Install both fender splash shields. Tighten retainers to 10-13 Nm (89-115 lb-in).
25.
On 4X4 models, install one screw removed from both wheel opening moldings.
26.
On Romeo engines, proceed as follows:
^
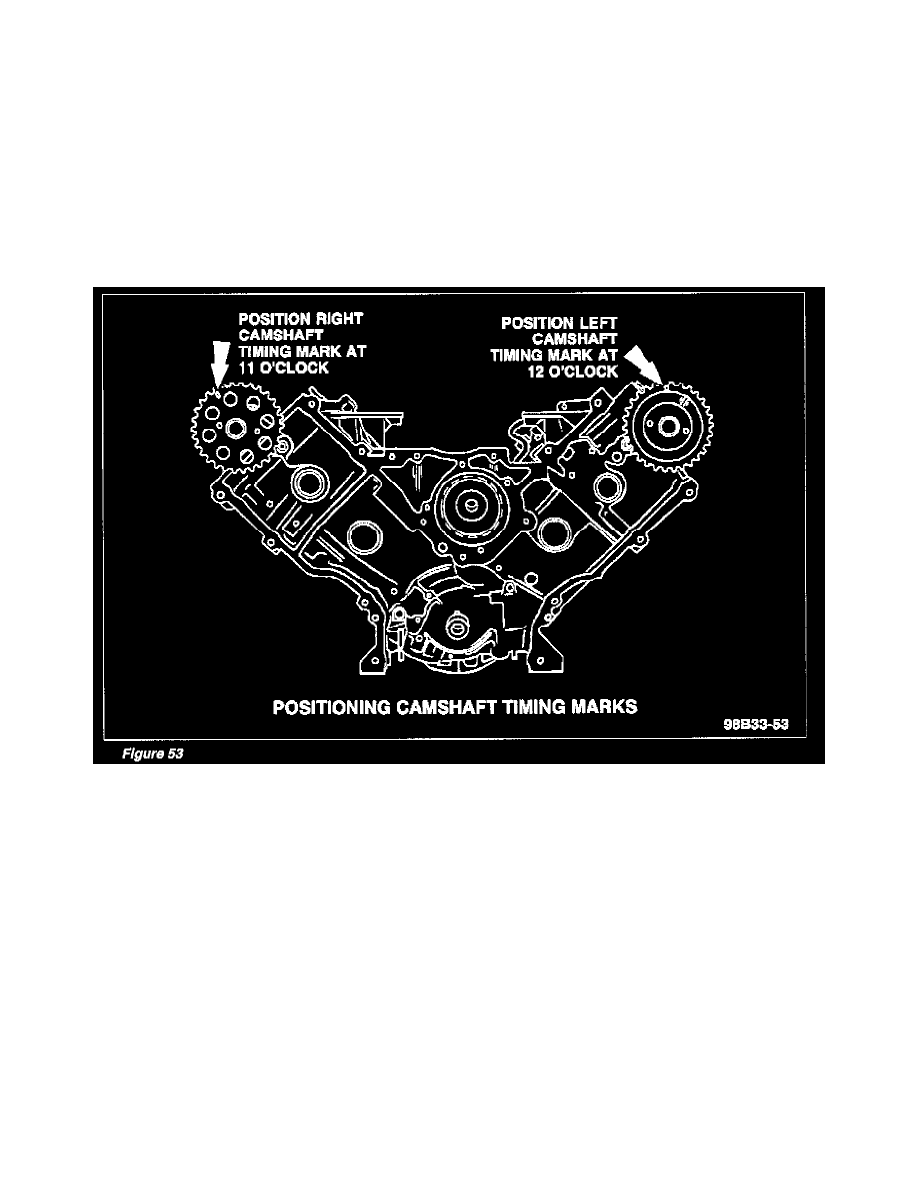
Using socket on camshaft sprocket bolt, rotate left camshaft until timing mark is in 12 o'clock position. Refer to Figure 53.
^
Using socket on camshaft sprocket bolt, rotate right camshaft until timing mark is in 11 o'clock position. Refer to Figure 53.
27.
On 4.6L and 5.4L Windsor engines, proceed as follows:
^
Using Camshaft Positioning Tool T96T-6256-AR, rotate left camshaft until timing mark is in 12 o'clock position. Refer to Figure 53.
^
Using Camshaft Positioning Tool T96T-6256-AR, rotate right camshaft until timing mark is in 11 o'clock position. See Figure 53.
^
Install Camshaft Holding Tool T96T-6256-B on each camshaft.
28.
On Romeo engines, tighten both camshaft sprocket bolts to 110-130 Nm (81-95 lb-ft).
CAUTION
Rotate the crankshaft counterclockwise only. Do not rotate past position shown or severe piston and/or valve damage can occur.