
Expedition 4WD V8-4.6L SOHC VIN W (1999)
4.
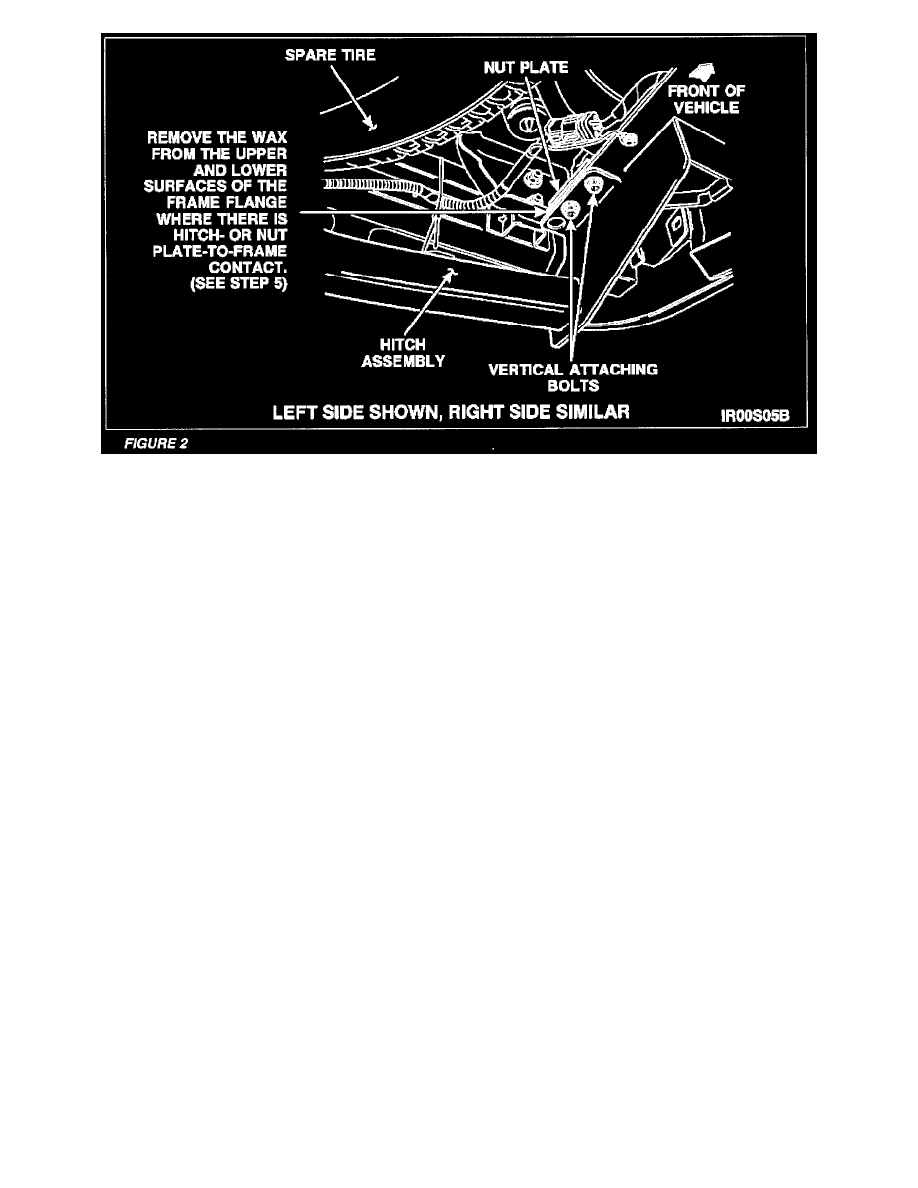
Remove all bolts and nut plates attaching the hitch to the frame, then remove the hitch assembly from the vehicle. See Figures 1 and 2.
5.
Using Brake Metal Parts Cleaner (F6AZ-2C410-AB) or equivalent obtained locally, remove the frame wax from all areas where there is hitch- or
nut plate-to-frame contact. This includes:
^
the inside areas of the hitch
^
the inside and outside areas of the frame web.
^
the upper and lower areas of the frame flanges.
CAUTION
To avoid cross threading the bolts into the nut plates, start each bolt by hand and be sure it is threading properly into the nut plate.
CAUTION
Do not final tighten any bolts until all have been installed. Be sure to tighten the horizontal bolts first (Step 7) before tightening the vertical bolts
(Step 8).
6.
Reposition the hitch on the jack stands and install the new bolts and new nut plates. Only tighten the bolts snug at this time.
7.
Tighten the horizontal attaching bolts to 175 Nm (129 lb-ft).
8.
Tighten the vertical attaching bolts to 175 Nm (129 lb-ft).
9.
Remove the jack stands.
10.
Install the hitch electrical connector bracket. For 7-pin connectors, tighten the bolt to 48 Nm (35 lb-ft). For 4-pin connectors, tighten the bolt to 63
Nm (46 lb-ft).
11.
Apply a coat of commercially available underbody anti-corrosion compound meeting Ford specification ESR-M7C54-A to the hitch attachment
area ensuring adequate coverage.
12.
Lower the vehicle and turn on the air suspension switch.