
Expedition 4WD V8-5.4L SOHC VIN 5 (2005)
5. Compress the orange lock ring, then pull down on the air line and disconnect the air line.
6. CAUTION: Remove any dirt or other foreign material from the air spring assembly prior to removing the air spring solenoid valve from the air
spring assembly.
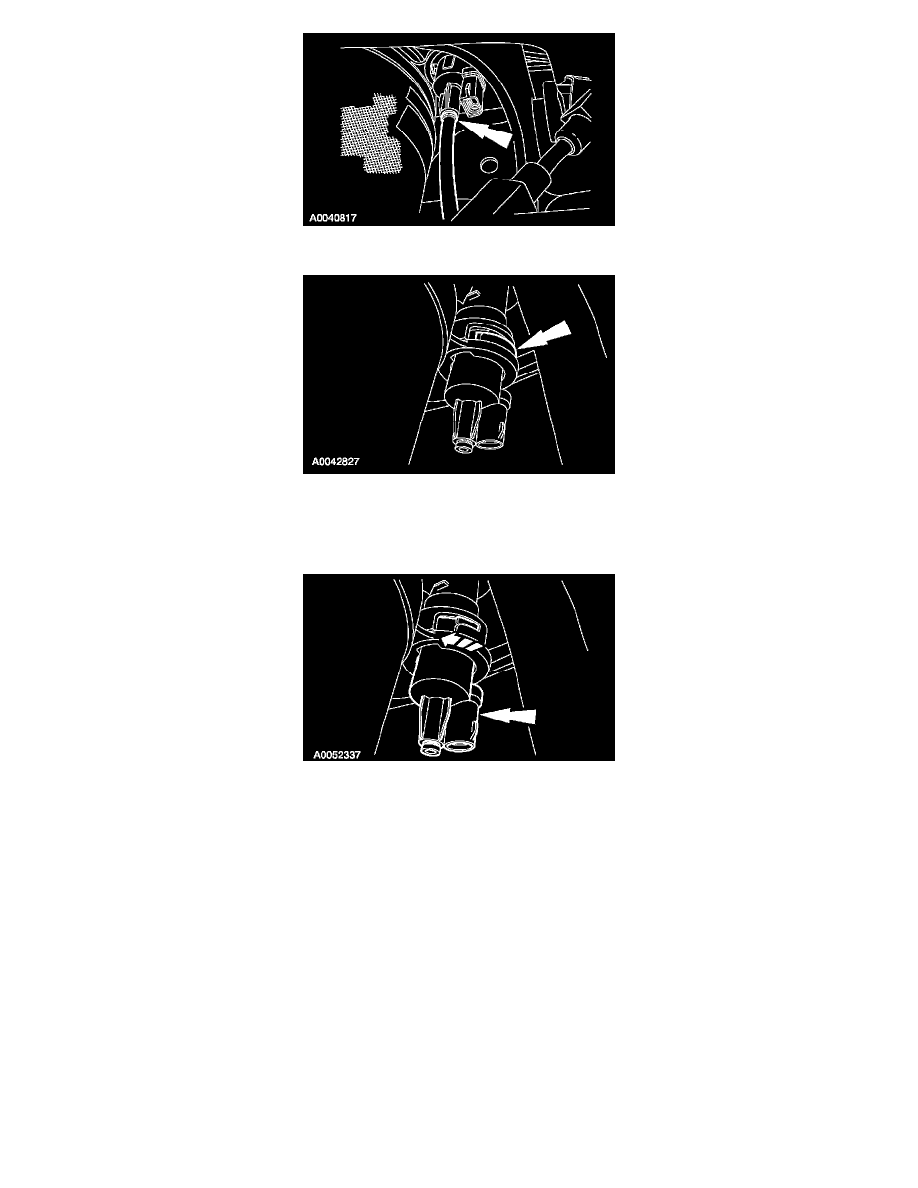
Remove the air spring solenoid clip.
7. WARNING: The air spring solenoid valve has a two stage release. When removing a non-functional solenoid and the air spring is
inflated, carefully rotate the solenoid counterclockwise until it reaches the first stage to release the air from the air spring. Turn the
solenoid to the second stage to remove the solenoid. Failure to follow these instructions when removing a non-functional air spring
solenoid can cause personal injury or damage to components as high pressure air is vented uncontrolled.
Rotate the air spring solenoid and remove the solenoid.
8. NOTE: Inspect the O-ring for damage and install a new O-ring as necessary. Lightly lubricate the solenoid seal area with silicone grease.
NOTE: After installing the solenoid, it is necessary to inflate the air suspension system.
NOTE: When installing the air spring solenoid, make sure that the electrical connector is positioned away from the air spring.
NOTE: When installing the air lines, make sure the white air line is fully inserted into the fitting for correct installation.
To install, reverse the removal procedure.