Expedition 4WD V8-5.4L VIN 5 (2006)

Brake Bleeding: Service and Repair
Four Wheel Anti-Lock Brake System (4WABS)
Four Wheel Anti-Lock Brake System (4WABS)
WARNING: Use of any other than approved DOT 3 motor vehicle brake fluid will cause permanent damage to brake components and will
render the brakes inoperative. Failure to follow these instructions may result in personal injury.
WARNING: Brake fluid contains polyglycol ethers and polyglycols. Avoid contact with eyes. Wash hands thoroughly after handling. If
brake fluid contacts eyes, flush eyes with running water for 15 minutes. Get medical attention if irritation persists. If taken internally, drink
water and induce vomiting. Get medical attention immediately. Failure to follow these instructions may result in personal injury.
CAUTION: Do not allow the brake master cylinder reservoir to run dry during the bleeding operation. Keep the brake master cylinder reservoir filled
with the specified brake fluid. Never reuse the brake fluid that has been drained from the hydraulic system.
CAUTION: Brake fluid is harmful to painted and plastic surfaces. If brake fluid is spilled onto a painted or plastic surface, immediately wash it with
water.
NOTE: When any part of the hydraulic system has been disconnected for repair or new installation, air may get into the system and cause spongy
brake pedal action. This requires bleeding of the hydraulic system after it has been correctly connected. The hydraulic system can be bled manually or
with pressure bleeding equipment.
NOTE: This procedure must be performed if the 4 wheel anti-lock brake (4WABS) hydraulic control unit (HCU) has been installed new.
NOTE: One conventional pressure bleed cycle consists of advancing the brake pedal to its depressed position, opening the disc brake caliper bleeder
screw, allowing fluid to be released into the waste container, closing the disc brake caliper bleeder screw and releasing the brake pedal.
NOTE: Performing the diagnostic program routine drives entrapped air from the otherwise inaccessible lower section of the 4WABS valve into the
upper sections (accessible by bleeding the brakes). Subsequent bleeding removes the air from the system.
NOTE: Add recommended brake fluid as necessary throughout the procedure.
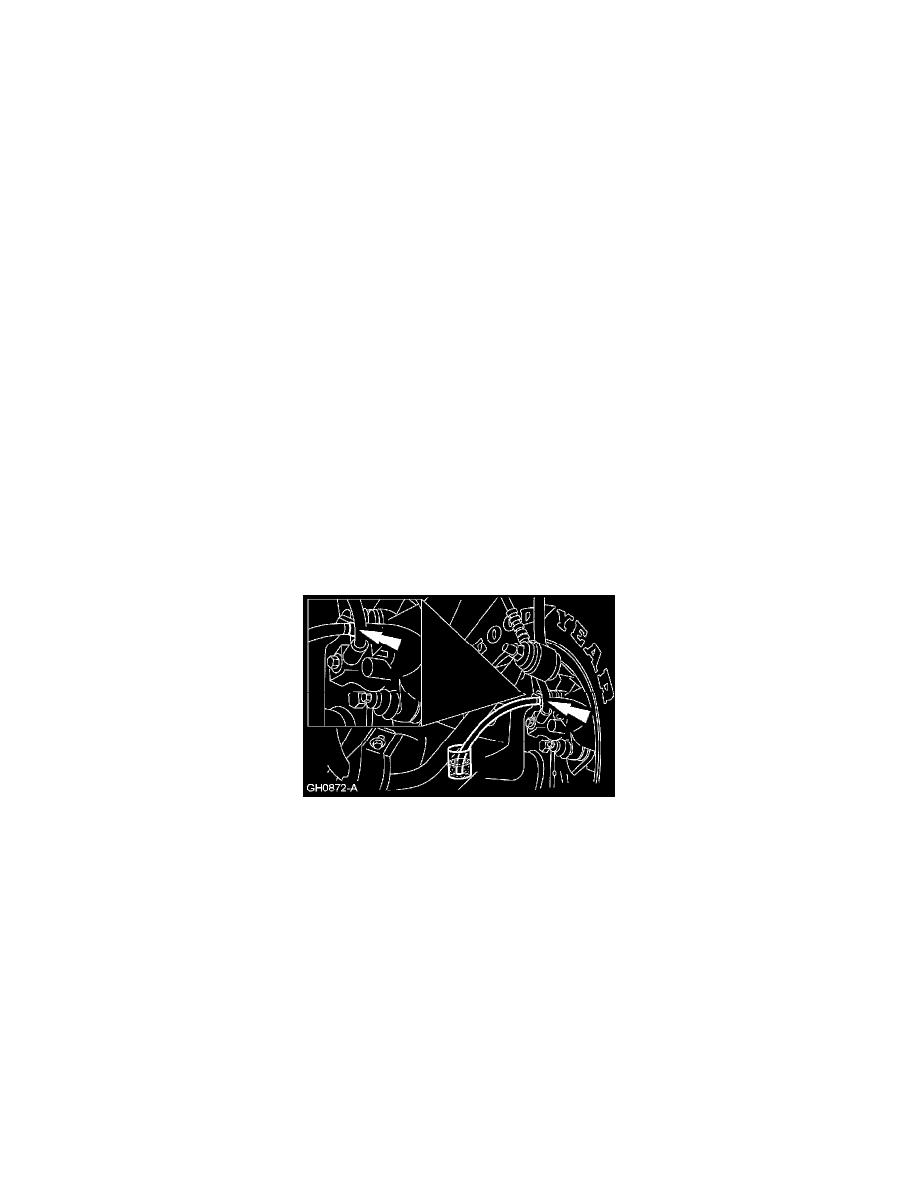
1. Connect a clear waste line to the RH rear disc brake caliper bleeder screw and the other end in a container partially filled with recommended brake
fluid.
2. Have an assistant pump the brake pedal and then hold firm pressure on the brake pedal.
3. Loosen the RH rear disc brake caliper bleeder screw until a stream of brake fluid comes out. Have an assistant maintain pressure on the brake
pedal while tightening the RH rear disc brake caliper bleeder screw.
^
Repeat until clear, bubble-free fluid comes out.
^
Refill the brake master cylinder reservoir as necessary.
4. Tighten the RH rear disc brake caliper bleeder screw.
^
Tighten to 16 Nm (12 ft. lbs.).
5. Repeat Steps 1 through 4 for the LH rear disc brake caliper bleeder screw, RH front disc brake caliper bleeder screw and the LH front disc brake
caliper bleeder screw.
^
Tighten to 16 Nm (12 ft. lbs.).
6. NOTE: Go to the Help menu in the diagnostic tool.
Connect the diagnostic tool DCL cable adapter into the vehicle data link connector (DLC) under the dash and follow the diagnostic tool
instructions.
7. Repeat the conventional bleed procedure as outlined in Steps 1 through 5.
8. If the brake pedal feels spongy, repeat the diagnostic tool service bleed procedure.
