
Expedition 4WD V8-5.4L VIN 5 (2006)
1. Depower the system.
Vehicles with a center console
2. Remove the center console.
Vehicles with 60/40 front bench seat
3. Remove the 60 percent portion of the front bench seat.
4. Remove the 3 nuts and the restraints control module (RCM) top bracket.
5. WARNING: Do not handle, move or change the original horizontal mounting position of the restraints control module (RCM) while the
RCM is connected and the ignition switch is ON. Failure to follow these instructions may result in the inadvertent deployment of the
safety canopy and risk of personal injury.
Remove the 3 nuts and separate the RCM from the bracket.
All vehicles
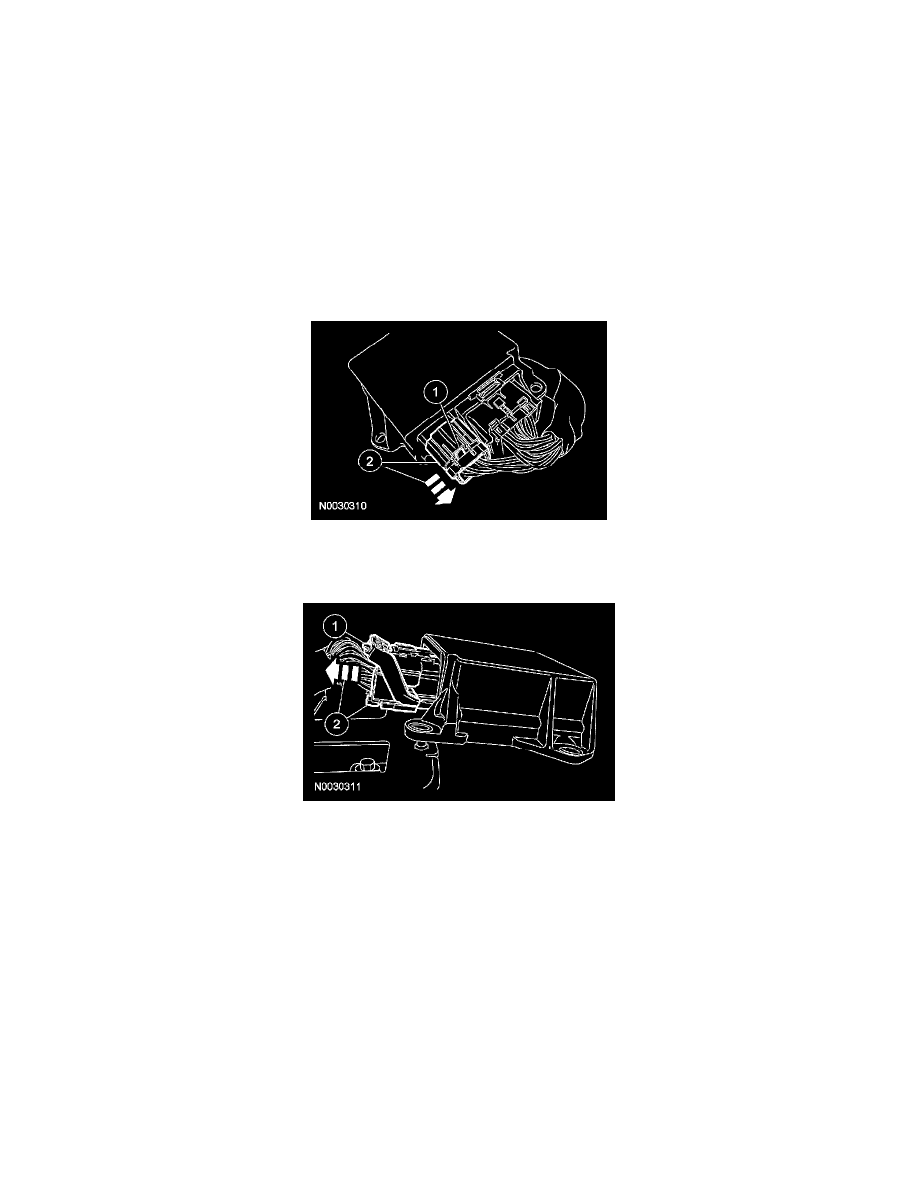
6. Disconnect the small restraints control module (RCM) electrical connector.
1
Push down to release the retaining tab.
2
While releasing the retaining tab, pull out and disconnect the small RCM electrical connector.
7. Disconnect the large RCM electrical connector.
1
Pinch the thumb tab and pivot the connector position assurance lever away from the RCM, disengaging the lever.
2
Pull out and disconnect the large RCM electrical connector.
Vehicles with 60/40 front bench seat
8. Remove the RCM.
Vehicles with a center console
9. Remove the 4 RCM bracket bolts and RCM with the bracket.
Installation
Vehicles with a center console
1. WARNING: The tightening torque of the air bag restraints control module (RCM) bracket retaining bolts is critical for correct system
operation.
Position the RCM with bracket and install the 4 bolts.
-
Tighten to 12 Nm (9 lb-ft).