
Expedition 4WD V8-5.4L VIN 5 (2006)
1. Depower the system.
2. CAUTION: Make sure the road wheels are in the straight-ahead position.
Remove the steering wheel.
3. Apply 2 strips of masking tape across the clockspring to prevent accidental rotation when the clockspring is removed.
4. If equipped, release the tabs and slide the gear selector cover away from the steering column shrouds.
5. From under the steering column, remove the 2 screws and the lower steering column shroud.
6. From under the steering column remove the screw and then remove the upper steering column shroud.
7. Remove the multi-function switch screw.
8. While releasing the retaining tab on the top, slide the multi-function switch up and out of the way.
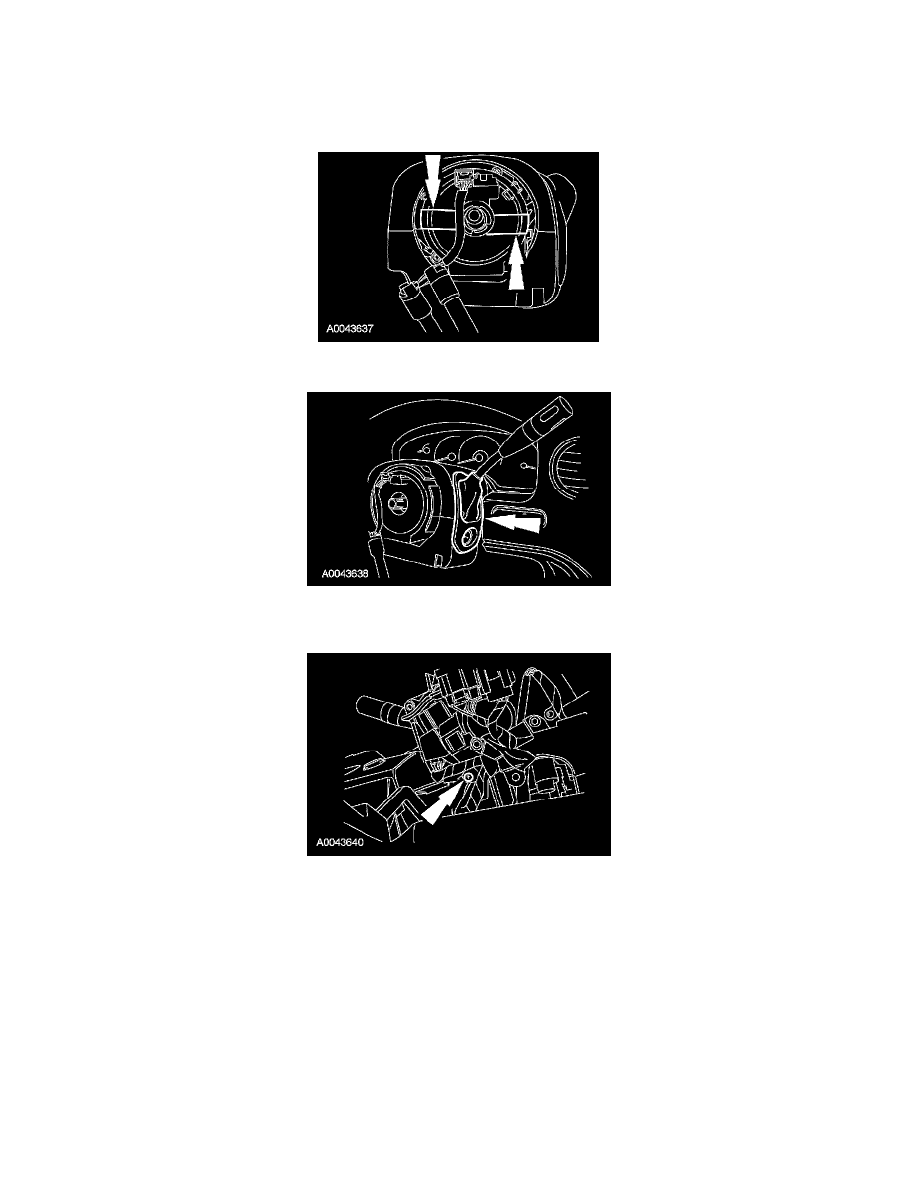
9. Remove the screws and slide the clockspring off the steering column shaft.
10. Disconnect the clockspring electrical connectors and remove the clockspring.
11. Inspect the clockspring bracket for damage and remove as necessary.
Installation
Vehicles receiving a new clockspring bracket
1. Install the clockspring bracket and screws.
-
Tighten to 6 Nm (53 lb-in).
Vehicles receiving a new clockspring
2. NOTE: A new clockspring is supplied in a centralized position and held there with a key.