
Explorer 2WD V6-245 4.0L VIN X SFI (1999)
^
Insert the blade into the urethane at the top middle and work toward the bottom corners.
WARNING: TO PREVENT GLASS SPLINTERS FROM ENTERING THE EYES OR CUTTING HANDS, WEAR SAFETY GLASSES
AND HEAVY GLOVES WHEN CUTTING THE GLASS FROM THE VEHICLE.
10. Trim the excess urethane from the outside edge of the windshield glass.
11. Carefully remove the windshield glass.
NOTE: Removing the windshield glass requires more than one technician.
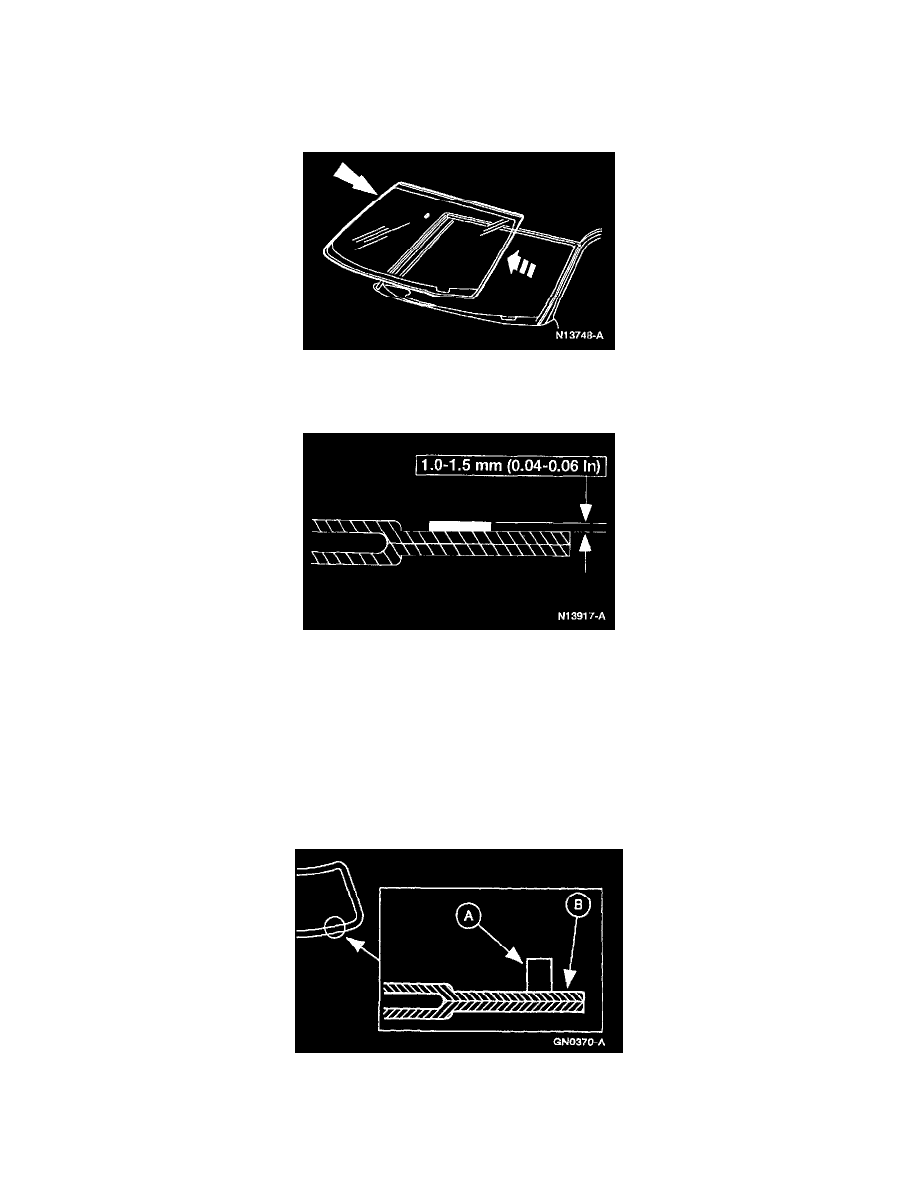
12. Trim the remaining urethane on the pinch weld to within specification.
^
The existing urethane surface should be smooth and free of cuts and contamination.
INSTALLATION
CAUTION: After replacing the urethane installed glass, the vehicle should not be driven until the urethane has cured. Inadequate curing of the urethane
may adversely affect the strength of the urethane bond.
1. Check the pinch weld for damaged sheet metal, raised sheet metal at the spot welds, rust or foreign material that could cause glass damage.
2. Use a wool applicator to apply Urethane Metal Primer (part of EOAZ-19562-A) or equivalent meeting Ford specification WSB-M2G234-C to any
exposed metal on the pinch weld.
3. Apply (A) 6 mm (0.23 in) foam (part of EOAZ-19562-A) or equivalent meeting Ford specification WSB-M2G234-C to the (B) pinch weld.
4. Remove the excess urethane from the windshield glass.
5. Clean the inside of the glass surface with an alcohol-free cleaner.
6. Apply Urethane Glass Prep (part of EOAZ-19562-A) or equivalent meeting Ford specification WSB-M2G234-C twice around the glass surface to