
Explorer 2WD V6-4.0L (2009)
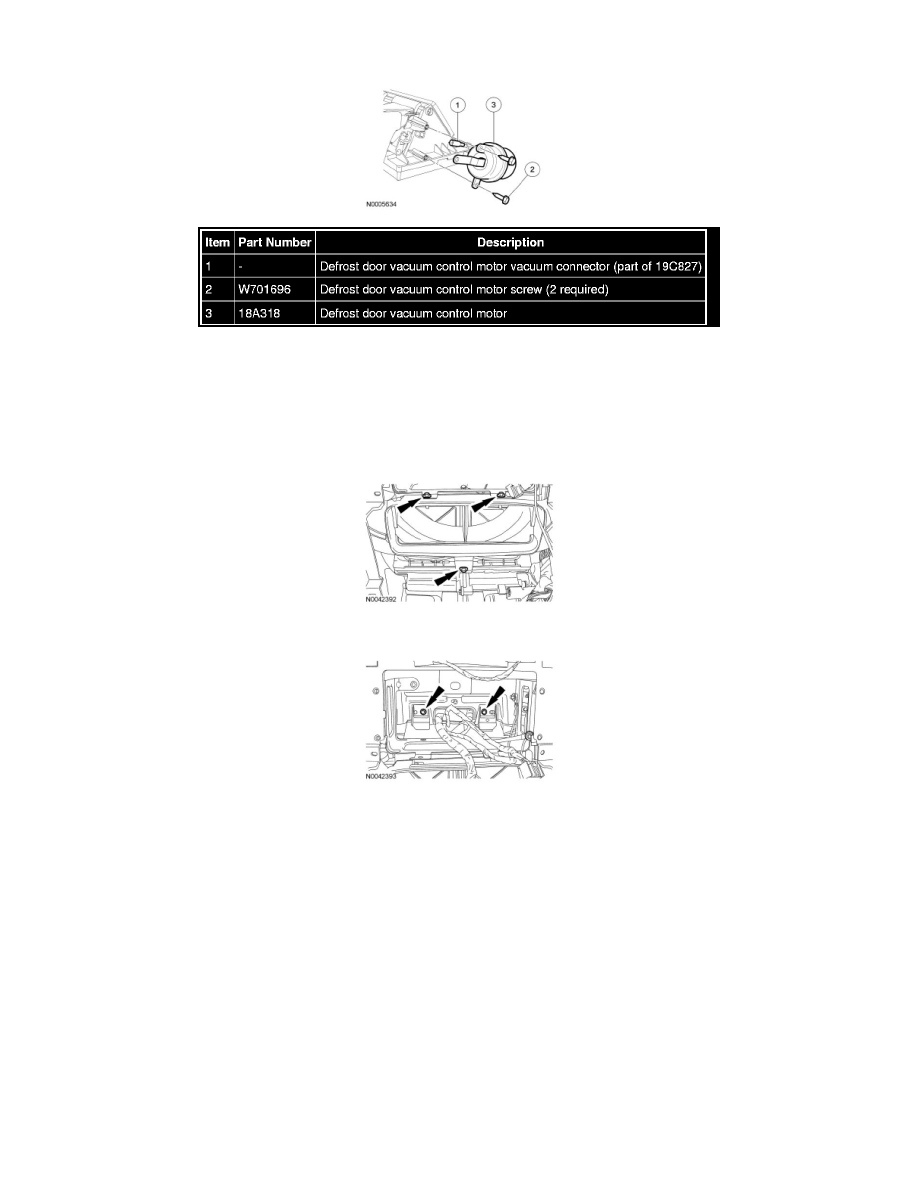
Vacuum Control Motor - Defroster Door
Removal and Installation
1. Remove the Audio Control Module (ACM).
2. Remove the lower steering column cover.
3. Remove the 3 center panel duct screws and position the center panel duct aside.
4. Remove the 2 plenum chamber screws.
5. Disconnect the defrost door vacuum control motor vacuum connector.
6. Remove the 2 defrost door vacuum control motor screws.
7. NOTE: The plenum chamber must be slightly repositioned to allow the defrost door vacuum control motor to be rotated far enough to clear the
retaining arm.
Rotate the defrost door vacuum control motor until it clears the retaining arm and remove the defrost door vacuum control motor.
8. To install, reverse the removal procedure.
Vacuum Control Motor - Floor Door
Vacuum Control Motor - Floor Door