
Explorer 2WD V8-4.6L (2008)
Removal and Installation
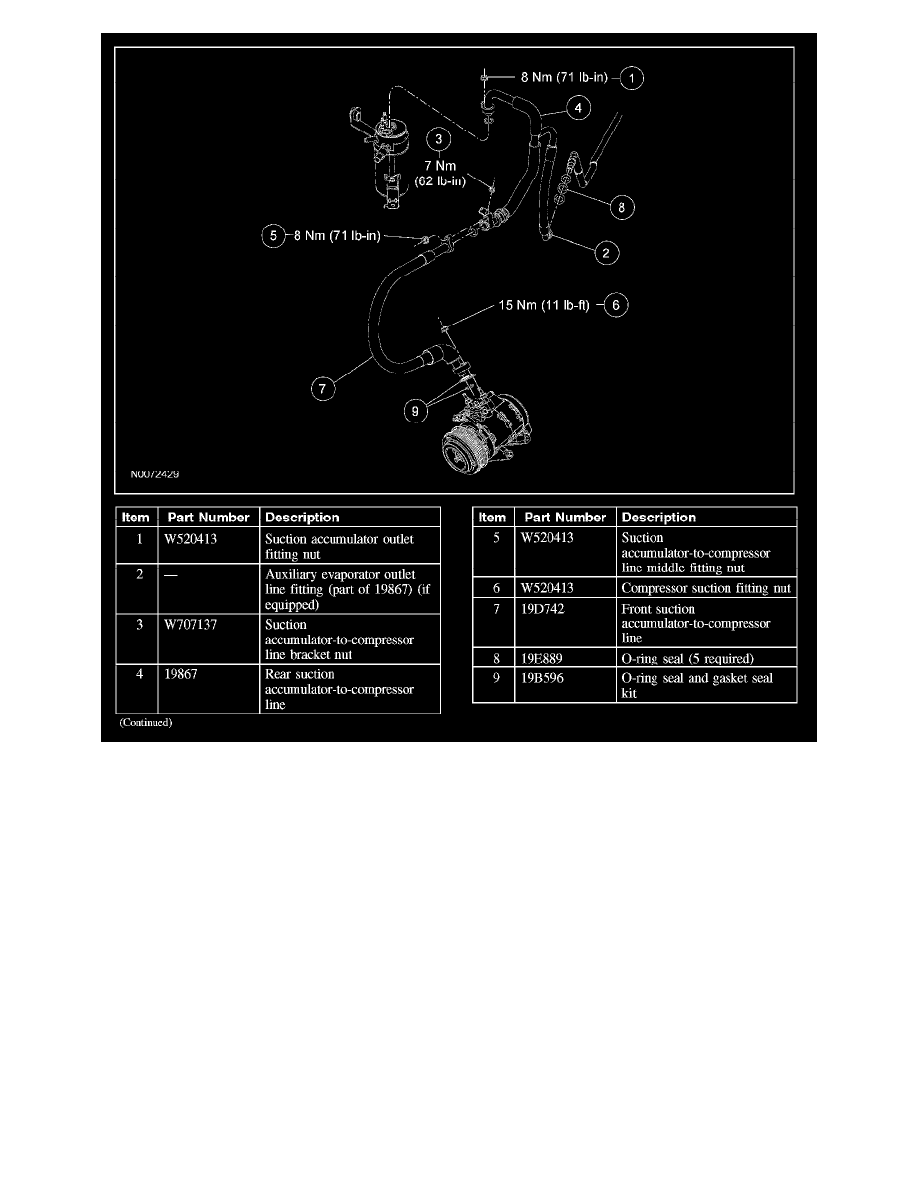
1. Recover the refrigerant.
2. Remove the suction accumulator outlet fitting nut.
-
To install, tighten to 8 Nm (71 lb-in).
3. Disconnect the auxiliary evaporator outlet line fitting.
-
Discard the O-ring seals.
4. Remove the suction accumulator-to-compressor line bracket nut.
-
To install, tighten to 7 Nm (62 lb-in).
5. Remove the suction accumulator-to-compressor line middle fitting nut and disconnect the fitting.
-
Discard the O-ring seal.
-
To install, tighten to 8 Nm (71 lb-in).
6. Remove the rear suction accumulator-to-compressor line.
-
Discard the O-ring seal.
7. NOTE: The compressor suction fitting nut can be accessed through the RH wheel well.
Remove the compressor suction fitting nut and disconnect the fitting.
-
Discard the O-ring seal and gasket seal.
-
To install, tighten to 15 Nm (11 lb-ft).