
Explorer 2WD V8-4.6L VIN 8 (2006)
2. Detach the evaporative emission (EVAP) canister purge valve from the bracket and position the valve aside.
3. CAUTION: Do not allow the lower steering column shaft to rotate while it is disconnected from the gear or the clockspring can be damaged. If
there is evidence that the lower steering column shaft has rotated, the clockspring must be removed and recentered.
Remove the intermediate steering shaft pinch bolt and disconnect the intermediate steering shaft from the lower steering column shaft.
4. Remove the 4 nuts and disconnect the dual converter Y-pipe from the exhaust manifolds.
5. Remove the bolts and the LH exhaust manifold heat shield.
6. Remove the 8 nuts, the LH exhaust manifold and the gaskets.
^
Discard the nuts and the gaskets.
7. Remove and discard the 8 LH exhaust manifold studs.
Installation
1. Inspect the LH exhaust manifold gasket mating surfaces for flatness.
2. Install 8 new LH exhaust manifold studs.
^
Tighten to 12 Nm (9 ft. lbs.).
3. Position the new gaskets, the LH exhaust manifold and install new nuts finger-tight.
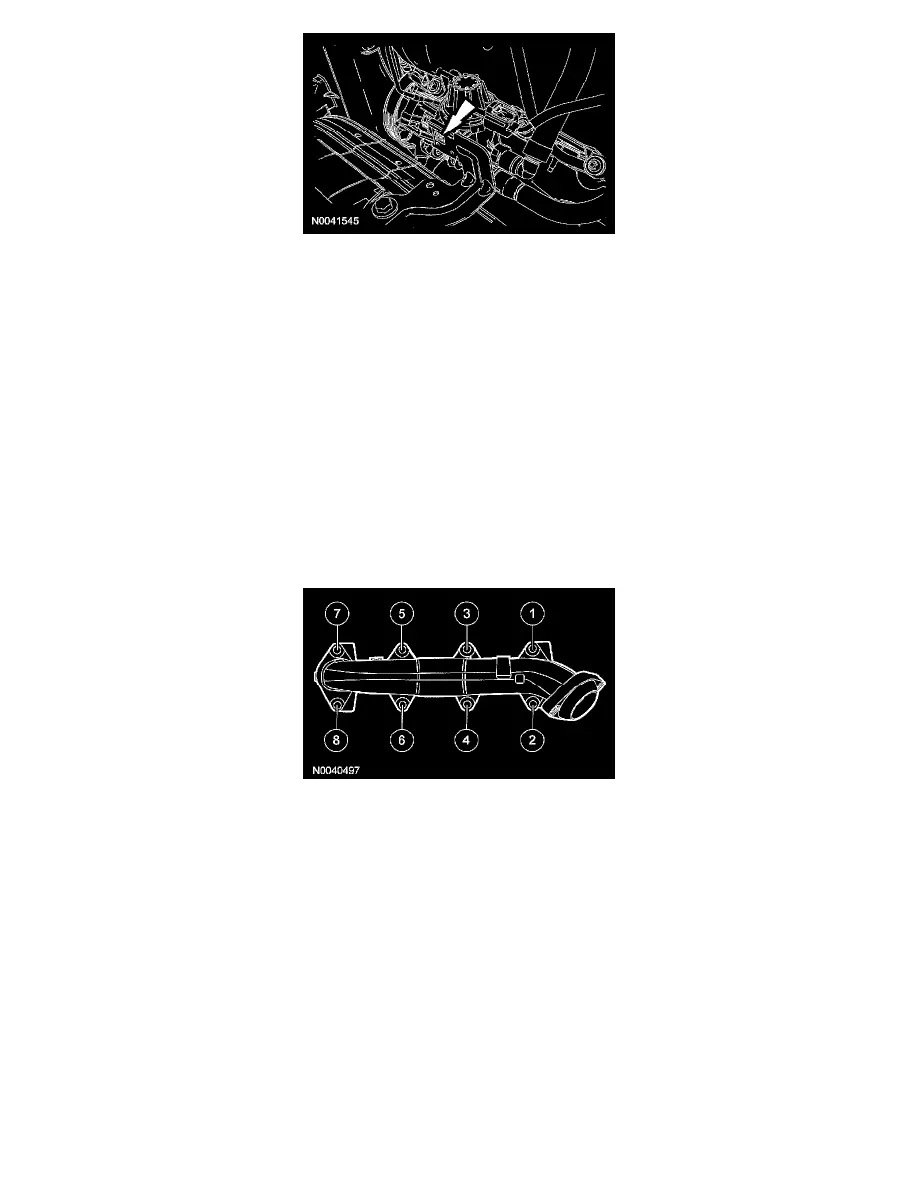
4. Tighten the exhaust manifold nuts in the sequence shown.
^
Tighten to 25 Nm (18 ft. lbs.).
5. Install the heat shield and the bolts.
^
Tighten to 10 Nm (89 inch lbs.).
6. Connect the dual converter Y-pipe to the exhaust manifolds and install the 4 nuts.
^
Tighten to 40 Nm (30 ft. lbs.).
7. Connect the intermediate steering shaft to the lower steering column shaft and install the pinch bolt.
^
Tighten to 48 Nm (35 ft. lbs.).