Explorer 2WD V8-4.6L VIN 8 (2006)

Part 2
Removal and Installation
NOTE: Installation of a new suction accumulator is not required when repairing the air conditioning system, except when there is physical evidence of
contamination from a failed A/C compressor or damage to the accumulator.
1. Recover the refrigerant.
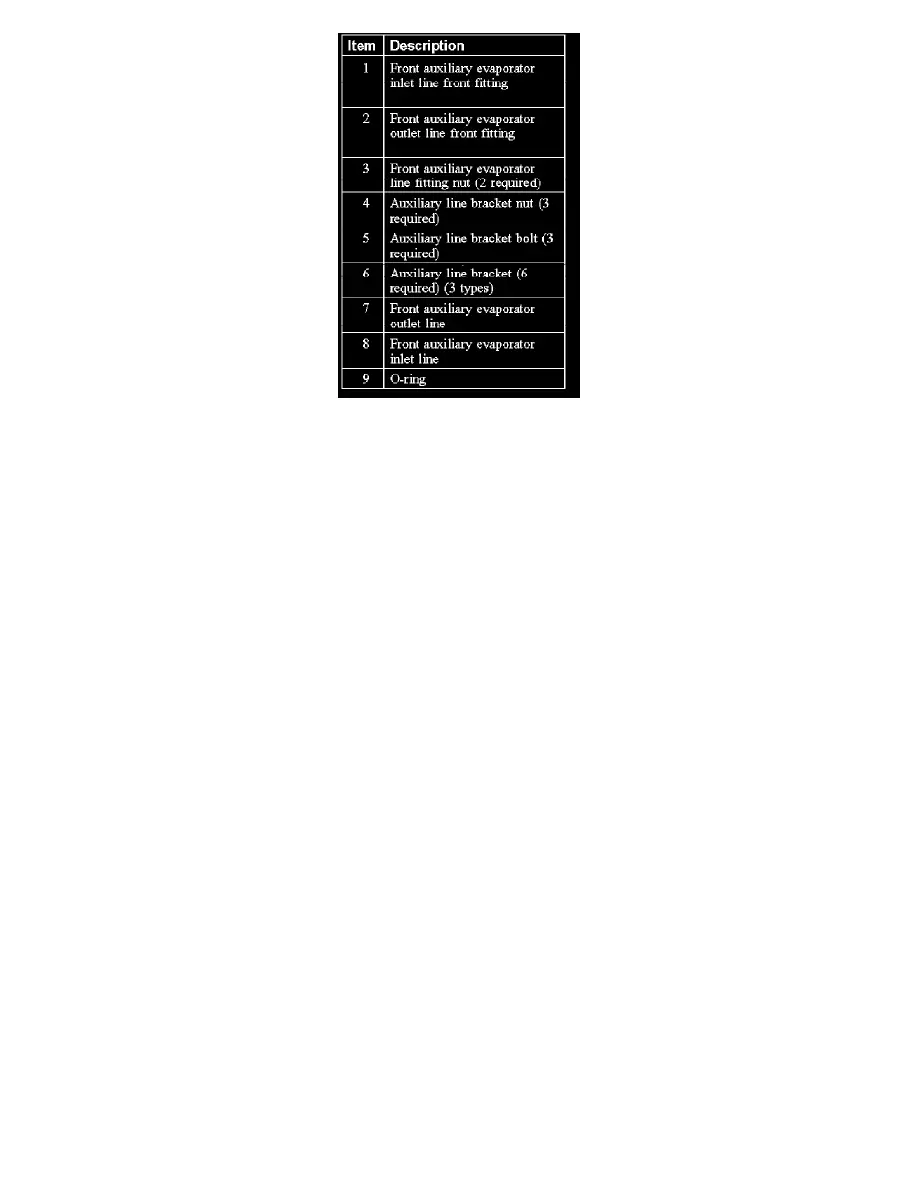
2. Disconnect the front auxiliary evaporator inlet line front fitting.
-
Discard the O-ring seals.
3. Remove the RH running board.
4. Disconnect the front auxiliary evaporator outlet line front fitting.
5. Remove the RH rear wheel.
6. Remove the front auxiliary evaporator line fitting nuts and disconnect the fittings.
-
Discard the O-ring seals.
-
To install, tighten to 8 Nm (71 lb-in).
7. Remove the 3 auxiliary line bracket nuts.
-
To install, tighten to 6 Nm (53 lb-in).
8. Remove the 3 auxiliary line bracket bolts.
-
To install, tighten to 6 Nm (53 lb-in).
9. Remove the 6 auxiliary line brackets.
10. Remove the front auxiliary evaporator outlet and inlet lines.
11. To install, reverse the removal procedure.
-
Install new O-ring seals.
-
Lubricate the refrigerant system with the correct amount of clean PAG oil.
12. Evacuate, leak test and charge the refrigerant system.
Auxiliary Evaporator Outlet and Inlet Line - Rear
AUXILIARY EVAPORATOR OUTLET AND INLET LINE - REAR
