
Explorer 2WD V8-4.6L VIN 8 (2006)
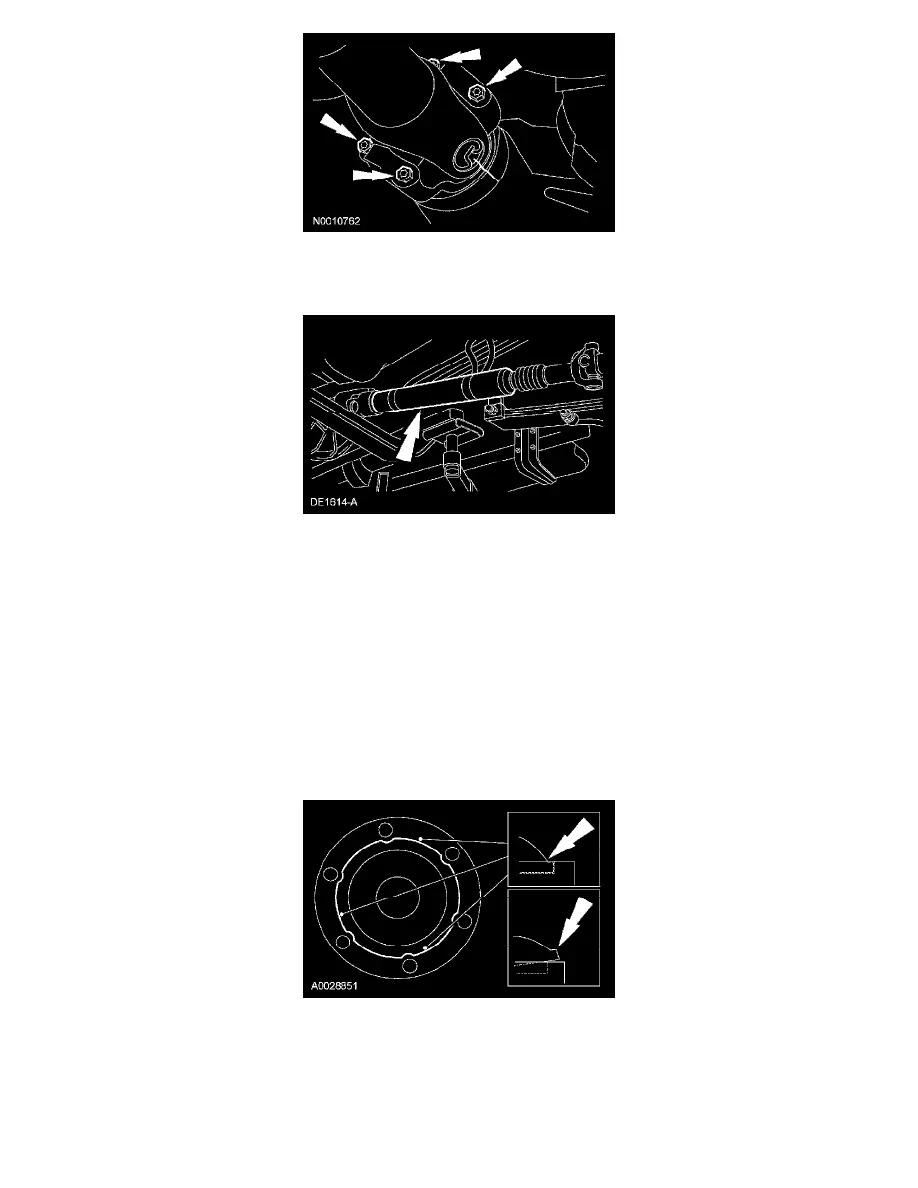
4. Remove the 4 universal joint strap bolts and remove the universal joint straps.
^
Discard the bolts.
^
To install, tighten to 19 Nm (14 ft. lbs.).
5. Remove the front driveshaft.
6. CAUTION: The can (domed CV joint housing cover) is pressed into the CV joint housing at the factory. When housed correctly, the can will
appear as shown in the cut-away illustration (top box). Do not reseat the can in the CV joint housing if the can's flange is above the CV joint
housing as shown in the cut-away illustration (bottom box). Install a new driveshaft.
CAUTION: Tighten the CV joint bolts evenly in a cross pattern or damage will occur to the CV joint.
NOTE: Install new CV joint washers and CV joint bolts. If new CV joint bolts are not available, coat the threads of the original CV joint bolts
with threadlock and sealer.
NOTE: Install new universal joint strap bolts. If new universal joint strap bolts are not available, coat the threads of the original universal joint
strap bolts with threadlock and sealer.
NOTE: Verify that the universal joint bearing caps are seated in the pinion yoke flange before tightening the universal joint strap bolts.
To install, reverse the removal procedure.