
Explorer 4WD V6-245 4.0L (1991)
d.
Re-tighten the nuts and bolts and re-check the seat for easy movement.
e.
Repeat Steps 43c through 43e if the seat still does not move easily.
NOTE:
IF THE SEAT DOES MOVE FORWARD AND REARWARD EASILY TORQUE, THE NUTS AND BOLTS TO 7.5-10.5 N-m (6-8 lb.ft.).
44.
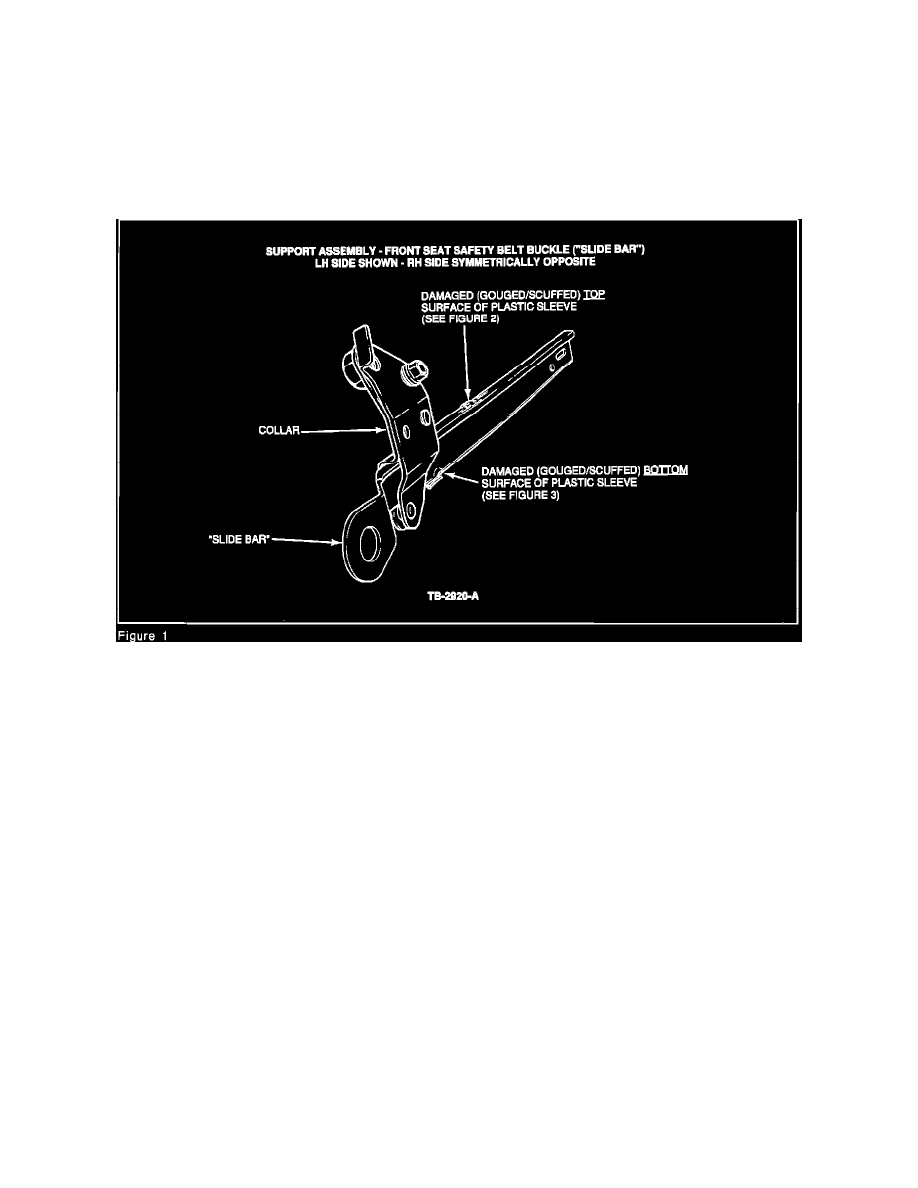
Using an open end wrench, tighten the nut retaining the front of the "slide bar" to the bracket mounted on the seat track. After the nut has
"bottomed out" on the "slide bar", loosen the nut only one (1) full turn, refer to Figure 17.
45.
Reverse the removal steps covered in Steps 6a through 6e and install the floor console. Be sure to torque the attachments to the specifications
shown in Figure 1.
46.
Verify that the seat adjusts forward and rearward properly.
47.
Check the safety belt for proper operation.
48.
Check the opposite front seat for proper operation and correct, if required, as covered above.
PART NUMBER
PART NAME
CLASS
D7AZ-19584-AA
Multi-Purpose Grease Spray -
B
15oz. Aerosol Can With Extension Nozzle
F1TZ-78610C84-B Front Seat Belt Buckle (R.H.)
B
Support Assembly Kit
F1TZ-78610C85-B Front Seat Belt Buckle (L.H.)
B
Support Assembly Kit
WARRANTY STATUS:
Eligible Under Safety Restraint System Warranty
OPERATION DESCRIPTION
TIME
930314AT
Rework Seat Tracks - Both
2.1 Hr.
930314A
Rework Seat Track - One
1.1 Hr.
930314B
Additional Time If "Slide
0.2 Hr.
Bar" Is To Be Replaced (Each)
930314C
Additional Time If Equipped
0.2 Hr.
With Center Console