
Explorer 4WD V6-4.0L (2009)
Accumulator HVAC: Service and Repair
Suction Accumulator
Removal and Installation
NOTICE: Care must be taken to minimize exposure of the inside of the suction accumulator to outside air. If multiple Air Conditioning (A/C)
system components are being removed and installed, the suction accumulator should be installed last. The suction accumulator shipping caps
should not be removed until the fittings are ready to be connected. Evacuation of the A/C system must be started as soon as the suction
accumulator is installed. Excessive exposure of the inside of the suction accumulator to outside air will result in moisture contamination of the
suction accumulator desiccant.
NOTE: Installation of a new suction accumulator is not required when repairing the A/C system, except when there is physical evidence of
contamination from a failed A/C compressor or damage to the suction accumulator. Damage to the suction accumulator includes leaks in the suction
accumulator, physical damage to the suction accumulator shell or desiccant, or moisture contamination. Moisture contamination results only from a
complete loss of refrigerant, and equalization of the refrigerant system pressure with atmospheric pressure for a period longer than 1 hour. If even a
slight amount of positive refrigerant pressure is present in the refrigerant system before repairs are carried out, the suction accumulator should not be
replaced.
All vehicles
1. Recover the refrigerant.
2. Remove the PCM.
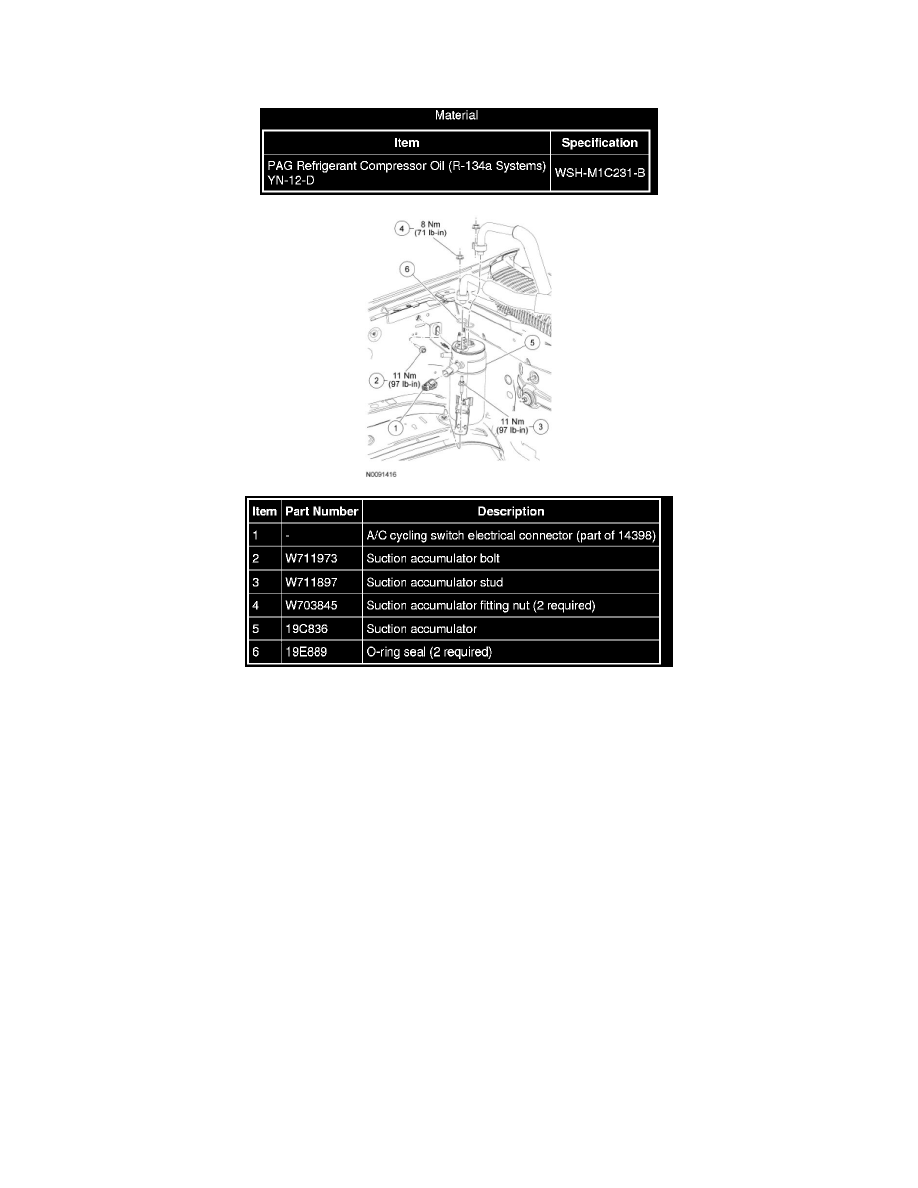
3. Disconnect the A/C cycling switch electrical connector.
4. Remove the suction accumulator bolt.
-
To install, tighten to 11 Nm (97 lb-in).
5. Remove the PCM bracket bolt.