
Explorer 4WD V6-4.0L (2009)
Removal and Installation
1. With the vehicle in NEUTRAL, position it on a hoist.
2. Recover the refrigerant.
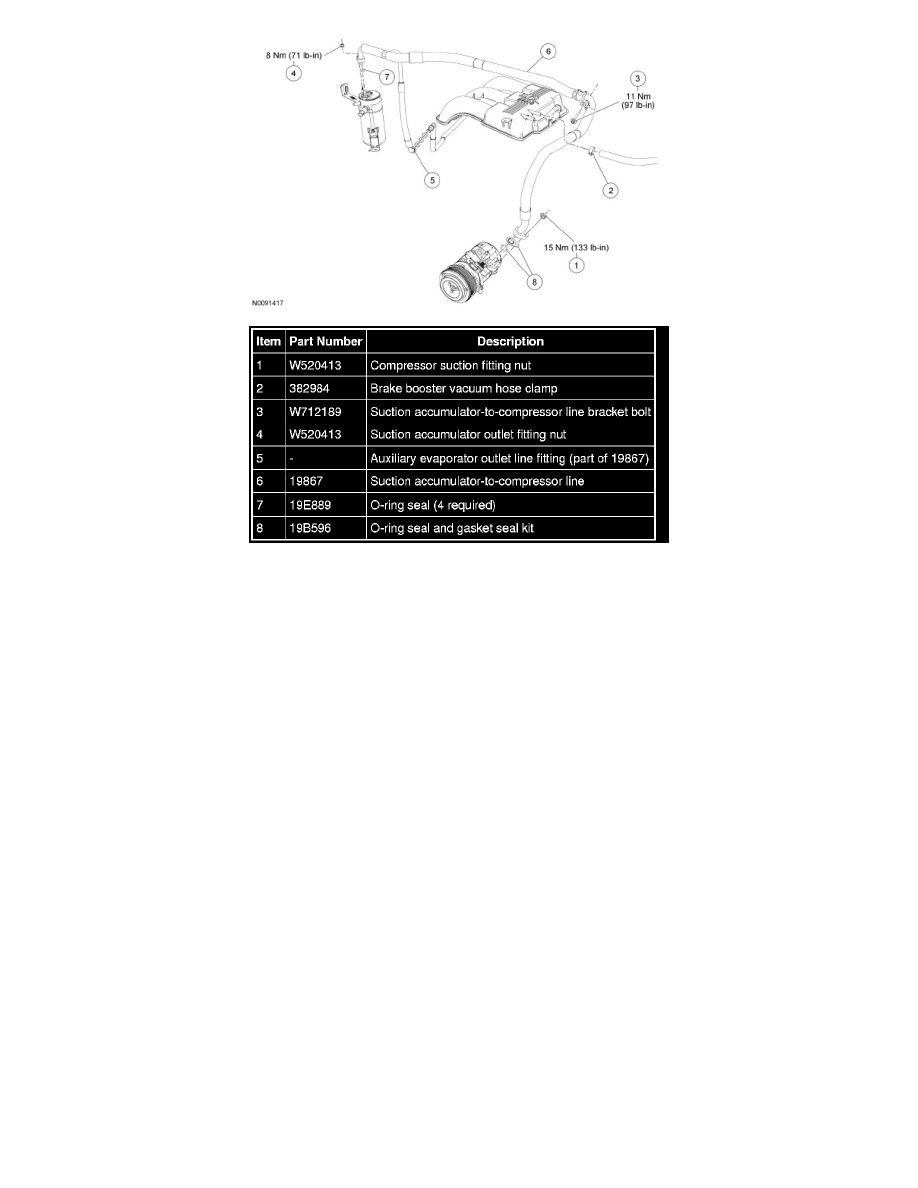
3. Remove the compressor suction fitting nut and disconnect the fitting.
-
Discard the O-ring seal and gasket seal.
-
To install, tighten to 15 Nm (133 lb-in).
4. Release the brake booster vacuum hose clamp and disconnect the hose.
5. Remove the suction accumulator-to-compressor line bracket bolt at the dash panel.
-
To install, tighten to 11 Nm (97 lb-in).
6. Remove the suction accumulator outlet fitting nut.
-
To install, tighten to 8 Nm (71 lb-in).
7. Disconnect the auxiliary evaporator outlet line fitting (if equipped).
-
Discard the O-ring seals.
8. Remove the suction accumulator-to-compressor line.
-
Discard the O-ring seal.
9. To install, reverse the removal procedure.
-
Install new O-ring seals and a new gasket seal.
-
Lubricate the refrigerant system with the correct amount of clean PAG oil.
10. Evacuate, leak test and charge the refrigerant system.
Suction Accumulator To Evaporator Line
Suction Accumulator To Evaporator Line