
Explorer 4WD V6-4.0L VIN E (1999)
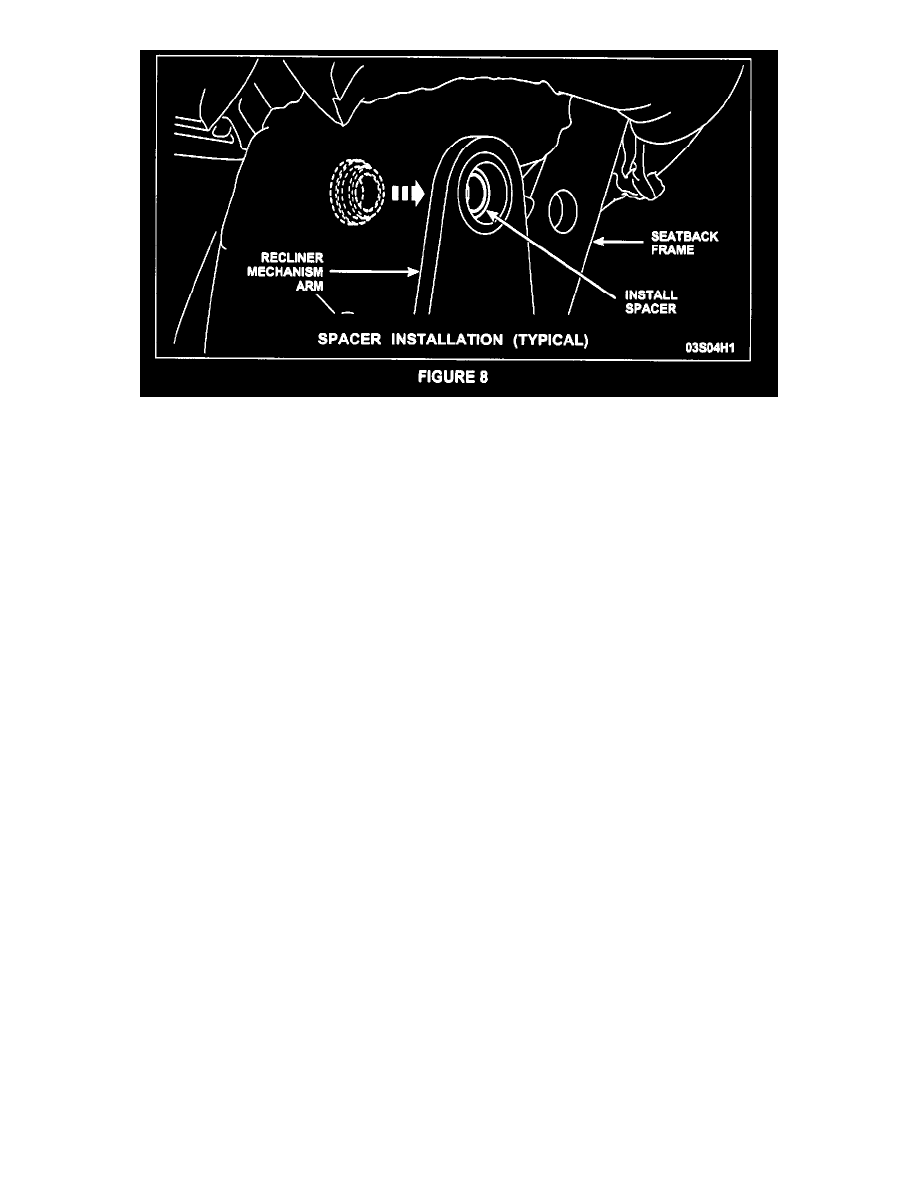
Insert the new spacer from the inboard side of the bolt hole. When Inserted correctly, the spacer should be between the recliner mechanism arm
and the seatback frame. See Figure 8.
14.
Install the new upper bolt (Bolt A). Tighten the bolt to 45 Nm (33 lb-ft).
15.
Carefully install the seatback trim cover over the recliner mechanism arm and into its original position.
16.
Position the driver seatback to its full4orward position.
17.
Connect the seatback trim cover J-clip.
18.
Position the driver seatback to its original position.
^
If the vehicle is equipped with a tubular seatback frame, go to Step 23.
^
If the vehicle is equipped with a stamped seatback frame, continue with the next step.
19.
NOTE: If the vehicle is not equipped with side air bags, no further service Is required. Turn the ignition switch from OFF to RUN.
20.
Install the airbag fuse and then install the fuse box cover.
21.
WARNING: BE SURE THAT NOBODY IS IN THE VEHICLE AND THAT THERE IS NOTHING BLOCKING OR SET IN FRONT OF
ANY AIRBAG MODULE WHEN THE BATTERY NEGATIVE CABLE IS CONNECTED.
Connect the battery negative cable.
22.
Position the driver seat to its original position and program the recorded preset radio stations.
THIS COMPLETES SERVICE ON STAMPED SEATBACK FRAMES.
FOR TUBULAR SEATBACK FRAMES, PLEASE CONTINUE WITH THE FOLLOWING STEPS.
23.
Position the seat cushion side shield aside as follows:
^
Pull off the lumbar support manual adjuster knob, if equipped.
^
Remove two (2) shield attaching screws (three [3] If equipped with power lumbar adjustment).
^
GENTLY unsnap the shield from the seat frame and position the shield out of the way.