
Explorer 4WD V8-4.6L (2008)
Clean the gasket mating surfaces.
^
Clean the valve cover mating surface of the cylinder head with silicone gasket remover and metal surface prep. Follow the directions on the
packaging.
^
Clean the valve cover gasket groove in the valve cover with soap and water or a suitable solvent.
2. Install a new gasket on the LH valve cover.
3. NOTE: If the valve cover is not secured within 4 minutes, the sealant must be removed and the sealing area cleaned with metal surface cleaner.
Failure to follow this procedure may cause future oil leakage.
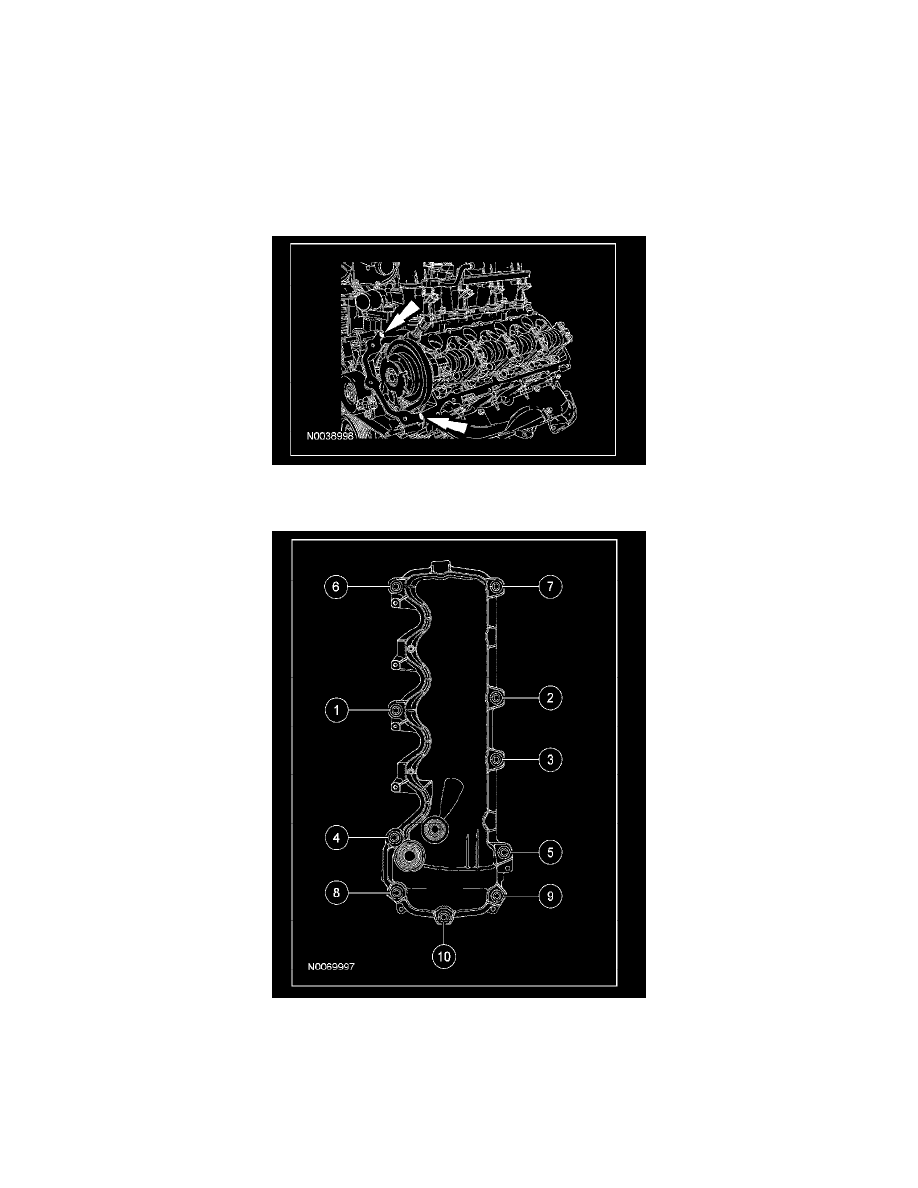
Apply a bead of silicone gasket and sealant in 2 places where the engine front cover meets the cylinder head.
4. Position the LH valve cover with a new gasket and tighten the bolts in the sequence shown.
^
Tighten to 10 Nm (89 lb-in).
5. Connect the EVAP canister-to-EVAP canister purge valve EVAP hose to the EVAP canister purge valve.
6. Connect the EVAP canister purge valve electrical connector.
7. Attach the wiring harness retainers to the valve cover studs.
8. Connect the VCT solenoid electrical connector.
9. Connect the 2 pin-type retainers to the valve cover.
10. Position the cooling fan wiring harness bracket and install the nut.
^
Tighten to 25 Nm (18 lb-ft).
11. Connect the PCV hose to the valve cover.